How Often Should A Coffee Maker Be Cleaned Regularly
How Often Should A Coffee Maker Be Cleaned depends on how frequently you use it and what type of machine you own. A quick daily rinse keeps your brews tasting fresh, while a deeper monthly clean removes stubborn mineral buildup and oils. This guide covers every cleaning frequency you need to know for a clean coffee machine that lasts.
There is nothing quite like the aroma of a fresh cup of coffee in the morning. But here is the thing most people overlook. The machine brewing that perfect cup needs regular care. How often should a coffee maker be cleaned is a question every coffee lover should ask. The answer might surprise you.
Over time, coffee oils, mineral deposits, and residue build up inside your machine. This affects the taste of your coffee and can even harbor bacteria. A dirty coffee maker can turn your favorite brew into something flat and unpleasant. The good news is that keeping your machine clean is simple. It just takes a little consistency.
In this guide, we will walk through exactly how often to clean different parts of your coffee maker. We will cover daily routines, weekly tasks, and monthly deep cleaning steps. You will also learn the signs that tell you it is time for a thorough clean. By the end, you will know exactly how to keep your coffee machine hygiene at its best.
Key Takeaways
- Daily rinsing prevents stale coffee oils from building up and keeps your morning cup tasting its best
- Weekly cleaning of the brew basket and carafe removes visible residue and prevents mold growth
- Monthly deep descaling removes mineral deposits that can affect taste and machine performance
- Vinegar and water make an effective natural cleaning solution for most coffee makers
- Signs like slow brewing or off-taste mean it is time to clean your machine right away
- Regular coffee maker maintenance extends its lifespan and saves money on replacements
- Never skip cleaning after using hard water as mineral buildup happens faster
📑 Table of Contents
- Why Regular Coffee Maker Cleaning Matters
- How Often Should You Clean Your Coffee Maker
- Step-by-Step Guide to Cleaning Your Coffee Maker
- Signs Your Coffee Maker Needs Cleaning
- Tips to Keep Your Coffee Maker Fresh Between Cleanings
- Common Mistakes People Make When Cleaning Coffee Makers
- How Cleaning Frequency Varies by Coffee Maker Type
- The Long-Term Benefits of Consistent Coffee Maker Cleaning
- Final Thoughts on Coffee Maker Cleaning Frequency
Why Regular Coffee Maker Cleaning Matters
Many people think cleaning their coffee maker is optional. It is not. Just like any other kitchen appliance, your coffee maker needs regular maintenance. Oils from coffee beans go rancid over time. Mineral deposits from water build up inside the heating element. Mold can grow in moist areas if you are not careful.
When you clean coffee machine parts regularly, you get better-tasting coffee. You also prevent bad odors and extend the life of your machine. A well-maintained coffee maker can last for years. A neglected one might fail within months.
The Hidden Build-Up Inside Your Machine
Here is what happens inside your coffee maker after weeks of use without cleaning. Coffee oils coat the interior walls. Mineral deposits from water collect around the heating element. Old coffee grounds stuck in the filter basket start to mold. The water reservoir can develop a slimy film.
All of this build-up affects your coffee in noticeable ways. Your brew might taste bitter or sour. It might smell stale even when you use fresh beans. The machine might brew slower than usual. These are all signs that remove coffee buildup needs to happen. Regular cleaning prevents all of these problems.
How Dirt Affects Your Morning Cup
You might not notice the change right away. But over time, the taste of your coffee shifts. Old oils make coffee taste flat. Mineral deposits can add a metallic aftertaste. Mold spores from residue can affect the aroma.
Think about it this way. Would you drink coffee from a dirty mug? Of course not. Your coffee maker is the mug. It deserves the same care. Keeping your coffee maker fresh taste starts with a consistent cleaning schedule.
Also, regular cleaning is a matter of health. Bacteria can grow in warm, moist environments. Your coffee maker provides the perfect conditions. A quick daily coffee maker care routine keeps harmful germs at bay. It also keeps your machine running efficiently.
How Often Should You Clean Your Coffee Maker
The frequency of cleaning depends on what part of the machine you are cleaning and how often you use it. Let us break it down into simple daily, weekly, and monthly tasks. This makes the whole process easy to follow.
Daily Cleaning Routine
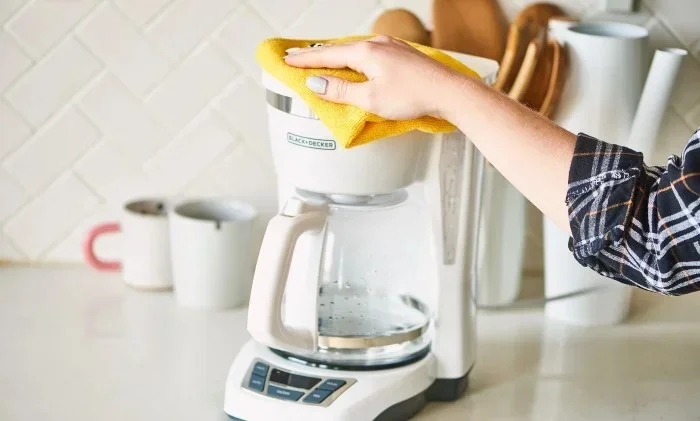
Every time you brew a pot, take sixty seconds to do these simple things. Throw away the used coffee grounds. Rinse the brew basket under running water. Wipe down the exterior with a damp cloth. Empty and rinse the carafe. These small steps prevent build-up from hardening.
Do not leave wet coffee grounds sitting in the basket. They start to mold within hours. If you use a reusable filter, rinse it thoroughly after each use. Letting it dry between uses also helps prevent bacteria growth.
Weekly Maintenance Tasks
Once a week, give your machine a little more attention. Wash the carafe and lid with warm soapy water. Scrub the brew basket with a soft brush to remove any stuck-on grounds. Wipe down the water reservoir with a damp cloth. Check the filter area for any visible residue.
This weekly weekly coffee machine cleaning routine takes about five minutes. It makes a big difference in how your coffee tastes. It also keeps your machine looking and smelling fresh. Think of it as a small investment in better coffee every morning.
Monthly Deep Cleaning and Descaling
Once a month, you need to do a deeper clean. This is when you descale the machine. Descaling removes mineral deposits that water leaves behind. These deposits are called limescale. They build up inside the heating element and water lines.
To descale, run a cycle with equal parts white vinegar and water. Let the solution sit in the machine for about thirty minutes. Then run a full cycle with fresh water. Repeat the rinse cycle if needed. This simple process keeps your machine running smoothly.
If you live in an area with hard water, you might need to descale more often. Some people do it every two weeks. Listen to your machine. If it starts brewing slower, that is a sign. Monthly coffee maker deep clean sessions keep everything running at peak performance.
Step-by-Step Guide to Cleaning Your Coffee Maker
Cleaning your coffee maker does not have to be complicated. Follow these simple steps for a thorough clean. Whether you own a basic drip machine or a fancy espresso maker, these steps work well.
What You Need
Gather these supplies before you start. White vinegar or a descaling solution. Warm water. A soft sponge or cloth. A small brush for the filter basket. Mild dish soap. A clean towel for drying. You probably already have everything you need in your kitchen.
For those who prefer natural cleaning methods, vinegar works great. It is cheap and effective. Some people also use lemon juice for a fresh scent. Avoid harsh chemicals. They can leave residues that affect your next pot of coffee.
The Cleaning Process
Start by disassembling the removable parts. Take out the carafe, lid, brew basket, and filter. Wash all of these with warm soapy water. Use the soft brush to scrub away any stuck-on grounds. Rinse everything thoroughly and let it air dry.
Next, clean the water reservoir. Wipe the inside with a damp cloth. If you see any white mineral deposits, use a mixture of vinegar and water. Let it sit for a few minutes before wiping. For tough residue, you can use the same method as cleaning an oven with a dishwasher tablet for tough kitchen stains, but stick to vinegar for your coffee maker.
Now run the vinegar and water cycle through the machine. Fill the reservoir with the solution. Run half a brew cycle and let it sit for thirty minutes. Then complete the cycle. Run two to three full cycles with fresh water to rinse out any vinegar taste.
Finally, wipe down the exterior. Clean the warming plate underneath. Make sure everything is dry before you reassemble. Your machine should now look and smell like new.
Signs Your Coffee Maker Needs Cleaning
Sometimes you do not need a schedule to know when to clean. Your machine gives you signals. Learning to recognize these signs helps you stay ahead of problems.
The first sign is a change in taste. If your coffee tastes bitter, sour, or just off, it might be time to clean. Old oils and mineral deposits change the flavor profile of your brew. A coffee maker descaling session often fixes this right away.
The second sign is a slow brew time. If your machine takes longer than usual to make a pot, mineral buildup might be blocking the water flow. Descaling clears these blockages and restores normal brewing speed.
The third sign is bad odors. A musty or stale smell coming from the machine means bacteria or mold are present. This usually happens when parts are left wet for too long. A thorough cleaning and proper drying fix this issue.
The fourth sign is visible residue. Check the water reservoir and the warming plate. If you see white flakes or a dark film, it is cleaning time. Do not wait for the problem to get worse.
The fifth sign is unusual noises. Gurgling or bubbling sounds that were not there before can indicate mineral buildup inside the machine. A cleaning session usually quiets things down.
Tips to Keep Your Coffee Maker Fresh Between Cleanings
Between your scheduled cleaning sessions, a few habits make a big difference. These simple tips keep your machine in great shape longer.
First, always empty the water reservoir when you are not using the machine. Stale water sitting in the reservoir promotes bacteria growth and mineral deposits. Fresh water for each brew session is the best practice.
Second, leave the lid off after brewing. This lets the inside dry out and prevents mold from forming. Moisture is the enemy of coffee maker hygiene. Air drying between uses is one of the easiest habits to adopt.
Third, use filtered water when possible. Filtered water has fewer minerals. This means less limescale buildup over time. It also improves the taste of your coffee. Many people swear by this simple change.
Fourth, clean your coffee grinder regularly if you use one. Old coffee oils build up in the grinder too. A clean grinder means fresher-tasting coffee. It works hand in hand with a clean coffee maker.
Fifth, do not ignore the carafe. Even glass caraves can develop coffee stains over time. A paste of baking soda and water removes these stains easily. Regular carafe cleaning keeps your coffee looking and tasting its best.
For those who also maintain other kitchen appliances, regular cleaning habits help across the board. Just like you would regularly clean your Oster toaster oven to keep it working well, the same care applies to your coffee maker.
Common Mistakes People Make When Cleaning Coffee Makers
Even with the best intentions, people make mistakes when cleaning their coffee makers. Avoiding these common errors makes the process more effective.
The first mistake is using too much vinegar. While vinegar is great for descaling, too much can damage rubber seals and plastic parts over time. Stick to the recommended ratio of equal parts vinegar and water. Rinse thoroughly after each cleaning session.
The second mistake is skipping the rinse cycles. After running the vinegar solution through the machine, always do two to three rinse cycles with fresh water. Any leftover vinegar taste will ruin your next pot of coffee. This step is non-negotiable.
The third mistake is using abrasive cleaners. Steel wool or harsh scrubbers can scratch the interior surfaces. Scratches create places where bacteria can hide. Stick to soft sponges and cloths for all cleaning tasks.
The fourth mistake is forgetting to clean the removable parts. Many people only run vinegar through the machine and skip washing the carafe and filter basket. All parts need attention for truly clean results.
The fifth mistake is never cleaning the water reservoir. This hidden area collects mineral deposits and bacteria. Wipe it out at least once a month. It makes a bigger difference than most people realize.
If you ever deal with tough residue or melted plastic issues in kitchen appliances, you know how frustrating stubborn buildup can be. Just as you would handle cleaning melted plastic out of an oven with patience and the right method, tough coffee maker residue responds best to soaking and gentle scrubbing.
How Cleaning Frequency Varies by Coffee Maker Type
Different types of coffee makers have slightly different cleaning needs. Understanding these differences helps you tailor your routine.
Drip coffee makers are the most common type. They need the routine we described above. Daily rinsing, weekly washing, and monthly descaling. These machines are straightforward to clean.
Single-serve pod machines like Keurig need similar care. However, they have smaller water reservoirs that can get stale faster. Empty and rinse the reservoir more frequently if you use these machines. Run a descaling cycle monthly.
Espresso machines are more complex. They have more parts to clean. The group head, steam wand, and portafilter all need regular attention. Backflush with cleaning solution weekly if your machine supports it. Descale monthly or more often if you have hard water.
French press coffee makers need a different approach. There is no machine to descale. But the plunger and glass carafe need thorough cleaning after each use. Coffee oils build up in the glass and metal mesh filter. Wash with warm soapy water and use a bottle brush for the carafe.
Moka pots and stovetop espresso makers also need special attention. The rubber seal should be checked regularly. Remove any coffee residue from the filter basket after each use. Descale with vinegar solution monthly.
No matter what type of machine you own, the core principle remains the same. Regular cleaning equals better coffee and a longer-lasting machine. Make it part of your routine and your coffee will thank you.
The Long-Term Benefits of Consistent Coffee Maker Cleaning
When you stick to a regular cleaning routine, the benefits add up over time. Your coffee tastes better with every cup. The machine runs more efficiently. It uses less energy and produces better results. The lifespan of your coffee maker extends significantly.
Clean coffee equipment also saves you money. A well-maintained machine does not need frequent repairs or early replacement. The cost of cleaning supplies is minimal compared to buying a new coffee maker. A few minutes of care each week pays off in the long run.
There is also a hygiene benefit. Clean machines do not harbor mold or bacteria. This is especially important for people with compromised immune systems or allergies. Fresh, clean coffee equipment supports better health.
Finally, a clean coffee maker simply feels better to use. There is a satisfaction that comes with brewing coffee in a well-maintained machine. The aroma is cleaner. The process is smoother. It makes the whole coffee experience more enjoyable.
Final Thoughts on Coffee Maker Cleaning Frequency
So how often should a coffee maker be cleaned regularly? The answer is every single day for quick rinsing, once a week for deeper washing, and once a month for descaling. This simple schedule keeps your machine in top shape and your coffee tasting its best.
Do not wait for signs of problems to start cleaning. Make it a habit now. Your future self will thank you when every morning cup tastes perfect. A little effort today saves time, money, and frustration tomorrow.
Start with the daily routine tonight. Rinse your brew basket, wipe down the machine, and empty the carafe. Small steps lead to big results. Your coffee maker will reward you with better-tasting coffee for years to come.
Remember, cleaning your coffee maker is not a chore. It is an investment in better coffee and a better morning. Make it part of your daily ritual and enjoy the difference with every single cup.
Frequently Asked Questions
How often should I descale my coffee maker?
Most coffee makers need descaling once a month. If you live in an area with hard water, you may need to descale every two weeks. Signs like slow brewing or a change in taste also indicate it is time to descale. Regular descaling keeps mineral deposits from building up and affecting your coffee flavor.
Can I use vinegar to clean my coffee maker?
Yes, white vinegar is one of the best natural cleaning solutions for coffee makers. Use equal parts vinegar and water, then run a full brew cycle. Follow up with two to three rinse cycles using fresh water. This removes oils, mineral deposits, and bacteria effectively without harsh chemicals.
What happens if I never clean my coffee maker?
Over time, coffee oils go rancid and mineral deposits build up inside the machine. Your coffee will taste bitter, sour, or flat. Mold and bacteria can grow in moist areas. The machine may brew slower or stop working altogether. Regular cleaning prevents all of these problems and keeps your coffee tasting great.
Is it safe to put a coffee maker in the dishwasher?
Most removable parts like the carafe, brew basket, and filter are dishwasher safe. Check your owner manual to confirm. However, never put the main machine body in the dishwasher. The electrical components and water reservoir are not designed for machine washing. Hand wash the base and reservoir with warm soapy water instead.
How do I remove coffee stains from my carafe?
Make a paste of baking soda and water. Apply it to the stained areas and let it sit for fifteen minutes. Scrub gently with a soft sponge. For stubborn stains, fill the carafe with warm water and a tablespoon of rice, then swirl it around. The rice acts as a gentle abrasive to lift stains without scratching the glass.
Can I use lemon juice instead of vinegar to clean my coffee maker?
Yes, lemon juice works as an alternative to vinegar for cleaning and descaling. It has a milder acid content and leaves a fresh citrus scent. Use the same method as vinegar, mixing equal parts lemon juice and water. Run it through a brew cycle, then rinse thoroughly with fresh water two to three times.