
How To Clean Oster Toaster Oven And Keep It Spotless
Keeping your Oster toaster oven clean is easier than you think. This guide shows you exactly how to clean Oster toaster oven interiors, racks, trays, and doors using safe, household ingredients. You will learn simple routines that prevent buildup and keep your oven performing at its best every single day.
Your Oster toaster oven works hard every day. It toasts bagels, bakes small pizzas, and broils chicken with ease. But here is the thing most people forget. All that cooking leaves behind grease, crumbs, and baked-on residue. Over time, this buildup affects performance and even smells. That is exactly why you need to know how to clean Oster toaster oven properly. A clean oven cooks better, lasts longer, and keeps your kitchen smelling fresh. In this guide, we walk you through every step. You will learn easy methods that really work.
Whether you just spilled some cheese or have not cleaned your oven in months, we have you covered. We will share simple tips, natural cleaners, and maintenance habits. No harsh chemicals needed. No expensive products required. Just straightforward advice from people who know their way around kitchen appliances. By the end of this article, you will feel confident tackling any mess inside your Oster toaster oven. Let us get started.
Key Takeaways
- Regular cleaning prevents grease buildup: Wiping down your toaster oven after each use keeps it in top shape.
- Baking soda and vinegar are your best friends: These natural cleaners tackle tough grime without harsh chemicals.
- Remove the crumb tray often: A clean crumb tray prevents smoke and unwanted odors during cooking.
- Deep clean monthly: A thorough monthly cleaning session extends the life of your Oster toaster oven.
- Use the right tools: Soft cloths, sponges, and non-abrasive pads protect your oven’s surfaces.
- Never use steel wool: It scratches interior coatings and damages non-stick surfaces over time.
- Consistency beats intensity: Small daily habits make deep cleaning sessions much faster and easier.
📑 Table of Contents
- Why Cleaning Your Oster Toaster Oven Matters
- Step-by-Step Guide: How To Clean Oster Toaster Oven
- How Often Should You Clean Your Oster Toaster Oven
- Common Mistakes People Make When Cleaning Toaster Ovens
- Deep Cleaning Tips for Tough, Baked-On Grease
- Maintaining Your Oster Toaster Oven for Long-Term Performance
- Benefits of Keeping Your Toaster Oven Spotless
- Final Thoughts on Cleaning Your Oster Toaster Oven
Why Cleaning Your Oster Toaster Oven Matters
Many people ignore their toaster oven until it starts smoking. That is a mistake. Regular oven cleaning does more than just make it look good. It directly impacts how well your appliance works. Grease buildup can block heating elements. Crumb accumulation can cause smoke and even small flare-ups. A dirty oven door lets heat escape, which means your food takes longer to cook. All of these issues add up over time.
Here is what happens when you skip cleaning your toaster oven regularly. Food residue carbonizes and becomes nearly impossible to remove. Grease coats the interior walls and starts to smell every time you cook. The crumb tray gets so full that crumbs fall onto the bottom heating element. Nobody wants that. Plus, a dirty oven can affect the taste of your food. Old grease and burnt crumbs can transfer flavors to fresh meals. That alone should be enough motivation to keep it clean.
The good news is that maintaining a clean Oster toaster oven does not take much effort. A few minutes after each use goes a long way. And when you do need to do a deeper clean, the right method makes it painless. Let us look at what you need before you start.
What You Need Before You Start
Gathering your supplies ahead of time saves you frustration. You do not need anything fancy or expensive. Most of these items are already in your kitchen. Here is a simple list of what you will need.
- Warm water
- Dish soap
- Baking soda
- White vinegar
- Soft microfiber cloths
- Non-abrasive sponge
- Old toothbrush
- Rubber gloves
- Paper towels
- Plastic scraper or spatula
With these items ready, you can handle almost any cleaning job. The baking soda and vinegar combo is especially powerful for degreasing toaster oven interiors. Avoid steel wool or harsh scouring pads. They scratch the interior coating and can damage the non-stick surface. Always go gentle with your Oster toaster oven.
Step-by-Step Guide: How To Clean Oster Toaster Oven
Now let us get into the actual cleaning process. We will break it down into clear, manageable steps. Follow along and your oven will look brand new. This method works for both interior and exterior surfaces.
Step One: Unplug and Cool Down
Safety always comes first. Before you touch anything inside the oven, make sure it is completely cool. Unplug it from the wall outlet. Wait at least 30 minutes after your last use. Cleaning a hot oven is dangerous and can cause burns. It also makes the grease harder to wipe off because it is still melted and spread out. Give it time to cool completely.
Step Two: Remove All Removable Parts
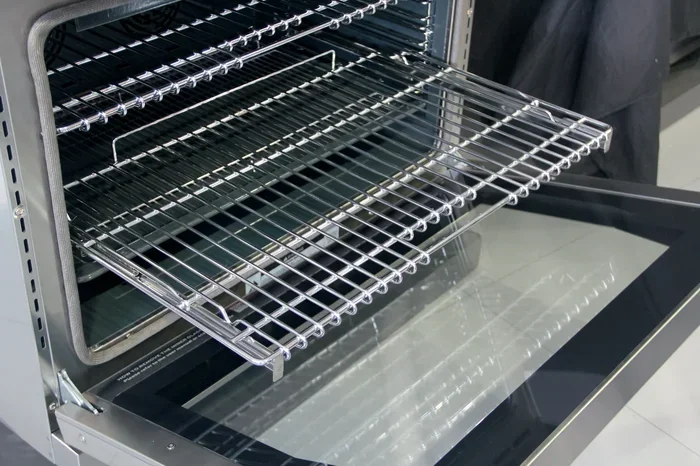
Take out the crumb tray, oven rack, and any wire shelves. These parts come out easily and should be cleaned separately. The crumb tray is usually located at the bottom front of the oven. Slide it out and empty the crumbs into the trash. Rinse it under warm water to remove loose debris. The oven rack goes into the sink or a large basin for soaking. Soaking loosens baked-on food and makes scrubbing much easier.
Step Three: Make a Baking Soda Paste
This is the secret weapon for tough grime. Mix three tablespoons of baking soda with one tablespoon of water. Stir it until you get a thick paste consistency. The baking soda paste works wonders on greasy surfaces inside your toaster oven. Spread it evenly across the interior walls, the ceiling, and the floor of the oven. Avoid the heating elements directly. Let the paste sit for at least 20 minutes. This gives it time to break down the grease and food residue.
Step Four: Wipe Down the Interior
After the paste has had time to work, grab a damp microfiber cloth. Wipe away the baking soda paste and all the grime it has loosened. You will be surprised at how much comes off. For stubborn spots, use an old toothbrush to gently scrub the area. The bristles get into corners and crevices that cloths miss. Repeat this process until the interior looks clean and free of grease.
Step Five: Use Vinegar for a Final Shine
Fill a small spray bottle with white vinegar. Mist the interior surfaces lightly. The vinegar reacts with the leftover baking soda and creates a fizzy action. This helps lift any remaining dirt. Wipe everything down with a clean, damp cloth. The interior of your Oster toaster oven should now look bright and fresh. The vinegar also helps neutralize any lingering odors.
Step Six: Clean the Oven Door
The oven door is one of the most used parts. It gets splattered with grease and food splashes regularly. Apply the baking soda paste to the door glass. Let it sit for 15 minutes. Then wipe it clean with a damp cloth. For tough spots on the glass, a plastic scraper works well. It removes baked-on residue without scratching the surface. Finish by wiping the door with a vinegar solution for streak-free shine.
Step Seven: Clean the Exterior
Do not forget the outside of your toaster oven. Wipe down the exterior with a damp cloth and a little dish soap. Pay attention to the control panel, handle, and any stainless steel surfaces. For stainless steel parts, use a dedicated stainless steel cleaner. It protects the finish and gives it a nice shine. Always wipe in the direction of the grain on stainless steel surfaces. This prevents streaking and keeps the look professional.
Step Eight: Clean the Removable Parts
Now go back to the crumb tray and oven rack you set aside. Wash them with warm soapy water. For the rack, if there is heavy grease buildup, soak it in a basin with hot water and a tablespoon of dish soap for 30 minutes. Use a non-abrasive sponge to scrub away loosened grime. The old toothbrush works great here too. Rinse everything thoroughly and dry completely before putting them back in the oven. Never place wet parts back into a warm oven. This can cause rust or warping.
How Often Should You Clean Your Oster Toaster Oven
Consistency is the key to easy oven maintenance. If you clean a little bit after each use, deep cleaning sessions become much less frequent. Here is a simple schedule to follow.
- After every use: Wipe down the interior with a damp cloth if there are visible crumbs or splatters. Empty the crumb tray.
- Once a week: Do a quick wipe of the interior walls and door glass. Check the crumb tray for buildup.
- Once a month: Perform a full deep cleaning session using the baking soda and vinegar method described above.
- Every three months: Inspect the heating elements for grease buildup. Clean them gently with a dry cloth if needed.
Following this routine keeps your toaster oven in excellent condition. It also prevents the need for intense cleaning sessions that take a lot of time and effort. A little regular maintenance saves you from big problems down the road.
Quick Tips for Daily Toaster Oven Upkeep
- Line the bottom with aluminum foil to catch drips and crumbs. Just change the foil after a few uses.
- Place a small baking sheet under your food when cooking something greasy.
- Wipe up spills immediately after the oven cools down.
- Never let crumbs sit in the crumb tray for more than a few days.
- Use oven-safe cookware to minimize splatter and grease splashes.
Common Mistakes People Make When Cleaning Toaster Ovens
Even with the best intentions, people make mistakes that can damage their oven. Avoid these common errors to keep your Oster toaster oven in great shape for years.
Mistake One: Using Abrasive Cleaners. Steel wool, harsh scouring pads, and abrasive powders scratch the interior coating. Once the coating is damaged, food sticks even more. This creates a vicious cycle of harder cleaning and more buildup. Always stick to soft cloths and non-abrasive sponges.
Mistake Two: Ignoring the Heating Elements. Some people scrub directly on the heating elements. This can damage them and reduce their efficiency. Never use water directly on the heating elements. Use a dry cloth or a soft brush to gently remove any debris that lands on them.
Mistake Three: Not Drying Parts Before Reassembly. Putting wet racks or trays back into the oven invites rust. It can also cause sizzling sounds and even small smoke puffs the next time you use it. Always dry all parts thoroughly before putting them back in place.
Mistake Four: Using Harsh Chemical Cleaners Inside the Oven. Strong chemical cleaners leave behind residues. These residues can transfer to your food the next time you cook. Stick to natural cleaners like baking soda and vinegar. They are safe, effective, and food-friendly.
Mistake Five: Skipping the Crumb Tray. The crumb tray is the most neglected part of any toaster oven. When it gets full, crumbs fall onto the heating element. This causes smoke, odors, and even fire hazards in extreme cases. Make checking and emptying the crumb tray a regular habit.
Deep Cleaning Tips for Tough, Baked-On Grease
Sometimes you inherit an oven that has not been cleaned in a long time. Baked-on grease and carbonized food require extra effort. Here are some proven methods to handle the toughest messes inside your Oster toaster oven.
Method One: The Steam Clean. Fill a small oven-safe bowl with water and add a few slices of lemon. Place it inside the oven and heat on high for 10 minutes. The steam loosens baked-on grime and grease. After the steam cycle, carefully remove the bowl. The interior surfaces should be much easier to wipe clean. Use a damp cloth to remove the softened residue.
Method Two: Extended Baking Soda Paste. For really tough spots, apply a thicker layer of baking soda paste. Let it sit for up to an hour or even overnight. The longer it sits, the more it breaks down the grease. This method works especially well for the corners and edges where grease accumulates over time.
Method Three: Vinegar Soak for Racks. If your oven rack has heavy grease buildup, try a vinegar soak. Fill a bathtub or large sink with hot water. Add one cup of white vinegar and two tablespoons of dish soap. Submerge the rack and let it soak for a few hours. The grease should loosen significantly, making it easy to scrub clean with a non-abrasive sponge.
Method Four: Dish Soap and Hot Water Paste. Mix dish soap with just enough hot water to form a thick paste. Apply it to the worst greasy areas. Let it sit for 30 minutes. The dish soap acts as a powerful degreaser. Scrub gently with a sponge and wipe clean. This method is especially effective for the oven floor and areas near the heating elements.
Maintaining Your Oster Toaster Oven for Long-Term Performance
Cleaning is only half the battle. Proper maintenance ensures your Oster toaster oven continues to perform well for years. Here are some habits that make a real difference.
Always preheat your oven before cooking. This reduces the chance of food sticking to the interior surfaces. Use parchment paper or aluminum foil to line baking areas. Just be careful not to let the foil touch the heating elements. Check the door seal regularly. A damaged seal lets heat escape and reduces cooking efficiency. Clean the seal gently with a damp cloth to remove any grease or food particles that collect there.
Store your toaster oven in a dry place. Moisture accelerates rust and can damage electrical components. If you keep it on a countertop, make sure the area is well-ventilated. Avoid placing it near the stove or other heat sources. Excess heat from surrounding appliances can strain the toaster oven’s exterior and internal components over time.
Replace parts when needed. The crumb tray, oven racks, and door handle are all replaceable components. Using genuine Oster replacement parts ensures a perfect fit and safe operation. A well-maintained toaster oven can last well beyond its expected lifespan. A little care goes a long way.
Benefits of Keeping Your Toaster Oven Spotless
You might wonder why all this effort matters. The benefits of regular toaster oven cleaning go beyond just appearances. Here is what a clean oven gives you.
- Better cooking performance: Clean heating elements distribute heat evenly. Your food cooks more consistently.
- Longer appliance life: Regular maintenance prevents wear and tear on internal components.
- Better tasting food: No more old grease flavors transferring to your meals.
- Safer cooking environment: A clean oven reduces the risk of smoke, flare-ups, and odors.
- Energy efficiency: A clean oven heats up faster and maintains temperature better. This saves energy over time.
- Pleasant kitchen smell: No more burnt crumb odors every time you turn on the oven.
These benefits make a strong case for developing a regular cleaning routine. It does not have to be complicated or time-consuming. Even five minutes of effort after each use makes a huge difference.
Final Thoughts on Cleaning Your Oster Toaster Oven
Learning how to clean Oster toaster oven properly is one of the best kitchen habits you can build. It takes just a few simple steps and common household items. Regular cleaning keeps your oven working efficiently, smelling fresh, and looking great. The baking soda and vinegar method is safe, effective, and affordable. It works for everyday messes and tough baked-on grease alike.
Remember that consistency beats intensity. A quick wipe after each use prevents the need for heavy deep cleaning sessions. Follow the maintenance schedule we outlined, avoid common mistakes, and your Oster toaster oven will serve you well for years. Take a few minutes today to give your oven the care it deserves. Your future self and your taste buds will thank you.
Frequently Asked Questions
What is the best way to clean the inside of an Oster toaster oven?
The best way is to use a baking soda paste. Mix baking soda with water, spread it inside the oven, and let it sit for 20 minutes. Then wipe it away with a damp cloth. Follow up with a vinegar spray for a final clean. This method is safe, natural, and highly effective for removing grease and food residue.
Can I use regular oven cleaner on my Oster toaster oven?
It is best to avoid harsh chemical oven cleaners. They can leave behind residues that transfer to your food. Natural cleaners like baking soda, vinegar, and dish soap work just as well without the health risks. They are also safer for the interior surfaces of your toaster oven.
How do I remove baked-on grease from my toaster oven racks?
Soak the racks in hot water with dish soap and a splash of white vinegar for at least 30 minutes. The grease will loosen significantly. Then scrub gently with a non-abrasive sponge. For stubborn spots, use an old toothbrush. Rinse thoroughly and dry completely before reinstalling.
How often should I clean the crumb tray in my Oster toaster oven?
You should empty the crumb tray after every few uses at minimum. For regular users, cleaning it once a week is ideal. A full crumb tray can cause smoke, odors, and even small fire hazards. It takes only a few seconds to empty and rinse it out.
Is it safe to put the oven rack in the dishwasher?
Check your Oster toaster oven manual first. Many oven racks are dishwasher safe, but some may warp or lose their coating. If the manual does not mention it, hand washing is the safest option. Use warm soapy water and a soft sponge for the best results.
What should I never use to clean my toaster oven?
Never use steel wool, abrasive scouring pads, or harsh chemical cleaners. These scratch the interior coating and can damage non-stick surfaces. Also avoid spraying water directly on heating elements or electrical components. Stick to soft cloths, sponges, and natural cleaning solutions.
=== CONCLUSION ===
Keeping your Oster toaster oven clean is simple, fast, and incredibly rewarding. With the right approach and a little regular effort, you can prevent buildup, avoid tough cleaning jobs, and enjoy better cooking results every day. The methods shared in this guide work for every level of mess, from light daily splatters to heavy baked-on grease. Start with the basics: unplug, cool down, remove parts, and use baking soda and vinegar. Build a routine that fits your cooking habits. Your toaster oven will stay in excellent condition, and your kitchen will always smell fresh. Take action today and make oven cleaning a regular part of your kitchen routine. A spotless Oster toaster oven is just a few simple steps away.





2 Comments