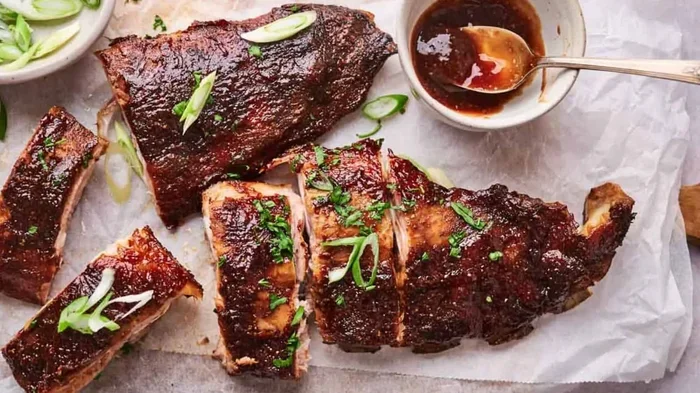
Which Way Do Ribs Go In The Oven For Perfect Results
Which way do ribs go in the oven is one of the most asked questions by home cooks. The answer depends on whether you place them bone side up or meat side up, and your chosen cooking method. Placing ribs bone side down protects the meat from direct heat, while meat side up allows better glaze absorption. The 3-2-1 method and low and slow approach deliver fall-off-the-bone tenderness every time.
There is nothing quite like pulling a rack of ribs out of the oven and smelling that rich, smoky aroma fill your kitchen. Whether you are a weekend BBQ enthusiast or a beginner trying to nail your first rib cook, the question which way do ribs go in the oven can make or break your result. Placement, temperature, and timing all work together to create tender, juicy ribs that your family and friends will rave about.
Many people assume ribs are a grill-only dish. But your oven can produce equally impressive results with the right technique. The oven-baked ribs method gives you more control over heat and moisture, which means fewer mistakes and more consistent outcomes. In this guide, we will walk through everything you need to know about rib placement, cooking time, and pro tips that elevate your rib game.
The direction your ribs face in the oven affects how heat reaches the meat, how the fat renders, and how the final bark and glaze turn out. It sounds like a small detail, but it truly matters. By the end of this article, you will know exactly how to position your ribs, which temperature to use, and how to avoid the common pitfalls that ruin an otherwise perfect rack.
Key Takeaways
- Bone side down is the best position: It shields the meat from direct oven heat and keeps juices flowing into the meat.
- Low temperature is key: Cook ribs at 275°F to 300°F for tender, juicy results.
- The 3-2-1 method works great: This timing approach suits pork ribs cooked in the oven with foil.
- Remove the membrane: Peeling the thin membrane from the bone side improves flavor and texture.
- Rest your ribs: Let them sit for 15-20 minutes after cooking for juicier slices.
- Use a rib rack or foil pan: Both help with even cooking and easy cleanup.
- BBQ sauce goes on last: Apply it in the final 30 minutes to avoid burning.
📑 Table of Contents
The Direction Debate: Bone Side Up vs. Meat Side Up
When you place ribs in the oven, you have two main options: bone side up or meat side up. Each position has its own advantages, and understanding them helps you decide what works best for your cook. The bone side down position is actually the most recommended by pitmasters and chefs alike.
Why Bone Side Down Works Best
Placing ribs with the bone side down means the meat faces upward toward the heat source. This might sound counterintuitive, but it has real benefits. The bones act as a natural heat shield, protecting the delicate meat from direct, intense heat. At the same time, fat renders downward and bastes the meat throughout the cook.
Here are the key reasons to go bone side down:
- Better heat protection: The bones create a buffer between the meat and the hot oven surface.
- Even rendering: Fat drips away from the meat and collects at the bottom of the pan.
- Moisture retention: The meat stays juicier because the bone side faces the cooler lower part of the oven.
- Easier sauce application: The flat meat surface on top absorbs BBQ sauce and glaze more evenly.
When to Use Meat Side Up
There are situations where placing ribs meat side up makes sense. If you want a thicker, more pronounced bark on the surface of the meat, cooking meat side up exposes more of it to direct heat. Some cooks also prefer this method when using a rib rack that elevates the ribs and allows air to circulate around both sides.
However, meat side up requires more attention. The meat is more exposed to heat, which can lead to drying out if you are not careful. If you choose this route, keep a close eye on internal temperature and consider wrapping the ribs in foil partway through the cook.
Quick Tip: If you are unsure which way to place your ribs, go with bone side down. It is the safest and most forgiving position for beginners and pros alike.
The Best Oven Temperature for Ribs
Temperature control is one of the most important factors in oven-baked ribs. Too hot and the meat dries out before the collagen breaks down. Too low and you waste time and energy. The sweet spot for cooking ribs in the oven falls between 275°F and 300°F.
Why Low and Slow Wins
The low and slow method is the gold standard for rib cooking. At temperatures around 275°F, the collagen in the connective tissue slowly converts into gelatin. This process is what gives ribs their tender, melt-in-your-mouth texture. Rushing the cook at high temperatures like 400°F or more will give you tough, chewy ribs that are nowhere near the quality of a properly slow-cooked rack.
Here is a quick comparison of different oven temperatures and their effects:
| Oven Temperature | Cook Time (per pound) | Result |
|---|---|---|
| 225°F | 4-5 hours | Very tender, smoky flavor |
| 275°F – 300°F | 2.5-3.5 hours | Tender, juicy, great bark |
| 325°F – 350°F | 2-2.5 hours | Firmer texture, faster cook |
| 400°F+ | 1-1.5 hours | Dry, tough, not recommended |
For most home cooks, 275°F is the ideal temperature. It strikes a perfect balance between cook time and tenderness. You get flavorful ribs without spending half the day babysitting the oven.
Using Indirect Heat in Your Oven
Most standard ovens do not have a direct flame like a grill. However, you can mimic indirect heat by placing the ribs on the middle rack and using a drip pan on the lower rack. This setup prevents the ribs from sitting in rendered fat and grease, which can cause flare-ups and uneven cooking. The drip pan also makes cleanup much easier.
Step-by-Step Guide to Oven Ribs
Now that you know the best position and temperature, let us walk through the entire process. Following these steps will help you achieve consistent, delicious results every single time.
Step 1: Prep the Ribs
Start by removing the thin membrane from the back of the rib rack. This rib membrane is tough and does not break down during cooking. Use a butter knife to loosen one corner, then grip it with a paper towel and peel it off. Removing this membrane allows better smoke penetration and a more tender bite.
Next, pat the ribs dry with paper towels. Season generously with your favorite rib rub or a simple mix of brown sugar, paprika, garlic powder, salt, and black pepper. Let the seasoned ribs sit at room temperature for about 30 minutes before cooking. This helps the seasoning adhere and brings the meat closer to the oven temperature, reducing overall cook time.
Step 2: Choose Your Cooking Method
You have two main methods for oven ribs: the 3-2-1 method and the 2-2-1 method. Both involve wrapping the ribs in foil at some point to trap moisture.
The 3-2-1 method works like this:
- 3 hours: Cook ribs unwrapped in the oven at 275°F.
- 2 hours: Wrap ribs tightly in foil with a splash of apple cider vinegar or apple juice.
- 1 hour: Unwrap ribs, brush with BBQ sauce, and return to the oven uncovered.
The 2-2-1 method is similar but adjusts the timing slightly. It works better for thicker cuts like beef ribs or spare ribs. The idea is the same: unwrapped cooking, wrapped steaming, and then a final glaze period.
Step 3: Position and Cook
Place the ribs bone side down on a lined baking sheet or in a foil pan. If you have a rib rack, use it to elevate the ribs and promote even airflow. Insert a meat thermometer into the thickest part of the meat, avoiding the bone. Your target internal temperature is around 200°F to 205°F for fully tender ribs.
Step 4: Apply Sauce and Finish
During the final 30 minutes of cooking, remove the foil (if using) and brush the ribs with your favorite rib glaze or BBQ sauce. Apply thin layers and let each one set before adding the next. This creates a sticky, caramelized coating that adds both flavor and visual appeal.
Step 5: Rest Before Serving
Once the ribs reach the target internal temperature, pull them out of the oven and let them rest for 15 to 20 minutes. This step is crucial. Resting allows the juices to redistribute throughout the meat, which means every bite is moist and flavorful. Skip this step, and your ribs will lose juice the moment you cut into them.
Common Mistakes That Ruin Oven Ribs
Even experienced cooks make mistakes when preparing ribs in the oven. Knowing what to avoid saves time, ingredients, and frustration.
Skipping the Membrane Removal
The rib membrane is the number one mistake people make. It is tough, chewy, and blocks seasoning from reaching the meat. Always remove it before cooking. It takes just a minute and makes a huge difference in the final texture.
Cooking at Too High a Temperature
It is tempting to crank up the oven to speed things along. But ribs need time for the collagen to break down properly. High heat dries out the meat and leaves you with tough, rubbery ribs. Patience is your best friend here.
Adding Sauce Too Early
BBQ sauce contains sugar, which burns easily at high temperatures. If you add sauce too early in the cook, it will caramelize into a bitter, blackened mess. Always apply sauce in the final 20 to 30 minutes of cooking.
Not Using a Meat Thermometer
Guessing doneness leads to inconsistent results. A meat thermometer takes the guesswork out of the equation. Ribs are done when the internal temperature reaches 200°F to 205°F and the meat has pulled back from the bones by about a quarter inch.
Overcrowding the Pan
Give your ribs room to breathe. Overcrowding the baking sheet blocks airflow and creates steam pockets, which can make the surface soggy instead of crispy. Use a rib rack or a larger pan to ensure proper spacing.
Expert Insight: Professional pitmasters always emphasize that low and slow is not just a saying, it is a science. The collagen breakdown that makes ribs tender only happens at sustained low temperatures over several hours.
Pro Tips for Perfect Oven Ribs
A few extra tips can take your ribs from good to outstanding. These are small adjustments that make a big impact on flavor, texture, and presentation.
Use Apple Cider Vinegar in the Foil
Adding a small splash of apple cider vinegar to the foil wrap during the steaming phase adds a subtle tanginess that cuts through the richness of the pork. It also helps tenderize the meat further and creates a more complex flavor profile.
Double Wrap for Extra Moisture
If you are cooking a larger rack or beef ribs, consider double-wrapping the ribs in foil during the steaming phase. This traps even more moisture and prevents the meat from drying out during the longer cook time.
Try Different Wood Chips for Smoke Flavor
While oven ribs do not get the same smokiness as grilled ribs, you can add a hint of smoke flavor by placing soaked wood chips in a foil pouch on the oven floor. Hickory and applewood chips work particularly well with pork ribs.
Trim Excess Fat Before Cooking
Removing the thick fat cap from the top of the ribs helps the rub penetrate deeper into the meat. It also prevents excessive grease buildup in the pan, which can cause smoking and uneven cooking.
Experiment with Different Rib Cuts
Not all ribs are the same. Pork baby back ribs are leaner and cook faster, making them ideal for beginners. Spare ribs have more fat and flavor but require longer cooking times. Beef ribs are larger and richer, and they benefit from the low-and-slow approach as well.
Here is a quick comparison of popular rib types:
| Rib Type | Cook Time at 275°F | Fat Content | Best For |
|---|---|---|---|
| Pork Baby Back Ribs | 2.5-3 hours | Low | Beginners, quick cooks |
| Pork Spare Ribs | 3.5-4 hours | High | Flavor lovers, longer cooks |
| Beef Back Ribs | 4-5 hours | High | Rich flavor, hearty eaters |
| Beef Short Ribs | 3-4 hours | Very High | Fall-off-the-bone tenderness |
How to Know When Ribs Are Done
Timing is important, but the real indicator of done ribs goes beyond the clock. There are three reliable ways to check if your ribs are ready.
- Internal Temperature: The meat should read 200°F to 205°F when measured with a probe thermometer in the thickest section.
- The Bend Test: Pick up the rack from one end with tongs. If it bends and cracks slightly on the surface, it is done. If it stays stiff, it needs more time.
- The Toothpick Test: Insert a toothpick into the thickest part of the meat. If it slides in with little resistance, the ribs are tender and ready.
Resting ribs after cooking is just as important as the cook itself. The juices settle, the temperature evens out, and the meat becomes easier to slice. Always give your ribs that 15 to 20 minute rest before cutting and serving.
Once your ribs are done, slice between the bones to serve individual portions. Serve with extra BBQ sauce on the side, along with classic sides like coleslaw, cornbread, or baked beans. The combination of tender meat, smoky glaze, and crunchy sides creates a memorable meal that everyone will love.
Remember, cooking ribs in the oven is all about patience and technique. The bone side down position, the low and slow temperature, and proper timing transform a simple rack of ribs into a show-stopping centerpiece. With the tips and methods shared in this guide, you are now equipped to tackle oven-baked ribs with confidence.
Start with the basics, follow the steps carefully, and do not be afraid to experiment with different rubs, sauces, and wood chips. Every cook you try will teach you something new, and soon you will be known as the go-to rib expert among your friends and family. So fire up that oven, grab a rack of ribs, and get ready to enjoy one of the most satisfying meals you can make at home.
The beauty of oven ribs is their consistency. Unlike outdoor grilling, where weather and wind can affect your cook, the oven gives you a controlled environment. You can replicate your results every single time, which means perfect ribs on demand. Once you master the 3-2-1 method and understand the importance of rib placement, you will never go back to guessing again.
Take what you have learned here, apply it to your next cook, and enjoy the process. Ribs are meant to be savored, shared, and celebrated. Whether it is a Sunday family dinner or a weekend gathering with friends, perfectly cooked ribs always bring people together. Happy cooking.
Frequently Asked Questions
Which way should ribs face in the oven?
The best position is bone side down with the meat facing up. This protects the meat from direct heat and allows fat to render evenly. The flat meat surface on top also absorbs sauce and glaze better.
What temperature should I cook ribs in the oven?
Cook ribs at 275°F to 300°F for the best results. This low temperature slowly breaks down collagen, giving you tender, juicy ribs without drying them out.
How long does it take to cook ribs in the oven?
Most pork ribs take between 2.5 and 4 hours at 275°F, depending on the type and size of the rack. Baby back ribs cook faster, while spare ribs and beef ribs need more time.
Should I wrap ribs in foil when cooking them in the oven?
Yes, wrapping ribs in foil during the middle phase of cooking helps trap moisture and speeds up tenderizing. This is the core of the 3-2-1 method and produces incredibly juicy results.
Can I use BBQ sauce on ribs in the oven?
Absolutely, but apply it in the last 20 to 30 minutes of cooking. Adding sauce too early causes the sugar in it to burn, which creates a bitter taste and dark, charred surface.
How do I know when oven ribs are done?
Ribs are done when the internal temperature reaches 200°F to 205°F, the meat pulls back from the bones, and the rack bends slightly when lifted from one end. A meat thermometer is the most reliable tool for checking doneness.
=== CONCLUSION ===
Which way do ribs go in the oven is a question with a clear answer: place them bone side down at a low temperature of 275°F to 300°F. This position protects the meat, allows fat to render properly, and creates the perfect canvas for your favorite rub and sauce. The 3-2-1 method and proper resting time take your ribs from good to extraordinary.
Remember to remove the rib membrane, use a meat thermometer, and avoid common mistakes like adding sauce too early or cooking at too high a temperature. With these guidelines, you can consistently produce fall-off-the-bone ribs that rival any restaurant or backyard BBQ. Your oven is a powerful tool for rib cooking, and now you know exactly how to use it. Happy cooking and enjoy every bite.