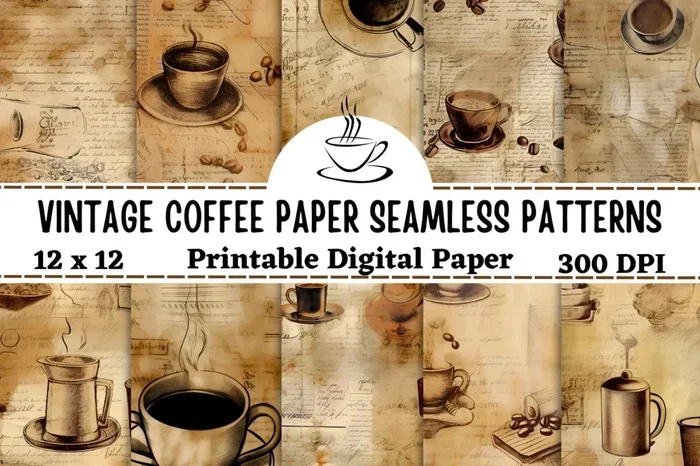
How To Make Vintage Paper With Coffee The Easy Way
Making vintage paper with coffee is a fun, affordable, and incredibly easy DIY project. You only need a few simple supplies like brewed coffee, paper, and a baking sheet. This guide walks you through every step so you can create beautiful aged paper at home.
There is something truly magical about how to make vintage paper with coffee. It is one of those simple crafts that transforms ordinary paper into something that looks like it has been tucked inside a dusty attic trunk for decades. Whether you are a paper crafting enthusiast, a scrapbooker, or someone who loves DIY vintage paper projects, this technique is incredibly easy to master.
You do not need any fancy supplies or advanced skills. Just a few household items, some brewed coffee, and a little patience. In this guide, we will walk you through the entire process step by step. By the end, you will know exactly how to create beautiful aged paper that looks authentically vintage. You will also learn some pro tips that take your results from basic to breathtaking.
This method works beautifully for paper crafting, journaling, card making, and even home decor projects. The warm, earthy tones that coffee gives to paper are unlike anything you can buy at a store. Plus, it is completely non-toxic and very affordable. So grab a cup of coffee, gather your supplies, and let us get started.
Key Takeaways
- Simple Supplies: You only need coffee, paper, a baking sheet, and a few basic tools to get started.
- Multiple Techniques: You can use brushing, dipping, or spraying methods to achieve different vintage effects.
- Low Heat Is Key: Drying your paper in a warm oven (similar to drying eggshells in the oven) gives you the best results without damaging the paper.
- Endless Creative Uses: Vintage paper works beautifully for scrapbooking, card making, journaling, and home decor projects.
- Avoid Common Mistakes: Using too much coffee or skipping the sealing step are the most common errors beginners make.
- Safe and Non-Toxic: This project is kid-friendly and uses completely natural materials.
📑 Table of Contents
What Is Vintage Paper With Coffee?
Vintage paper with coffee is a simple crafting technique that uses brewed coffee or coffee grounds to stain and age plain paper. The result is paper that looks old, worn, and full of character. People have been using this method for years to create homemade vintage paper for art projects, invitations, and decorative pieces.
The process is surprisingly straightforward. You essentially soak or paint coffee onto paper and then dry it. The coffee reacts with the paper fibers and creates natural brown tones that mimic the look of aged parchment or old letters. No special chemicals are needed. No harsh fumes. Just pure, natural coffee.
This technique falls under the broader category of paper dyeing with coffee. It is a form of coffee paper art that has gained huge popularity among crafters, teachers, and hobbyists. The beauty of this method is that every piece of paper turns out slightly different. Each sheet has its own unique pattern and shade of brown.
People use vintage stationery made this way for wedding invitations, thank you cards, and gift tags. Teachers use it for history lessons about ancient documents. Artists incorporate it into mixed media projects. The possibilities are truly endless. And the best part? You probably already have everything you need in your kitchen.
Why Coffee Is The Perfect Paper Stain
You might wonder why coffee works so well for creating distressed paper and antique paper technique effects. The answer lies in the natural chemistry of coffee. Coffee contains tannins, which are organic compounds that bond with paper fibers. This bonding creates a permanent stain that looks remarkably like aged paper.
Unlike synthetic dyes, coffee produces warm, earthy tones. You get everything from a light tan to a deep chocolate brown. The color is rich and natural. It does not look artificial or plasticky. Instead, it has that authentic, time-worn look that people love about old fashioned paper.
Another reason coffee is perfect for this project is safety. It is non-toxic. It smells wonderful. And it is completely food-safe. This makes it an ideal choice for projects involving children. You do not have to worry about harsh fumes or chemical exposure. Just pure, natural creativity.
The coffee staining process is also incredibly forgiving. If you apply too much coffee, you can simply let it dry and try again. The paper absorbs the liquid beautifully, and mistakes are easy to fix. This makes it a perfect beginner craft. You can experiment freely without worrying about wasting expensive materials.
The Science Behind Coffee Staining
When coffee meets paper, the tannins in the coffee bind to the cellulose fibers in the paper. This is the same reason why old paper turns yellow over time. Coffee accelerates this natural aging process in a controlled way. The result is paper that looks decades old in just minutes.
The temperature of the coffee also matters. Hot coffee stains faster and darker. Cold coffee gives you a lighter, more subtle effect. You can control the intensity by adjusting the concentration of your coffee and the application method. This gives you complete creative control over your final vintage look paper.
Supplies You Will Need
One of the best things about how to make vintage paper with coffee is how few supplies you need. You probably already have most of these items in your kitchen. Here is what you will need to get started.
- Plain white paper: Printer paper, cardstock, or even newspaper works great. Thicker paper holds up better during the staining process.
- Brewed coffee: Use strong, dark roast coffee for the deepest color. Instant coffee also works in a pinch.
- A baking sheet or tray: This catches drips and keeps your workspace clean.
- A sponge or paintbrush: For applying the coffee to the paper evenly.
- A spray bottle (optional): This gives you a more even, mist-like application.
- Parchment paper or wax paper: Place this under your paper to protect your surfaces.
- A oven or drying rack: For drying your finished paper pieces.
- Mod Podge or clear sealant (optional): This protects your finished vintage paper from smudging.
If you want to experiment with different effects, consider adding a few extra items. Cinnamon sticks steeped in the coffee add a lovely scent and a slightly darker tint. A tea bag dipped in the coffee creates interesting speckled patterns. These small additions can elevate your rustic paper projects to the next level.
For the best results, use paper that is at least 20 lb weight. Thinner paper can become too soggy and tear easily. Cardstock is an excellent choice because it holds its shape while absorbing the coffee evenly. Avoid glossy or coated paper, as the coffee will not absorb properly on those surfaces.
Step-by-Step Guide To Making Vintage Paper
Now that you have your supplies ready, let us dive into the actual process. Follow these steps carefully, and you will have beautiful coffee stained paper in no time. Each step is simple and straightforward, so do not worry if you are a complete beginner.
Step 1: Brew Your Coffee
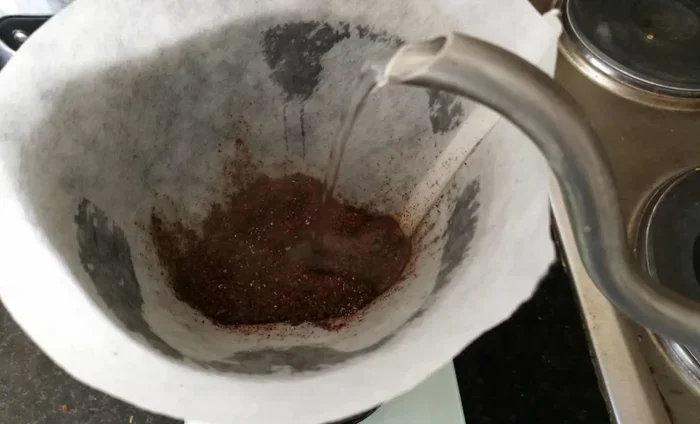
Start by brewing a strong pot of coffee. Use about twice the amount of grounds you normally would. The stronger the coffee, the darker your paper will turn out. Dark roast coffee works best because it has the deepest color and the most tannins.
Let the coffee cool completely before you begin. Hot coffee can warp or wrinkle thin paper. You want the liquid to be warm or at room temperature. If you are using instant coffee, dissolve 2-3 tablespoons in a cup of warm water for a rich staining solution.
Pro tip: Save your coffee grounds after brewing. You can sprinkle them directly onto wet paper for a textured, speckled effect. This is one of the easiest ways to add character to your aged paper without any extra effort.
Step 2: Prepare Your Workspace
Cover your workspace with newspaper or a plastic tablecloth. Coffee stains can be messy, and you do not want to ruin your table or countertop. Place a sheet of parchment paper on a baking tray. This will be your work surface.
Have a damp cloth nearby for quick cleanup. You will also want paper towels or old rags to blot any excess coffee. Working in a well-ventilated area helps the paper dry faster and keeps the smell from lingering too long in your home.
Step 3: Apply the Coffee
There are several ways to apply coffee to your paper. Choose the method that gives you the look you want.
Brushing Method: Dip a sponge or wide paintbrush into the coffee and brush it onto the paper in long, even strokes. This gives you the most control. You can create lighter areas by using less coffee and darker areas by applying more coats.
Dipping Method: Pour coffee into a shallow tray and submerge the paper completely. Lift it out and let the excess drip off. This method creates an all-over stain that looks very natural and aged. It is the fastest way to cover large pieces of paper.
Spraying Method: Pour coffee into a spray bottle and mist the paper from above. This creates a beautiful, speckled effect that looks like old, weathered paper. It is perfect for vintage stationery projects where you want an organic, uneven look.
For a more dramatic vintage look paper, try layering your application. Apply one coat, let it dry partially, then apply another. Each layer deepens the color and adds dimension. You can also crumple the paper before staining for a truly authentic, aged texture.
Step 4: Add Extra Details (Optional)
Once the base stain is applied, you can add extra details to make your paper even more authentic. Sprinkle coffee grounds onto wet paper for a gritty, textured look. Use a toothpick to draw patterns or write words in the wet coffee. You can even tear the edges of the paper before staining for a rough, handmade feel.
Some crafters like to burn the edges slightly after the paper dries. Use a lighter or match carefully and hold it near the edge until it chars just a little. This adds a beautiful, authentic touch to your antique paper technique. Just be careful and work on a fire-safe surface.
Another popular technique is to fold or crumple the paper before staining. This creates natural creases and wrinkles that make the paper look genuinely old. After staining, unfold or smooth the paper gently and let it dry flat. The creases will remain and add to the vintage character.
Step 5: Dry Your Vintage Paper
Drying is a crucial step in the paper aging method. You want your paper to dry evenly without warping or buckling. The best approach is to place your stained paper on a wire drying rack or a clean baking sheet lined with parchment paper.
If you are in a hurry, you can use a low-temperature oven to speed up the drying process. Set your oven to the lowest setting, usually around 200°F. Place the paper on a baking sheet and put it in the oven for 5-10 minutes. This is similar to the technique used for browning flour in the oven, where gentle, controlled heat brings out the desired effect without burning. Keep a close eye on the paper to make sure it does not scorch or curl too much.
Alternatively, you can air-dry your paper by laying it flat on a clean surface. This takes longer but produces the most natural results. If the paper starts to curl at the edges, place something heavy on top, like a book, to keep it flat while it dries. The drying time depends on the thickness of the paper and how much coffee you used. Thin paper may dry in 30 minutes, while thicker cardstock can take an hour or more.
Step 6: Seal and Protect Your Paper
Once your coffee stained paper is completely dry, you may want to seal it to protect the finish. This is especially important if you plan to use the paper for something that will be handled frequently, like greeting cards or bookmarks.
Apply a thin layer of Mod Podge or clear acrylic sealant with a soft brush. Let it dry completely before handling the paper. The sealant locks in the coffee stain and prevents smudging. It also gives the paper a subtle sheen that enhances the vintage appearance.
For a more matte, natural finish, use a spray sealant instead of a brush-on sealant. This avoids brush marks and gives you an even, protective coating. Hold the can about 12 inches from the paper and spray in light, even passes. Let it dry for 15-20 minutes before touching the paper.
Tips For Perfect Vintage Paper Every Time
Getting the perfect aged paper takes a little practice, but these tips will help you achieve great results every time. Even if your first attempt is not perfect, you can always try again. Coffee paper is very forgiving.
- Use dark roast coffee: It has more tannins and produces richer, deeper colors than light roast.
- Make multiple batches: Varying the coffee concentration lets you create a range of tones from light tan to deep brown.
- Work on one side at a time: Staining one side gives you more control over the final look.
- Let each coat dry before adding another: This prevents the paper from becoming too soggy and tearing.
- Use cold coffee for lighter effects: Cold coffee stains more slowly and gives you a subtler, more delicate tone.
- Keep a test sheet: Always stain a scrap piece first to test your color before working on your final paper.
- Store leftover coffee in the fridge: It stays usable for up to a week, so you can return to the project later.
One of the most important tips is to not rush the process. Patience is the secret ingredient in how to make vintage paper with coffee. If you try to speed up the drying or apply too much coffee at once, you will end up with uneven or streaky results. Take your time, enjoy the process, and let the coffee do its magic.
If you are working with children, keep the coffee concentration mild. Use one tablespoon of instant coffee per cup of water for a lighter stain that is easier to work with. Supervise younger kids during the application step and make sure everyone washes their hands afterward. The process is messy but very safe and fun for all ages.
Another pro tip is to experiment with different types of paper. Newsprint gives a wonderfully authentic old-newspaper look. Brown kraft paper takes on a rich, deep tone when stained with coffee. White cardstock produces the most dramatic contrast and is perfect for formal projects like wedding invitations or certificates.
Creative Uses For Your Homemade Vintage Paper
Now that you know how to create beautiful vintage paper with coffee, let us talk about what you can do with it. The creative possibilities are truly endless. Here are some of the most popular and rewarding ways to use your homemade aged paper.
Scrapbooking: Vintage paper adds an authentic, nostalgic feel to scrapbook pages. Use it as a background for photos, or cut it into shapes and layer it onto your layouts. The coffee stain pairs beautifully with other vintage embellishments like ribbon, stamps, and old photographs.
Journal Making: Create a unique handmade journal using your coffee-stained paper. Bind the pages together with string or a staple, and add a cover made from thicker cardstock. The result is a journal that looks like it was made decades ago. This makes a thoughtful, personal gift for friends and family.
Wedding Invitations: Vintage stationery made with coffee stain is perfect for rustic or vintage-themed weddings. The warm, earthy tones complement burlap, lace, and dried flowers beautifully. Your guests will treasure invitations that look like they came from another era.
Gift Tags and Labels: Cut your vintage paper into small rectangles, write a message, and attach a piece of twine. These handmade gift tags are far more personal than anything you can buy in a store. They add a thoughtful, artisanal touch to any gift.
Home Decor: Frame a piece of your vintage paper and hang it on the wall as a decorative art piece. You can write a meaningful quote, a favorite poem, or even a family recipe on the paper before framing. It adds warmth and character to any room.
Letter Writing: In a world full of digital communication, receiving a handwritten letter on homemade vintage paper is a truly special experience. Write a heartfelt letter to someone you love and watch their face light up when they see the beautiful, aged paper.
Bookmarks: Cut your vintage paper into strips, punch a hole at one end, and tie on a piece of yarn or ribbon. These handmade bookmarks make wonderful gifts for book lovers. They are simple to make but look incredibly elegant.
You can also use your vintage paper for educational projects. Teachers can create history lesson materials that look like authentic old documents. Students can use it for history reports or creative writing assignments. The possibilities extend far beyond just crafting.
If you enjoy this type of project, you might also like exploring other oven-based crafting techniques. The gentle heat control you learn here applies to many creative projects. Once you master the drying process, you will find it opens up a whole world of paper and crafting experiments.
Common Mistakes To Avoid
Even though how to make vintage paper with coffee is a simple process, there are a few common mistakes that can ruin your results. Here is what to watch out for.
- Using too much coffee: This is the number one mistake. Too much coffee creates dark, uneven blotches instead of a beautiful, even stain. Apply thin, even coats and build up the color gradually.
- Skipping the sealant: Unsealed vintage paper is vulnerable to smudging and moisture damage. Always seal your finished paper, especially if it will be handled frequently.
- Using coated or glossy paper: Coffee will not absorb properly on coated surfaces. Stick to plain, uncoated paper for the best results.
- Not letting the paper dry completely: Stacking wet paper causes sticking and can ruin the finish. Always let each piece dry fully before storing or handling it.
- Using a hot oven for drying: High heat can scorch the paper and create an unpleasant smell. Always use the lowest oven setting and watch the paper carefully.
- Ignoring cleanup: Coffee spills can stain surfaces permanently. Clean up any spills immediately with a damp cloth, similar to how you would clean melted plastic out of an oven, where quick action prevents permanent damage.
By avoiding these mistakes, you will save yourself frustration and achieve beautiful results from the very beginning. Remember, practice makes perfect. Your first few sheets might not be flawless, but each attempt teaches you something new. Before long, you will be producing stunning vintage paper like a pro.
Another mistake people make is not experimenting enough. The beauty of this craft is in the variety. Try different coffee strengths, different paper types, and different application methods. Keep a journal of what works and what does not. Over time, you will develop your own signature style that sets your coffee paper art apart from everyone else’s.
Final Thoughts
How to make vintage paper with coffee is one of the most rewarding and accessible crafts you can try. It requires almost no investment, produces stunning results, and opens up a world of creative possibilities. Whether you are making gifts, decorating your home, or simply enjoying a relaxing afternoon project, this technique delivers every time.
The beauty of DIY vintage paper is that no two sheets are ever the same. Each piece carries its own unique character, its own story written in coffee stains and warm, earthy tones. It is a craft that connects you to centuries of paper-making tradition while giving you the freedom to create something entirely your own.
So the next time you brew a pot of coffee, save some for your craft table. You never know what beautiful aged paper creations you might bring to life. Start simple, experiment freely, and enjoy the process. Before you know it, you will have a collection of stunning vintage paper ready for your next project.
Grab your supplies, clear off your workspace, and give it a try today. You will be amazed at how easy and satisfying it is to create something beautiful from something as simple as a cup of coffee. Happy crafting!
Frequently Asked Questions
Can I use instant coffee instead of brewed coffee?
Yes, instant coffee works perfectly fine for making vintage paper. Just use two to three tablespoons per cup of warm water for a strong solution. Instant coffee gives you slightly lighter colors than brewed coffee, but you can achieve the same beautiful aged look with a little extra application.
How long does the drying process take?
Air drying typically takes one to two hours depending on the paper thickness and coffee concentration. Using a low-temperature oven can cut this down to 10-15 minutes. Always make sure the paper is completely dry before handling or sealing it to prevent smudging.
Can I use tea instead of coffee for this project?
Absolutely. Tea is another excellent option for aging paper. Black tea produces warm brown tones similar to coffee, while green tea gives a lighter, more yellowish tint. You can also mix tea and coffee together for unique, custom colors. Experiment with different types of tea to find your favorite vintage look.
Will the coffee smell fade over time?
The coffee scent usually fades within a few days after the paper dries completely. Sealing the paper with Mod Podge or a clear spray sealant can help lock in the smell if you want to preserve it. Most people find that the scent fades quickly and does not interfere with the paper’s use.
Can I use this technique on colored paper?
Yes, you can apply coffee staining to colored paper, but the results will be different. The coffee will darken the existing color and create a more muted, layered effect. This can produce interesting results, but it is harder to control the final color. For beginners, white or light-colored paper is recommended.
Is this technique safe for children?
Yes, this is a very safe and kid-friendly craft. Coffee is non-toxic and the process does not involve any harsh chemicals. However, younger children should be supervised during the application and drying steps. The project is a wonderful way to teach kids about natural dyes and creative recycling.