How To Clean A Dutch Oven After Use Without Any Hassle
Cleaning your Dutch oven after every use keeps it in great shape and makes cooking even better. This guide shows you simple, proven steps to remove stuck-on food, tackle stains, and maintain your pot naturally. You will learn the best techniques for cast iron and enameled Dutch ovens, plus common mistakes to avoid. With these easy tips, your Dutch oven will stay in top condition for years.
There is nothing quite like a Dutch oven for cooking a perfect stew, baking bread, or making a rich one-pot meal. But once the last bite is gone, the real work begins. Learning how to clean a Dutch oven after use is one of the most important skills any home cook can master. A dirty Dutch oven can develop stubborn stains, lingering smells, and even rust if not handled properly.
The good news is that cleaning your Dutch oven does not have to be a chore. With the right approach and a few simple household items, you can keep your pot looking and performing like new. This guide walks you through every step of the process. Whether you own a classic cast iron Dutch oven or a shiny enameled version, you will find practical advice that works. Let us dive in and make Dutch oven cleanup effortless.
Key Takeaways
- Clean immediately after use: Letting food cool inside leads to stubborn stains and odors.
- Use natural cleaners: Baking soda, vinegar, and salt are safe and effective for all Dutch oven types.
- Avoid harsh chemicals: Soap and steel wool can strip seasoning and damage enamel coatings.
- Dry thoroughly after washing: Moisture causes rust on cast iron Dutch ovens.
- Season regularly: A light oil coating after cleaning protects and improves your pot.
- Know your Dutch oven type: Cast iron and enameled pots need different care approaches.
- Store properly: Keep your Dutch oven in a dry place with the lid slightly ajar.
📑 Table of Contents
- Why Cleaning Your Dutch Oven Right After Use Matters
- Step-by-Step Guide To Cleaning Your Dutch Oven After Use
- Natural Cleaning Solutions That Actually Work
- Comparison Table: Cast Iron Vs. Enameled Dutch Ovens
- Common Mistakes People Make When Cleaning
- Maintenance Tips To Keep Your Dutch Oven In Top Shape
- Quick Tips For Hassle-Free Dutch Oven Cleanup
- Frequently Asked Questions
- Conclusion
Why Cleaning Your Dutch Oven Right After Use Matters
Many people think it is fine to leave food residue in a Dutch oven until the next day. That is a mistake. Food that sits on the surface starts to harden, bond, and cling to the material. The longer you wait, the harder it becomes to remove. Cleaning right after use saves you time and effort later.
Beyond appearance, there are health and safety reasons to clean promptly. Old food particles can harbor bacteria, especially in warm environments. They can also create unpleasant odors that transfer to your next meal. Dutch oven maintenance is not just about looks. It is about keeping your cooking equipment safe and your food tasting great.
The Science Behind Sticky Residue
When food heats up in a Dutch oven, proteins and sugars undergo chemical changes. This process, called the Maillard reaction, is what makes cooked food so delicious. But it also means food bonds strongly to the cooking surface. Starches become sticky, fats polymerize, and sauces caramelize. All of this makes post-cooking cleanup a real challenge if you delay it.
The key is to act while the pot is still warm. Warm water and a soft brush can remove most residue before it hardens. Think of it like washing dishes right after a meal. The same logic applies to your Dutch oven. A few minutes of attention after cooking can prevent hours of scrubbing later.
What Happens If You Let Food Sit
If you ignore your Dutch oven after cooking, several things happen. First, food residue hardens into a crust that is very difficult to remove. Second, proteins and fats begin to oxidize, which causes discoloration. Third, bacteria can start growing on leftover food particles. Fourth, stubborn odors develop that are hard to get rid of.
Over time, these problems compound. A well-maintained Dutch oven develops a beautiful patina. A neglected one develops rust, black buildup, and foul smells. The difference between a well-cared-for pot and a neglected one is simply consistency in cleaning habits.
Step-by-Step Guide To Cleaning Your Dutch Oven After Use
Now that you understand why cleaning matters, let us walk through the actual process. Follow these steps every time you use your Dutch oven, and cleanup will become second nature.
Step One: Cool Down Before You Clean
Never plunge a hot Dutch oven into cold water. The sudden temperature change can warp the pot or crack the enamel. Instead, let it cool on the stove or counter until it is safe to touch. This usually takes about 15 to 30 minutes depending on what you cooked.
During this cooling period, you can scrape off any large food pieces with a wooden spoon or silicone spatula. Removing the bulk of the food before washing makes the rest of the process much easier. This simple step is one of the best Dutch oven care tips you can follow.
Step Two: Fill With Warm Water
Once the pot is warm to the touch but no longer hot, fill it with warm water. Let it sit for five to ten minutes. The warm water will loosen stuck-on food and make scrubbing much gentler. For cast iron Dutch ovens, warm water is all you need at this stage.
For enameled Dutch ovens, you can be a little more flexible with water temperature. But still avoid ice-cold water on a hot pot. The goal is to soften residue without causing thermal shock. This method works wonders for removing most food residue without any harsh scrubbing.
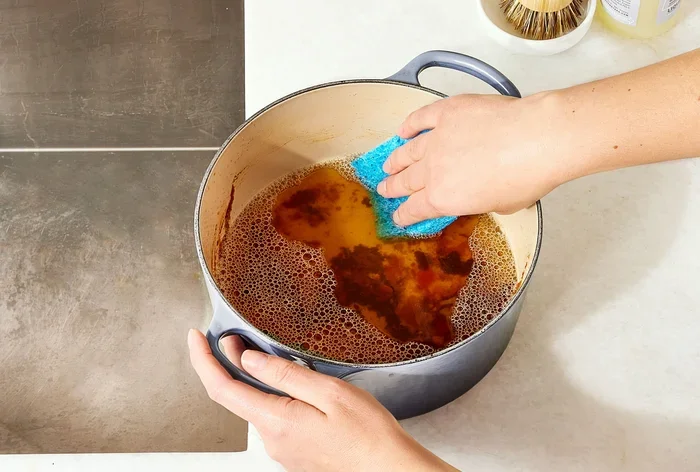
Step Three: Scrub Gently But Thoroughly
After soaking, use a soft sponge or nylon brush to clean the interior. For cast iron, avoid metal scrubbers and abrasive pads. They can strip away the seasoning that makes your pot non-stick. For enameled Dutch ovens, you have a bit more flexibility, but soft tools are still best.
Focus on areas with visible stains or stuck-on food. Use gentle circular motions. If the residue comes off easily, great. If not, move on to the natural cleaning solutions in the next section. Cleaning a Dutch oven after use should never require steel wool or harsh chemical cleaners.
Step Four: Rinse And Dry Completely
Rinse the Dutch oven thoroughly with clean warm water. Make sure no soap residue or cleaning solution remains. Then dry the pot immediately and completely with a clean towel. For cast iron, you can also place it on a low-heat burner for a minute to ensure all moisture is gone.
Drying is one of the most overlooked steps in Dutch oven care. Even a small amount of trapped moisture can lead to rust over time. Never store a Dutch oven while it is still damp. A completely dry pot is a safe pot.
Step Five: Apply A Light Coat Of Oil
For cast iron Dutch ovens, apply a thin layer of cooking oil after drying. Use a paper towel to spread a small amount of oil inside the pot and on the lid. This helps maintain the seasoning and protects against moisture. Wipe off any excess so the surface does not feel greasy.
Enameled Dutch ovens do not need oil after cleaning. But cast iron benefits greatly from this simple step. Think of it as a protective shield. Regular oiling after each use builds up a natural non-stick surface over time. This is the foundation of proper Dutch oven maintenance.
Natural Cleaning Solutions That Actually Work
You do not need expensive cleaning products to keep your Dutch oven spotless. Several household items work remarkably well for removing stains, odors, and buildup. Here are the most effective natural solutions.
Baking Soda Paste Power
Baking soda is a gentle abrasive that lifts stains without scratching surfaces. To use it, mix three parts baking soda with one part water to form a thick paste. Spread the paste over the stained areas inside your Dutch oven. Let it sit for 15 to 30 minutes.
After soaking, scrub gently with a soft sponge. The baking soda will break down food residue and absorb odors. This method works especially well for stubborn Dutch oven stains that refuse to budge with plain water. It is safe for both cast iron and enameled pots.
Vinegar And Salt Combo
White vinegar is a natural acid that dissolves mineral deposits and food buildup. Mix equal parts vinegar and water in your Dutch oven and bring it to a gentle simmer on the stove. Let it cook for about ten minutes, then remove from heat.
For extra cleaning power, add two tablespoons of salt to the vinegar solution. The salt acts as a mild abrasive. After simmering, pour out the solution and scrub with a soft brush. This combo is excellent for removing burnt food from Dutch ovens and restoring shine. It works particularly well on enameled surfaces where stains tend to linger.
Lemon Juice For Freshness
Lemon juice is a natural deodorizer and mild acid cleaner. Cut a lemon in half and rub the cut side directly on stained areas. The citric acid helps lift stains while the scent neutralizes odors.
You can also boil lemon halves in water inside your Dutch oven for a fresh-scented cleanup. This is especially helpful if your pot has absorbed strong food smells like garlic or fish. Natural Dutch oven cleaning methods like this keep your pot chemical-free and smelling great.
Comparison Table: Cast Iron Vs. Enameled Dutch Ovens
Not all Dutch ovens are the same, and their cleaning needs differ. Here is a quick comparison to help you understand the right approach for your pot.
| Feature | Cast Iron Dutch Oven | Enameled Dutch Oven |
|---|---|---|
| Cleaning Method | Warm water, soft brush, no soap | Warm water, mild soap okay |
| Seasoning Required | Yes, after every few uses | No |
| Stain Removal | Baking soda paste, salt scrub | Vinegar soak, baking soda |
| Rust Prevention | Critical, dry thoroughly and oil | Not a concern |
| Best For | Long-term seasoning build-up | Easy cleanup and low maintenance |
| Avoid | Steel wool, dishwasher, soaking overnight | Thermal shock, abrasive pads |
Understanding these differences helps you choose the right Dutch oven cleaning method for your specific pot. When in doubt, check the manufacturer’s instructions. Most brands provide clear guidelines for care and maintenance.
Common Mistakes People Make When Cleaning
Even experienced cooks sometimes make mistakes that damage their Dutch ovens. Here are the most common errors and how to avoid them.
Using Harsh Chemicals And Abrasive Cleaners
Many people reach for bleach, oven cleaners, or heavy-duty scrub pads. These products are too harsh for Dutch oven surfaces. Bleach can strip seasoning from cast iron and damage enamel coatings. Abrasive cleaners create scratches that trap food and make future cleaning harder.
Stick to gentle, natural cleaners. Baking soda, vinegar, and salt are safe and effective. If you must use soap on an enameled Dutch oven, choose a mild, fragrance-free option. But for cast iron, avoid soap entirely or use it only sparingly. Proper Dutch oven cleanup means protecting the surface, not attacking it.
Soaking For Too Long
Soaking a Dutch oven in water seems like a good idea for tough stains. But soaking cast iron for extended periods causes rust. Even enameled pots can develop water spots or damage from prolonged soaking.
Limit soaking to 15 to 30 minutes maximum. For really stubborn residue, try a baking soda paste overnight instead. The paste works without submerging the pot in water. This is one of the most important Dutch oven care tips to remember.
Storing The Pot While Damp
Putting a wet Dutch oven away is a recipe for rust and mold. Always dry your pot completely before storing it. For cast iron, leave the lid slightly ajar to allow air circulation and prevent moisture buildup.
If you live in a humid climate, consider placing a small cloth or paper towel inside the pot before storing it. This absorbs any remaining moisture and keeps your pot in excellent condition. Simple habits like this make a huge difference in Dutch oven longevity.
Maintenance Tips To Keep Your Dutch Oven In Top Shape
Cleaning after each use is essential, but ongoing maintenance keeps your Dutch oven performing at its best. Here are expert-backed tips to extend the life of your pot.
Regular Seasoning Routine
For cast iron Dutch ovens, seasoning is not optional. It is the process of applying a thin layer of oil and heating it to create a natural non-stick surface. Season your pot after every few uses, or whenever you notice food sticking more than usual.
To season, apply a thin coat of flaxseed oil or vegetable oil to the entire pot and lid. Place it upside down in an oven set to 375 degrees Fahrenheit for one hour. Let it cool completely before storing. Regular seasoning builds a protective layer that improves with each use. This is the secret behind perfectly seasoned Dutch ovens that look great and cook beautifully.
Deep Cleaning Once A Month
Even with regular cleaning, your Dutch oven benefits from a monthly deep clean. This removes buildup that normal washing cannot address. Use the vinegar and salt method or a baking soda paste for this purpose.
During a deep clean, inspect the pot for any signs of rust, chipping enamel, or worn seasoning. Catching problems early prevents them from becoming serious issues. Think of deep cleaning as a checkup for your Dutch oven. It keeps your pot in excellent condition and ensures every meal tastes its best.
Storage Best Practices
How you store your Dutch oven matters more than most people realize. Never stack heavy items on top of a Dutch oven. The weight can chip enamel or warp the shape of cast iron pots.
Store your Dutch oven in a cool, dry place. If space is limited, hang it on a pot rack or place it on a dedicated shelf. Keep the lid slightly ajar to allow airflow. These small storage habits protect your investment and keep your pot ready for action whenever you need it.
Quick Tips For Hassle-Free Dutch Oven Cleanup
Here are some extra tips to make cleaning your Dutch oven after use even easier:
- Line the bottom with parchment paper when baking to prevent sticking and simplify cleanup.
- Add a splash of water immediately after cooking to soften residue before it hardens.
- Use silicone utensils instead of metal to avoid scratching the interior surface.
- Wipe down the exterior after each use to prevent grease buildup and staining.
- Keep a dedicated brush or sponge for your Dutch oven to avoid cross-contamination with other cleaners.
- Cook at appropriate temperatures to prevent excessive burning and carbon buildup.
- Re-season cast iron pots whenever food starts sticking more than usual.
Expert Insight: Professional chefs recommend cleaning your Dutch oven within 30 minutes of finishing cooking. This window is the sweet spot where residue is still soft enough to remove easily but the pot is cool enough to handle safely. Building this habit eliminates the need for heavy scrubbing or harsh chemical cleaners.
Frequently Asked Questions
Can I put my Dutch oven in the dishwasher?
Most manufacturers advise against putting Dutch ovens in the dishwasher. The harsh detergents and high heat can strip seasoning from cast iron and damage enamel coatings over time. Hand washing is always the safer choice for maintaining your Dutch oven’s quality and appearance.
How do I remove black stains from my Dutch oven?
Black stains are usually carbon buildup from high-heat cooking. Make a paste of baking soda and water, apply it to the stains, and let it sit for 30 minutes. Scrub gently with a soft sponge. For stubborn stains, simmer a solution of vinegar and water in the pot for 10 minutes before scrubbing. This natural approach removes stains without damaging the pot’s surface.
Is it okay to use soap on a cast iron Dutch oven?
Modern dish soap is mild enough to use occasionally on cast iron. The old belief that soap destroys seasoning is outdated. However, use soap sparingly and rinse thoroughly. For regular cleaning, plain warm water and a soft brush are sufficient. Overuse of soap can gradually strip the seasoning, so keep it as an occasional tool rather than a habit.
How do I get rid of odors in my Dutch oven?
Odors often come from absorbed fats and proteins. Simmer a mixture of water, vinegar, and lemon juice in the pot for 10 minutes to neutralize smells. You can also bake the pot at 250 degrees Fahrenheit with the lid off for 15 minutes to eliminate persistent odors. Keeping your pot clean and dry after each use prevents most odor problems from developing in the first place.
Can rust on a Dutch oven be fixed?
Yes, minor rust can be removed with a paste of baking soda and water. Scrub the rusted area gently, then rinse and dry thoroughly. Apply a thin layer of oil and heat the pot in the oven at 350 degrees for one hour. For severe rust or deep pitting, however, the pot may be beyond saving. Prevention through proper drying and oiling is always better than trying to fix advanced rust damage.
How often should I re-season my cast iron Dutch oven?
Re-season your cast iron Dutch oven every few months or whenever you notice food sticking more than usual. If you use the pot frequently, a light seasoning after each use helps maintain the protective layer. A well-seasoned Dutch oven develops a beautiful dark surface that improves cooking performance over time. Regular seasoning is the single best thing you can do for long-term Dutch oven care.
Conclusion
Learning how to clean a Dutch oven after use is simpler than most people think. With the right approach, you can keep your pot in excellent condition without any hassle. The key is to act quickly, use gentle natural cleaners, and build consistent habits around maintenance and care.
Whether you own a classic cast iron Dutch oven or a convenient enameled version, the principles remain the same. Clean promptly, scrub gently, dry completely, and store properly. These four habits protect your investment and ensure your Dutch oven serves you well for decades.
Remember that Dutch oven maintenance is not about perfection. It is about consistency. A little attention after each use prevents big problems later. Natural cleaning methods like baking soda, vinegar, and lemon juice work wonders without harsh chemicals. They keep your pot safe, your food tasting great, and your cooking experience enjoyable.
Start applying these tips today, and you will notice the difference in your next meal. A clean Dutch oven cooks better, looks better, and lasts longer. Take pride in your kitchen tools, and they will reward you with countless delicious meals to come. Happy cooking and happy cleaning!