How To Make Pumpkin Puree Without Heating Up An Oven
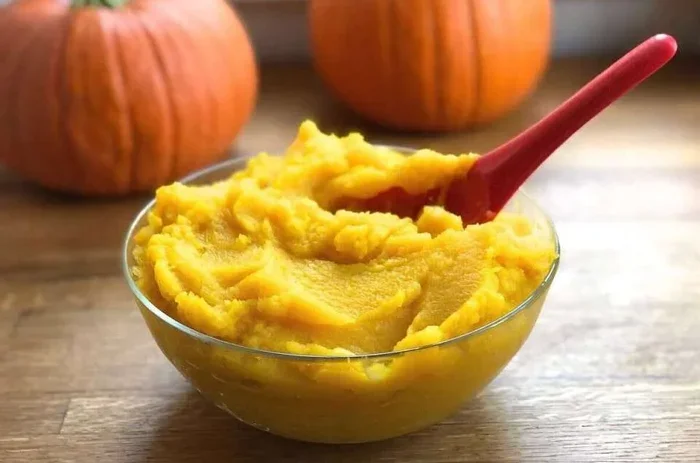
Making pumpkin puree without an oven is simple, fast, and saves you from warming up your kitchen. You can use a stovetop, microwave, or even a slow cooker to turn fresh pumpkin into smooth, delicious puree in under an hour. This guide walks you through every method step by step, so you can enjoy homemade pumpkin puree no matter the season or weather.
There is something truly satisfying about making pumpkin puree from scratch. The rich, earthy aroma and silky smooth texture beat anything you find in a can. But here is the problem many people face. They want to make their own puree, and the oven is the go-to method. The issue? Turning on the oven heats up the entire kitchen, which nobody wants during a warm fall day or in a small apartment.
The good news is that you do not need an oven at all. There are several easy ways to make pumpkin puree without heating up an oven. You can use your stovetop, microwave, or even a slow cooker. Each method works wonderfully and produces smooth, flavorful puree perfect for pies, soups, muffins, and more.
In this guide, I will walk you through every method in detail. You will learn the best techniques, helpful tips, and common mistakes to avoid. By the end, you will feel confident making fresh pumpkin puree whenever the craving strikes. Let us get started.
Key Takeaways
- Stovetop Method: Boiling or steaming pumpkin on the stove is the fastest way to make puree without an oven.
- Microwave Method: You can make pumpkin puree in under 20 minutes using a microwave and minimal cleanup.
- Slow Cooker Method: Perfect for hands-off cooking and ideal when you want to multitask in the kitchen.
- No Special Tools Needed: All these methods use basic kitchen equipment you already own.
- Storage Tips: Homemade puree lasts up to a week in the fridge and months in the freezer.
- Fresh vs. Canned: Making your own pumpkin puree from scratch tastes better and has no added preservatives.
📑 Table of Contents
- Why Make Pumpkin Puree Without an Oven?
- How to Make Pumpkin Puree on the Stovetop
- How to Make Pumpkin Puree in the Microwave
- Using a Slow Cooker for Pumpkin Puree
- Best Pumpkins for Making Puree
- Storing Your Homemade Pumpkin Puree
- Common Mistakes to Avoid When Making Pumpkin Puree
- Creative Ways to Use Your Homemade Pumpkin Puree
- Pumpkin Puree vs. Canned Pumpkin: What is the Difference?
- Final Thoughts on Making Pumpkin Puree Without an Oven
Why Make Pumpkin Puree Without an Oven?
Before we dive into the how-to, let us talk about why this matters. Many traditional recipes call for roasting pumpkin in the oven. That works, but it has downsides. First, it takes a long time. Second, it heats up your kitchen significantly. Third, it uses a lot of energy, especially during summer months.
Making pumpkin puree on the stovetop or in the microwave solves all of these problems. It is faster, cooler, and just as effective. The texture and taste are nearly identical to oven-roasted puree. Plus, you have more control over the cooking process, which means fewer dry or undercooked pieces.
Another big reason is convenience. Not everyone owns an oven. Maybe you live in a dorm, a small apartment, or a rental without a full kitchen. Or perhaps your oven is already occupied with another dish. Whatever the reason, knowing how to make pumpkin puree without an oven gives you flexibility and freedom in the kitchen.
The Science Behind Pumpkin Puree
Understanding a little bit about how pumpkin cooks helps you make better puree. Pumpkin flesh is dense and full of water. When you apply heat, the water breaks down the cell walls, making the flesh soft and mushy. This is exactly what you want for puree.
Boiling, steaming, and microwaving all use different methods to apply this heat. Boiling surrounds the pumpkin with hot water. Steaming uses steam to gently cook the flesh. Microwaves excite water molecules directly inside the pumpkin. Each method works, but they differ in speed and flavor intensity.
The key is to cook the pumpkin until it is completely tender. You should be able to poke it easily with a fork. If it is still firm in the center, it will not blend smoothly. This applies to every method we cover below.
How to Make Pumpkin Puree on the Stovetop
The stovetop method is hands down the most popular way to make pumpkin puree without an oven. It is fast, reliable, and uses equipment you already have. You can boil or steam the pumpkin, and both approaches work beautifully.
Method 1: Boiling Pumpkin
Boiling is the simplest stovetop method. You cut the pumpkin into small pieces, cover them with water, and boil until tender. Then you drain the water and blend the cooked flesh into smooth puree.
Here is how to do it step by step:
- Start with a sugar pie pumpkin or butternut squash. These varieties have the best flavor and texture for puree.
- Cut the pumpkin in half and scoop out the seeds and stringy pulp.
- Peel the skin off using a sharp knife or vegetable peeler.
- Cut the flesh into small, uniform cubes, about one inch each.
- Place the cubes in a large pot and cover them with cold water.
- Bring the water to a boil over high heat, then reduce to a simmer.
- Cook for 15 to 20 minutes, or until the cubes are fork-tender.
- Drain the water and let the pumpkin cool for a few minutes.
- Transfer the cooked pumpkin to a food processor or blender.
- Blend until completely smooth, adding a splash of water if needed.
Quick Tip: Save the leftover pumpkin water! It makes a great base for pumpkin soup or can be used in place of regular water in bread and muffin recipes.
Method 2: Steaming Pumpkin
Steaming is a slightly better method if you want to preserve more nutrients and flavor. Instead of submerging the pumpkin in water, you cook it above the water using steam. This prevents the pumpkin from absorbing excess water, which can dilute the flavor.
To steam pumpkin, follow these steps:
- Prepare the pumpkin the same way as the boiling method: cut, peel, and cube it.
- Fill a large pot with about two inches of water and place a steamer basket inside.
- Arrange the pumpkin cubes in the steamer basket in a single layer.
- Cover the pot with a lid and bring the water to a boil.
- Reduce the heat to medium and steam for 12 to 18 minutes.
- Check for tenderness by poking a cube with a fork.
- Once tender, transfer the pumpkin to a blender and blend until smooth.
Steamed pumpkin puree tends to have a richer, more concentrated flavor compared to boiled puree. This is because less water dilutes the natural sugars and pumpkin flavor. If you want the best tasting homemade pumpkin puree, steaming is the way to go.
How to Make Pumpkin Puree in the Microwave
If you need pumpkin puree fast, the microwave is your best friend. This method takes less than 20 minutes from start to finish, and cleanup is minimal. It is perfect for when you are in a hurry or do not want to heat up your stove.
Step-by-Step Microwave Method
Here is the simplest way to make pumpkin puree in the microwave:
- Choose a small sugar pumpkin that fits inside your microwave-safe dish.
- Cut the pumpkin in half and scoop out the seeds.
- Do not peel the pumpkin. The skin will help hold the flesh together during cooking.
- Place the pumpkin halves cut-side down in a microwave-safe dish with about one inch of water.
- Cover the dish with a microwave-safe lid or plastic wrap.
- Microwave on high for 10 to 15 minutes, depending on the size of the pumpkin.
- Check for doneness by piercing the flesh with a knife. It should slide in easily.
- Let the pumpkin cool until you can handle it comfortably.
- Scoop the soft flesh away from the skin and discard the skin.
- Blend the scooped flesh until completely smooth.
The microwave method is incredibly fast, but it does not produce quite as even a texture as stovetop methods. You may need to blend a little longer to get a perfectly smooth puree. Some small bits of skin may sneak through if you do not scoop carefully.
Quick Tip: If your microwave has a turntable, rotate the dish halfway through cooking. This ensures even cooking and prevents one side from getting mushy while the other stays firm.
Using a Slow Cooker for Pumpkin Puree
Not all methods involve direct heat. A slow cooker is an excellent alternative for making pumpkin puree without an oven or stovetop. This method is perfect for busy days when you want to come home to a kitchen full of warm, cooked pumpkin.
Here is how to make puree in a slow cooker:
- Cut a medium pumpkin in half and remove the seeds.
- You can leave the skin on or peel it off. Leaving it on makes cleanup easier.
- Place the pumpkin halves cut-side down in the slow cooker.
- Add about one cup of water to the bottom of the cooker.
- Cover and cook on low for 4 to 6 hours, or on high for 2 to 3 hours.
- The pumpkin is done when the flesh is completely soft and easily pierced with a fork.
- Let it cool, then scoop out the flesh and blend until smooth.
The slow cooker method produces a very mild, slightly sweet puree. Because the pumpkin cooks slowly, the flavors have time to develop. This puree works wonderfully in recipes that call for a subtle pumpkin taste.
Expert Insight: Slow cooker puree has a softer, almost custard-like texture compared to stovetop puree. It blends more easily and requires less liquid in your blender. This makes it ideal for thick recipes like pumpkin bread or pumpkin cheesecake.
Best Pumpkins for Making Puree
Not all pumpkins are created equal when it comes to making puree. The variety you choose affects the flavor, texture, and overall quality of your finished product. Using the wrong type of pumpkin can result in bland or stringy puree.
Here are the best pumpkins and squash varieties for homemade pumpkin puree:
- Sugar Pie Pumpkin: This is the gold standard for puree. Small, dense, and sweet, with very little stringy flesh.
- Butternut Squash: Technically a squash, but it makes excellent puree with a slightly nutty flavor.
- Kabocha Squash: A Japanese pumpkin variety with a rich, creamy texture and deep flavor.
- Delicata Squash: Mild and sweet, with a creamy consistency that blends beautifully.
- Acorn Squash: Works well but has a slightly more fibrous texture. Best for blending into soups.
Avoid using large carving pumpkins for puree. They have watery, stringy flesh and lack the sweetness needed for good puree. They are bred for size and durability, not flavor or texture.
Comparison Table: Pumpkin Varieties for Puree
| Pumpkin Variety | Flavor | Texture | Best Method | Difficulty |
|---|---|---|---|---|
| Sugar Pie Pumpkin | Sweet and rich | Dense and smooth | All methods | Easy |
| Butternut Squash | Nutty and sweet | Creamy and smooth | Boiling or steaming | Easy |
| Kabocha Squash | Rich and earthy | Creamy and velvety | Microwave or slow cooker | Medium |
| Delicata Squash | Mild and sweet | Soft and creamy | Boiling or steaming | Easy |
| Acorn Squash | Mild and slightly sweet | Fibrous and moist | Slow cooker | Medium |
| Carving Pumpkin | Bland and watery | Stringy and thin | Not recommended | Difficult |
Choosing the right variety is one of the most overlooked steps in making great pumpkin puree from scratch. A good pumpkin makes all the difference between a smooth, flavorful puree and a watery, bland one.
Storing Your Homemade Pumpkin Puree
Once you have made your fresh pumpkin puree, you need to store it properly to keep it fresh and safe. The good news is that puree stores very well in multiple ways.
Refrigerator Storage
Homemade pumpkin puree keeps in the refrigerator for up to 7 days. Let the puree cool completely, then transfer it to an airtight container. Glass jars work great, as do sealed plastic containers. Make sure the container is clean and dry before you add the puree.
Quick Tip: Label the container with the date you made the puree. This helps you keep track of freshness and prevents you from forgetting about it in the back of the fridge.
Freezer Storage
Freezing is the best option for long-term storage. Pumpkin puree lasts up to 6 months in the freezer. Here is how to freeze it properly:
- Let the puree cool completely to room temperature.
- Spoon the puree into freezer-safe bags or airtight containers.
- Squeeze out as much air as possible from the bags.
- Label each bag with the date and the amount of puree inside.
- Place the bags flat in the freezer so they freeze into convenient flat shapes.
- Thaw overnight in the refrigerator when you are ready to use it.
Expert Insight: Freezing puree in ice cube trays is another great trick. Once frozen, pop the cubes out and transfer them to a bag. This lets you thaw just the amount you need for a single recipe, reducing waste and saving time.
Canning Pumpkin Puree
For those who like to can their own foods, pumpkin puree can be pressure canned. However, this requires special equipment and careful attention to food safety guidelines. The USDA recommends canning pumpkin in cubed form rather than as a puree, because purees are too thick for safe heat penetration during the canning process. Always follow tested canning recipes from trusted sources like the USDA or your local extension office.
Common Mistakes to Avoid When Making Pumpkin Puree
Even though making pumpkin puree is straightforward, there are a few common mistakes that can ruin your results. Avoiding these pitfalls will help you achieve perfect puree every time.
- Using the wrong pumpkin variety: Carving pumpkins are not meant for eating. They have too much water and not enough flavor. Stick with sugar pie pumpkins or butternut squash.
- Skipping the peeling step: Leaving the skin on when you boil or steam the pumpkin can result in a skinnier, less smooth puree. The skin is fine for slow cooking or microwaving, but remove it before blending.
- Not cooking the pumpkin long enough: Undercooked pumpkin will not blend smoothly and may leave chunks in your puree. Always check for tenderness before blending.
- Adding too much water when blending: Excess water makes your puree runny and watery. Add only small splashes if your blender needs help processing the pumpkin.
- Skipping the draining step: If you boil pumpkin, make sure you drain it well. Excess water dilutes the flavor and changes the texture of your puree.
- Storing puree in the wrong container: Plastic containers that are not airtight can cause the puree to absorb fridge odors or dry out on the surface. Always use sealed glass or BPA-free plastic containers.
By steering clear of these mistakes, you will save time and end up with a much better final product. Pumpkin puree from scratch should be smooth, flavorful, and vibrant in color. These simple tips help you get there.
Creative Ways to Use Your Homemade Pumpkin Puree
Now that you know how to make pumpkin puree without heating up an oven, it is time to put it to good use. Homemade puree is incredibly versatile and works in both sweet and savory recipes.
Sweet Recipes
- Pumpkin Pie: The classic use for puree. Combine with spices, eggs, and sweetened condensed milk for a perfect fall dessert.
- Pumpkin Bread: Moist, spiced, and incredibly delicious. Homemade puree gives bread a richer flavor than canned alternatives.
- Pumpkin Muffins: Quick and easy to make. Add chocolate chips or nuts for extra texture.
- Pumpkin Smoothie: Blend puree with yogurt, banana, cinnamon, and a touch of maple syrup for a healthy breakfast treat.
- Pumpkin Pancakes: Add a few spoonfuls of puree to your pancake batter for a seasonal twist.
Savory Recipes
- Pumpkin Soup: Simmer puree with broth, onion, garlic, and spices for a comforting autumn soup.
- Pumpkin Pasta Sauce: Blend puree with cream, sage, and Parmesan for a unique pasta topping.
- Stuffed Pumpkins: Fill hollowed pumpkin halves with rice, vegetables, and cheese, then bake or steam until tender.
- Pumpkin Hummus: Add puree to your favorite hummus recipe for a seasonal variation.
Having a batch of homemade puree in the fridge opens up a world of recipe possibilities. You can make something sweet or savory, simple or elaborate, depending on your mood. The flavor of fresh pumpkin puree simply cannot be matched by canned alternatives.
Pumpkin Puree vs. Canned Pumpkin: What is the Difference?
Many people wonder whether homemade puree is really worth the effort when canned pumpkin is so convenient. The answer depends on what you value most in your cooking.
Homemade pumpkin puree has a fresher, more natural flavor. It contains no added sugars, spices, or preservatives. The texture is completely customizable, and you control exactly what goes into it. For baking and cooking, homemade puree often produces better results because it has a more concentrated pumpkin flavor.
Canned pumpkin, on the other hand, is consistent and convenient. It is always available, has a long shelf life, and works well in most recipes. Most canned pumpkin is actually made from pumpkin puree (sometimes called pumpkin purée), but it may include added salt or spices depending on the brand.
Both options have their place in the kitchen. However, once you taste the difference that fresh homemade puree makes, you may find yourself reaching for the pumpkin more often. Making pumpkin puree without an oven gives you the best of both worlds: fresh, homemade quality without the hassle of turning on the heat.
Final Thoughts on Making Pumpkin Puree Without an Oven
Making pumpkin puree without heating up an oven is one of the easiest and most rewarding kitchen skills you can learn. Whether you choose to boil, steam, microwave, or slow cook your pumpkin, the process is simple and forgiving. You do not need special equipment or advanced cooking skills. All you need is a fresh pumpkin, a basic kitchen setup, and a little bit of patience.
The stovetop methods give you the most control and the best flavor. The microwave method wins for speed and convenience. The slow cooker method is perfect for busy days when you want to come home to ready-to-blend pumpkin. Each approach produces excellent results, and none of them require you to turn on the oven.
Remember to choose the right pumpkin variety, cook the flesh until it is completely tender, and blend until the puree is perfectly smooth. Store your leftover puree properly, and you will have a versatile ingredient ready for all your favorite recipes throughout the season.
Once you start making homemade pumpkin puree, you will never go back to canned. The taste is better, the texture is richer, and the satisfaction of creating something from scratch is unmatched. So grab a pumpkin, pick your favorite method, and get started today. Your kitchen and your taste buds will thank you.
Frequently Asked Questions
Can I use any type of pumpkin for puree?
Not all pumpkins are suitable for puree. Sugar pie pumpkins are the best choice because they are small, dense, and sweet. Avoid large carving pumpkins, as they have watery, stringy flesh and very little flavor. Butternut squash and kabocha also make excellent alternatives to traditional pumpkins.
How long does homemade pumpkin puree last?
In the refrigerator, homemade puree stays fresh for up to 7 days when stored in an airtight container. In the freezer, it lasts for up to 6 months. For the best quality, always label your containers with the date you made the puree and use it within the recommended time frame.
Is it better to boil or steam pumpkin for puree?
Steaming is slightly better than boiling because it preserves more flavor and nutrients. Boiling can cause the pumpkin to absorb extra water, which dilutes the taste. However, both methods produce good puree, and boiling is faster and simpler if you are in a hurry.
Can I make pumpkin puree in the microwave without a lot of mess?
Yes, the microwave method is actually one of the cleanest options. You cook the pumpkin halves with a small amount of water in a covered dish, which keeps splatter to a minimum. The skin also contains the flesh during cooking, making cleanup even easier. Just be careful when removing the dish, as the steam will be hot.
Do I need to peel the pumpkin before blending?
It depends on the method you are using. For stovetop boiling and steaming, you should peel the pumpkin before cooking. For the microwave method, you can leave the skin on during cooking and scoop out the soft flesh afterward. Always remove the skin before blending to ensure a smooth, grit-free puree.
Can I freeze pumpkin puree in portions?
Absolutely! Freezing puree in portions is one of the smartest ways to store it. You can use ice cube trays to freeze small portions, then transfer the cubes to a freezer bag. This way, you only thaw what you need for each recipe, reducing waste and keeping the rest of your puree fresh in the freezer.
=== CONCLUSION ===
Making pumpkin puree without an oven is simple, practical, and incredibly rewarding. You have several methods to choose from, including stovetop boiling, steaming, microwaving, and slow cooking. Each method produces delicious, smooth puree that is far superior to anything from a can. The key is to pick the right pumpkin, cook it until tender, and blend it until completely smooth.
Now that you know how easy it is to make pumpkin puree from scratch, there is no reason not to try it. You will save money, avoid preservatives, and enjoy a better-tasting product in your favorite recipes. Whether it is pie season or just a random Tuesday craving, you are fully equipped to make fresh pumpkin puree anytime, without ever turning on the oven. Get into your kitchen and give it a try today!