How To Make Coffee With Aeropress Youtube Tutorial
Making coffee with an Aeropress is simple, fast, and incredibly rewarding. This guide walks you through a complete YouTube-style tutorial so you can brew smooth, rich coffee at home. You will learn the right grind size, water temperature, brewing time, and the inverted method that baristas love.
There is something deeply satisfying about brewing a perfect cup of coffee at home. And if you have been searching for a simple way to make great coffee without spending a fortune, you have come to the right place. This guide will show you how to make coffee with Aeropress the same way you would follow in a YouTube tutorial. We will cover every step from setup to cleanup so you can brew like a pro on your very first try.
The Aeropress has become one of the most popular coffee brewing tools in the world. It is affordable, portable, and incredibly easy to use. Whether you are a complete beginner or a coffee enthusiast looking to try something new, this method delivers rich, smooth coffee every single time. Let us dive in and get you brewing.
Key Takeaways
- Easy to Learn: The Aeropress method is beginner-friendly and takes less than two minutes to brew.
- Customizable Brew: You control grind size, water temperature, and steep time for your perfect cup.
- Affordable Equipment: An Aeropress costs far less than most coffee makers and lasts for years.
- Clean and Portable: Cleanup is a breeze, and the device is perfect for travel and camping.
- Smooth Taste: The Aeropress produces low-acidity coffee that is gentle on your stomach.
- Multiple Methods: Try both the standard and inverted techniques to find your favorite.
- YouTube-Friendly: Follow along with video tutorials for a hands-on learning experience.
📑 Table of Contents
- Why the Aeropress Is a Game Changer for Home Brewing
- What You Need to Get Started
- Step-by-Step Guide: How To Make Coffee With Aeropress
- The Inverted Method: A Popular YouTube Favorite
- Perfecting Your Brew: Tips and Adjustments
- Common Mistakes and How To Avoid Them
- Cleaning and Maintenance Tips
- Where to Find Great YouTube Tutorials
- Health Benefits of Aeropress Coffee
- Conclusion
Why the Aeropress Is a Game Changer for Home Brewing
The Aeropress was invented in 2005 by Alan Adler, and it has changed the way people brew coffee at home. Unlike drip machines or French presses, the Aeropress uses air pressure to push water through coffee grounds. This creates a clean, full-flavored cup in under two minutes. Many people watch YouTube videos to learn the technique because it is so quick and visual.
Here is why so many coffee lovers swear by this device:
- Speed: A full cup takes less than two minutes from start to finish.
- P affordability: Most Aeropress units cost under forty dollars.
- Portability: It fits in a bag and works anywhere with hot water.
- Easy Cleanup: You just pop out the used filter and rinse the chamber.
- Versatility: You can make espresso-style shots, Americanos, or regular brewed coffee.
One of the best things about the Aeropress is that there is no single right way to use it. People experiment with different coffee grind sizes, water temperatures, and brewing times to find their perfect cup. This flexibility is part of what makes it so fun to use.
What Makes Aeropress Coffee Different
The Aeropress uses a method called immersion brewing. This means the coffee grounds sit in hot water for a short time before being pushed through a filter. The result is a cup that tastes clean and smooth. Because the paper filter catches most of the oils and fine particles, the coffee has less acidity and bitterness compared to French press coffee.
If you have ever found drip coffee too weak or French press too gritty, the Aeropress might be exactly what you need. It sits right in the sweet spot between the two. The taste is bright and clear, yet still full-bodied and satisfying.
What You Need to Get Started
Before you start brewing, you need a few basic items. The good news is that everything is simple and easy to find. Here is your shopping list for making great Aeropress coffee at home.
The Essential Equipment
- Aeropress Unit: This includes the chamber, plunger, and cap. Most kits come with everything you need.
- Paper Filters: These filters keep sediment out of your cup. You can buy packs of 350 for just a few dollars.
- A Kettle: A gooseneck kettle gives you more control over the water flow. But any kettle works fine.
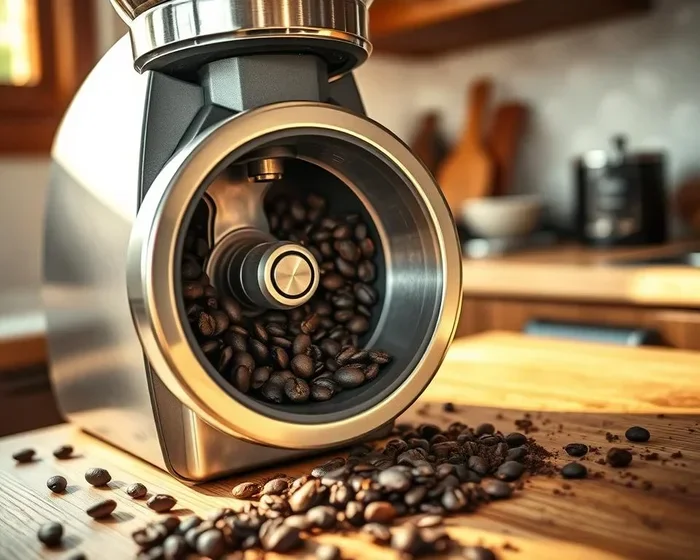
- A Coffee Grinder: A burr grinder gives you a consistent grind size. Blade grinders work too but take more effort.
- A Stirring Tool: A simple wooden stirrer or chopstick works perfectly.
- A Mug: Any mug or cup will do. Just make sure it fits the Aeropress on top.
You do not need expensive equipment to make great coffee. Many people start with a basic kettle and a hand grinder. As you get more comfortable, you can upgrade your tools. But the Aeropress itself is really all you need to get started.
Choosing the Right Coffee Beans
The beans you choose matter a lot. Freshly roasted beans give the best flavor. Look for beans that were roasted within the last two to four weeks. Medium roast beans work well for most Aeropress recipes because they offer a balanced flavor profile. Light roasts bring out more acidity and fruit notes, while dark roasts give you a bolder, smokier taste.
Grind your beans just before brewing for the freshest result. The ideal grind size for Aeropress is medium-fine, similar to table salt. If your grind is too coarse, the coffee will taste weak and watery. If it is too fine, it will be slow to drip through and may taste bitter.
Step-by-Step Guide: How To Make Coffee With Aeropress
Now let us get into the heart of the matter. This step-by-step guide follows the standard method that most YouTube tutorials teach. Once you have done it a few times, it will become second nature.
Step 1: Boil Your Water
Start by heating your water to between 175 and 205 degrees Fahrenheit. If you do not have a thermometer, just bring the water to a boil and then let it sit for about thirty seconds. Using water that is too hot will burn the coffee grounds and create a bitter taste. Water that is too cool will under-extract the coffee and leave it tasting flat.
Step 2: Grind Your Coffee
Measure out about 15 to 17 grams of coffee beans. This is roughly two level tablespoons. Grind them to a medium-fine consistency. Think of the texture of sand or table salt. Put the ground coffee into the Aeropress chamber on top of your mug.
Step 3: Add Water and Stir
Pour about 200 milliliters of hot water into the chamber. Start from the center and work your way outward. Give the mixture about ten gentle stirs with your stirring tool. The stirring helps the coffee grounds interact evenly with the water, which leads to better extraction.
Step 4: Insert the Plunger and Wait
Place the plunger gently on top of the chamber to create a seal. Do not push it down yet. Let the coffee steep for about one to two minutes. This steeping time is part of what makes Aeropress coffee so smooth and flavorful. If you prefer a stronger cup, let it steep closer to two minutes.
Step 5: Press and Serve
After the steeping time is up, press the plunger down slowly and steadily. It should take about 20 to 30 seconds to push all the way down. If you feel too much resistance, your grind might be too fine. If the plunger slides down too quickly, your grind might be too coarse. Pour your fresh coffee into a mug and enjoy it right away.
Step 6: Clean Up
Cleanup is one of the easiest parts of the whole process. Remove the used filter cap, push out the coffee puck, and rinse the chamber under warm water. The used filter and grounds go right into the trash. You can also rinse the plunger and seal with warm water. Keeping your Aeropress clean after every use ensures it lasts for years and your coffee always tastes fresh.
The Inverted Method: A Popular YouTube Favorite
If you have watched how to make coffee with Aeropress YouTube videos, you have probably seen the inverted method. This technique flips the Aeropress upside down during brewing. It is the method most popular among coffee enthusiasts and is featured in countless video tutorials online.
Here is why people love the inverted method:
- Full Immersion: The coffee grounds stay submerged in water for the entire steeping time.
- More Control: You can steep for longer without worrying about dripping.
- Better Extraction: The even contact between water and grounds creates a richer flavor.
- Easier to Add Ingredients: You can stir in milk, sugar, or flavors before pressing.
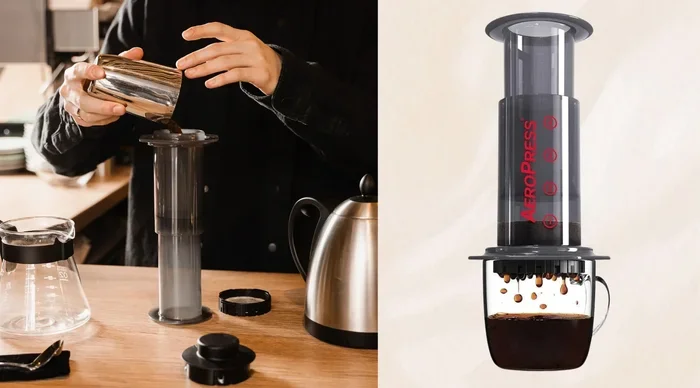
To use the inverted method, simply assemble the Aeropress upside down on a flat surface. Add the coffee grounds and hot water, steep for one to two minutes, then attach the filter cap. Place your mug on top, flip the Aeropress over, and press down slowly. The result is a full-bodied cup with a rich, complex flavor profile.
Many beginners start with the standard method and then switch to the inverted method once they feel comfortable. Both methods produce excellent coffee. It really just comes down to personal preference. Try both and see which one you enjoy more.
Pro Tips for the Inverted Method
Here are a few tips that will help you master the inverted technique:
- Always place the Aeropress on a stable surface before adding water. A kitchen counter works best.
- Use a kitchen timer to track your steeping time precisely.
- Do not flip the Aeropress too quickly or the hot coffee may spill.
- Practice the flip-and-press motion a few times before you have coffee in the chamber.
- Keep a towel nearby in case of any drips or spills during the flip.
Once you get the hang of the inverted method, you will never want to go back to the standard method. It gives you more control and consistently better results. This is why it is the go-to technique in most YouTube tutorials.
Perfecting Your Brew: Tips and Adjustments
The beauty of the Aeropress is that you can tweak every variable to suit your taste. Here are some adjustments you can make to dial in your perfect cup.
Adjusting the Coffee to Water Ratio
The standard ratio is about 1:15, which means 15 grams of coffee for every 250 milliliters of water. But this is just a starting point. If you like stronger coffee, try a 1:12 ratio. If you prefer a lighter taste, go for 1:17 or even 1:18. Experimenting with ratios is one of the most fun parts of using an Aeropress.
Getting the Right Water Temperature
Water temperature has a huge impact on the taste of your coffee. Too hot and you will over-extract, which brings out bitter flavors. Too cool and you will under-extract, leaving the coffee tasting sour and thin. The sweet spot is between 175 and 205 degrees Fahrenheit. For a smoother cup, try using water at 185 degrees. For a bolder cup, use water closer to 205 degrees.
If you are worried about temperature, you can always use a simple kitchen thermometer. Or, as mentioned earlier, just boil the water and let it rest for 30 to 45 seconds. This brings it right into the ideal range.
Dialing In Your Grind Size
Your grind size is the most important variable to get right. Medium-fine is the sweet spot for most Aeropress recipes. If your coffee tastes weak or watery, try grinding a little finer. If it tastes harsh or bitter, grind a little coarser. Small adjustments make a big difference, so change your grind size in small increments.
Brewing Time Matters
The standard steeping time is one to two minutes. A shorter brew time gives you a lighter, more delicate cup. A longer steep produces a stronger, more intense flavor. If you like your coffee bold, aim for closer to two minutes. If you prefer a milder taste, stick with one minute. You can also experiment by pulling the plunger up slightly during steeping to slow the extraction.
Common Mistakes and How To Avoid Them
Even though the Aeropress is simple to use, there are a few common mistakes that can ruin your cup. Here is what to watch out for.
- Using boiling water directly: This burns the coffee and creates a harsh, bitter taste. Always let boiling water cool for 30 to 45 seconds.
- Grinding too coarse: Coarse grounds let water pass through too quickly, resulting in weak and sour coffee.
- Not stirring enough: Without proper stirring, the grounds do not extract evenly, leading to an inconsistent taste.
- Skipping the filter: Always use a paper filter. It removes sediment and oils that can make the coffee taste muddy.
- Rushing the press: Pushing the plunger too fast can disturb the grounds and create a gritty cup. Go slow and steady.
- Using old coffee beans: Stale beans lose their flavor quickly. Always use fresh beans and grind them right before brewing.
Avoiding these mistakes will immediately improve the quality of your coffee. And remember, every mistake is a learning opportunity. Each brew teaches you something new about what you like and what you do not like.
Cleaning and Maintenance Tips
Keeping your Aeropress clean is essential for great-tasting coffee. After every brew, remove the filter cap and push out the used coffee puck. Rinse all the parts under warm running water. The rubber seal and plunger should be cleaned gently to maintain their elasticity.
Every few weeks, give your Aeropress a deeper clean. Disassemble all the parts and wash them with warm soapy water. Let them air dry completely before reassembling. This prevents any buildup of oils or residue that could affect the taste of your next cup.
One thing to keep in mind is that the Aeropress is not dishwasher safe. The heat and harsh detergents can damage the rubber seal and chamber over time. Hand washing is always the best approach. If you ever notice a strange taste in your coffee, it is usually a sign that the device needs a thorough cleaning.
When it comes to keeping your kitchen clean after coffee sessions, a simple wipe down of your counters and tools goes a long way. If you ever deal with stubborn messes in your kitchen, you can always refer to guides on how to clean an oven with a dishwasher tablet without scrubbing for tough kitchen stains. And if you need tips on cleaning other kitchen appliances, check out this guide on how to clean an Oster toaster oven for general appliance maintenance. Keeping your entire kitchen clean makes the coffee brewing experience even more enjoyable.
Where to Find Great YouTube Tutorials
Watching a video tutorial is one of the best ways to learn the Aeropress method. Seeing the process in action helps you understand the timing, the pouring technique, and the pressing motion. Many coffee channels on YouTube offer free, high-quality tutorials that walk you through every step.
When searching for a tutorial, look for videos that cover both the standard and inverted methods. The best creators also explain the science behind each step, which helps you understand why certain techniques work. Watching someone else brew coffee is a great way to pick up tips and tricks that you might not find in written guides.
Once you watch a few tutorials, you will feel confident enough to brew on your own. And if you ever want to learn about other coffee methods, there are plenty of resources available. For example, if you are curious about other kitchen appliances and how they work, you might enjoy learning about how to measure a toaster oven for precision in your kitchen experiments.
Health Benefits of Aeropress Coffee
Beyond the great taste, Aeropress coffee offers some health benefits that are worth mentioning. The paper filter removes most of the cafestol and kahweol, which are compounds that can raise cholesterol levels. This makes Aeropress coffee a healthier choice compared to French press or espresso methods that do not use paper filters.
Coffee itself is rich in antioxidants and has been linked to improved mental focus, better physical performance, and a lower risk of certain diseases. The Aeropress method preserves these beneficial compounds while giving you a clean, smooth cup that is easy on the stomach. For people who are sensitive to acidity in coffee, the Aeropress is often the best brewing method because it produces a low-acidity cup.
Drinking coffee in moderation has been associated with a longer lifespan and a reduced risk of type 2 diabetes, Parkinson’s disease, and liver disease. So when you brew your next cup with the Aeropress, you can feel good about the choice you are making for your health and your taste buds.
Conclusion
Learning how to make coffee with Aeropress is one of the best skills you can add to your morning routine. It is fast, affordable, and produces a cup of coffee that rivals anything you will find at a coffee shop. With the right grind size, water temperature, and brewing time, you can customize every cup to match your personal taste perfectly.
Whether you use the standard method or the inverted method, the Aeropress gives you complete control over your brew. Start with the basic steps outlined in this guide, and then experiment with different variables to find your perfect cup. Watch a few YouTube tutorials for extra guidance, and do not be afraid to make mistakes along the way. Every brew teaches you something new. So grab your Aeropress, some fresh beans, and start your journey to better coffee today.
Frequently Asked Questions
What is the best coffee grind size for an Aeropress?
A medium-fine grind works best for most Aeropress recipes. It should feel similar to table salt or fine sand. If your coffee tastes weak, try grinding a little finer. If it tastes bitter or is hard to press, grind a little coarser.
Can I use the Aeropress without a YouTube tutorial?
Absolutely. While YouTube tutorials are very helpful for visual learners, this guide covers everything you need to know. The Aeropress is designed to be simple and intuitive, so you can follow the written steps and still brew a great cup of coffee.
How long does an Aeropress last?
With proper care and regular cleaning, an Aeropress can last for several years. The rubber seal may need replacing after about a year of frequent use, but replacement parts are inexpensive and easy to find online.
Can I make espresso with an Aeropress?
Yes, you can make a concentrated espresso-style shot using the Aeropress. Simply use less water and a finer grind, and press the plunger down slowly. The result is a rich, bold shot that is perfect for making Americanos or lattes at home.
Is Aeropress coffee stronger than drip coffee?
Aeropress coffee is often richer and more concentrated than standard drip coffee because of the immersion brewing method and the pressure used during pressing. However, you can adjust the ratio to make it as strong or as light as you prefer.
Do I need a special kettle to make Aeropress coffee?
A gooseneck kettle gives you more control over pouring, but it is not required. Any kettle that can heat water to the right temperature works perfectly fine. The most important thing is getting the water temperature between 175 and 205 degrees Fahrenheit.