How To Cook A Tender Roast In The Oven Step By Step
How To Cook A Tender Roast In The Oven is easier than you think with the right technique and a little patience. This step-by-step guide walks you through everything from choosing the perfect cut to pulling a juicy, fork-tender meat roast out of the oven. You will learn searing secrets, seasoning tips, and the exact oven temperature to use for a perfect pot roast every single time.
There is nothing quite like the smell of a slow-roasting beef pot roast filling your kitchen on a weekend afternoon. Whether you are feeding a family or hosting guests, learning how to cook a tender roast in the oven is a skill that will serve you well for years to come.
A perfectly cooked roast is juicy, flavorful, and falls apart with just a fork. The secret is not magic, it is method. With the right oven temperature, quality ingredients, and a little patience, you can achieve restaurant-quality results right in your own home. This guide covers every step, from selecting the best cut to slicing and serving.
Many home cooks think roasting a beef juicy roast is complicated. It really is not. You just need to understand a few basic principles about heat, time, and seasoning. By the end of this article, you will feel confident enough to tackle your very own slow roast beef with ease. Let us get started.
Key Takeaways
- Pick the right cut: Chuck roast, brisket, and prime rib are the best choices for a tender oven roast.
- Sear before roasting: Browning the outside builds deep flavor through the Maillard reaction.
- Cook low and slow: A 325°F oven temperature with low and slow cooking breaks down tough fibers for the best texture.
- Use a meat thermometer: The roast beef internal temp is the only reliable way to know your roast is done.
- Rest the roast: Giving your roast 15 to 30 minutes of resting time keeps the juices locked inside.
- Add liquid and aromatics: Beef broth, wine, and root vegetables create a flavorful braising liquid.
- Slice against the grain: This simple trick makes every bite more tender and easier to chew.
📑 Table of Contents
Choose The Right Cut Of Meat For Your Roast
The foundation of any great beef roast recipe starts with picking the right cut. Not all pieces of beef are created equal when it comes to oven roasting. Some cuts are naturally tender, while others need time and low heat to break down their tough connective tissues.
Best Beef Cuts For Oven Roasting
When you are planning a pot roast or a slow roast beef, certain cuts work far better than others. Here are the top choices you should consider:
- Chuck Roast – This is the most popular choice for home cooks. It has excellent marbling and becomes fork-tender meat when cooked low and slow.
- Brisket – A larger cut that rewards patience. It needs a longer cooking time but delivers incredible depth of flavor.
- Rump Roast – Leaner than chuck but still very tender when braised properly in the oven.
- Prime Rib – Also known as standing rib roast, this is a premium cut perfect for special occasions and gatherings.
- Bottom Round Roast – Budget-friendly and full of flavor, though it requires careful cooking to stay moist.
Each of these cuts responds beautifully to low and slow cooking. The key is matching your chosen cut with the right oven temperature and cooking duration. A chuck roast is forgiving and ideal for beginners, while a prime rib demands more precision and attention.
What To Look For At The Butcher
When you visit the butcher or meat counter, look for a few specific qualities. First, check the color. A good roast beef should have a bright red color with thin white streaks of fat running through it. This marbling is what keeps your roast moist during long cooking times.
Second, feel the meat. It should be firm but slightly yielding. Avoid any roast that feels slimy or has an off smell. Third, ask your butcher for a cut that is uniform in shape. This ensures even cooking throughout your oven-braised roast.
Finally, do not be afraid to ask questions. A good butcher will guide you toward the best beef roast recipe cut for your needs. They can also trim excess fat or tie the roast with kitchen twine if needed. Building a relationship with your local butcher is one of the best steps you can take for better cooking.
Prepare Your Roast For Maximum Flavor
Once you have selected your cut, the next step is preparation. This is where the real flavor begins to build. Taking the time to properly prep your meat before it hits the oven makes a huge difference in the final result.
Trimming And Seasoning Your Roast
Start by removing any large pockets of hard fat from the surface. You want to leave a thin layer of fat, as this bastes the meat during cooking. Use a sharp knife and work carefully. The goal is not to remove all fat, just the thick, hard pieces that will not melt down during low and slow cooking.
Next, it is time to season. A simple roast seasoning of salt, black pepper, garlic powder, and paprika works wonders. Rub the seasoning generously over all sides of the meat. For extra flavor, add dried rosemary, thyme, or oregano. Let the seasoned roast sit at room temperature for about 30 minutes before cooking. This helps it cook more evenly from edge to center.
Searing The Roast For Maximum Flavor
Searing is a step many beginners skip, but it is one of the most important. Searing creates a flavorful brown crust on the outside of the meat through the Maillard reaction. This adds depth and richness to your braised beef that you simply cannot get otherwise.
Heat a tablespoon of oil in a large oven-safe skillet or roasting pan over medium-high heat. Once the oil is shimmering, place the roast in the pan. Let it sear for about 2 to 3 minutes on each side until you get a deep brown crust. Use kitchen twine to tie the roast if it has an irregular shape so it cooks evenly throughout.
After searing, transfer the roast to a plate and set it aside. Do not discard the pan drippings. Those browned bits are pure flavor gold. You will use them to build your cooking liquid in the next section.
Oven Temperature And Cooking Time Guide
Getting the oven temperature right is the single most important factor in cooking a tender roast. Too hot and the outside burns before the inside is cooked. Too low and the meat dries out. Finding the sweet spot is the key to a perfect juicy roast.
Low And Slow Versus High Heat
The best approach for a tender roast is low and slow cooking. This means setting your oven to a moderate temperature, typically between 300°F and 325°F. At this range, the collagen in the meat slowly breaks down into gelatin, which keeps the roast moist and tender.
Some cooks prefer a higher temperature of 375°F or 400°F for a shorter cook time. This can work well for smaller cuts like a rump roast or a bottom round roast. However, higher heat increases the risk of drying out the outer layers before the center reaches the right temperature.
For a classic pot roast or chuck roast, stick with 325°F. This temperature strikes the perfect balance between flavor development and moisture retention. A slow roast beef at this temperature will reward you with melt-in-your-mouth tenderness.
How Long To Cook Different Sizes
Cooking time depends on the size of your roast and the cut you chose. Here is a general guide to help you plan:
- 3 to 4 pound roast: About 3 to 3.5 hours at 325°F
- 4 to 6 pound roast: About 4 to 5 hours at 325°F
- 6 to 8 pound roast: About 5.5 to 7 hours at 325°F
- Prime rib (per pound): About 15 to 20 minutes per pound at 325°F for medium-rare
These are approximate times. The real indicator of doneness is internal temperature, not the clock. Always use a meat thermometer to check the temperature in the thickest part of the roast without touching bone.
Adding Liquids And Aromatics For Juiciness
A dry roast in the oven will quickly become tough and tasteless. The secret to a juicy roast is adding liquid and aromatics to the pan. This creates steam and braising liquid that keeps the meat moist and infuses it with incredible flavor.
Broth, Wine, And Herb Combinations
The cooking liquid is the backbone of a great braised beef dish. Start with about one cup of beef broth poured into the bottom of the roasting pan. You can also add a half cup of red wine for depth and acidity. The wine does not need to be expensive, just something you would enjoy drinking.
Add aromatics to the liquid to elevate the flavor. Onion cloves, garlic cloves, bay leaves, and whole peppercorns are classic choices. Fresh herbs like rosemary, thyme, and parsley stems add a wonderful earthy aroma. Tuck a few sprigs of fresh thyme directly onto the roast for extra fragrance.
Here are some great liquid and aromatics combinations to try for your beef roast recipe:
- Classic French: Beef broth, red wine, garlic, bay leaves, and thyme
- Rustic Italian: Beef broth, white wine, rosemary, sage, and onion
- Asian-Inspired: Beef broth, soy sauce, ginger, star anise, and garlic
- BBQ Style: Beef broth, barbecue sauce, brown sugar, smoked paprika, and onion
Adding Vegetables To The Pan
One of the best parts of a pot roast is the vegetables that cook alongside the meat. Root vegetables like carrots, potatoes, and onions absorb the rich braising liquid and become incredibly flavorful. Cut them into large chunks so they do not overcook and turn to mush.
Add the vegetables in the last 2 hours of cooking. This prevents them from breaking down too much. Place them around and under the roast in the roasting pan. As the roast cooks, the vegetables soak up all those delicious juices and become a complete meal on their own.
Checking Doneness And Resting The Roast
This is the step that separates good cooks from great ones. Knowing exactly when your roast is done and giving it proper resting time are both critical to achieving a tender, juicy result.
Using A Meat Thermometer
A meat thermometer is the single most important tool for roasting beef. Without one, you are guessing, and guessing leads to overcooked or undercooked meat. Insert the thermometer into the thickest part of the roast, avoiding any bone or large fat deposits.
Here are the recommended roast beef internal temp readings for different levels of doneness:
- Rare: 120°F to 125°F
- Medium Rare: 130°F to 135°F
- Medium: 135°F to 145°F
- Well Done: 155°F to 165°F
For most tender roasts, aim for medium-rare to medium. This range gives you the best balance of juiciness and tenderness. Remember that the temperature will rise about 5 to 10 degrees during the resting time, so pull the roast out a few degrees early.
Why Resting Time Is Critical
Once your roast reaches the target temperature, take it out of the oven and let it rest. This is not optional. Resting allows the juices inside the meat to redistribute. If you cut into the roast immediately, those juices will run out onto the cutting board, leaving you with a dry roast.
Tent the roast loosely with aluminum foil and let it rest for at least 15 to 20 minutes for a smaller roast, or up to 30 to 40 minutes for a larger one. The foil traps enough heat to keep the roast warm without creating steam that would make the crust soggy.
Resting time is one of the most overlooked steps in cooking a tender roast in the oven. Do not skip it. Use this time to prepare your gravy and warm up any side dishes. Your patience will be rewarded with a far superior final result.
Serving And Storing Your Tender Roast
You have put in the work, and now you have a beautiful, tender roast. The final steps of serving and storing are just as important as the cooking process itself.
Slicing Techniques For Best Results
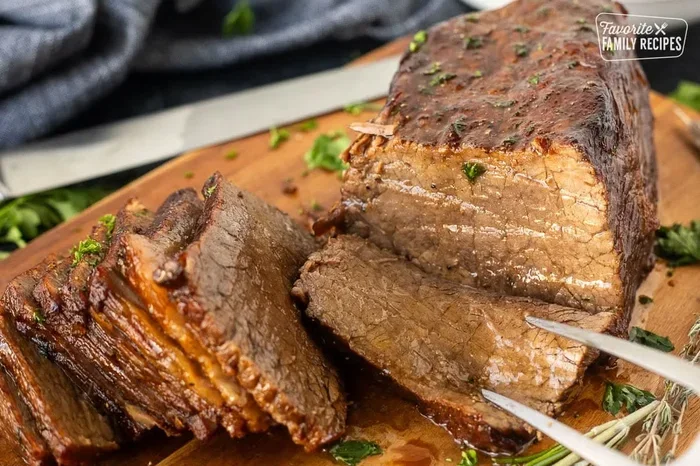
How you slice your roast affects both the texture and the presentation. Always slice against the grain. This means cutting perpendicular to the direction of the muscle fibers. Slicing against the grain shortens those fibers, making each bite easier to chew and more tender.
Use a sharp carving knife for clean cuts. For a chuck roast or pot roast, cut the slices about a quarter-inch thick. For a prime rib, slightly thicker slices work well. Arrange the slices on a warm platter and spoon some of the pan juices over the top for extra moisture and flavor.
How To Store Leftovers
Leftover roast keeps well in the refrigerator for up to 4 days. Store it in an airtight container or wrap it tightly in plastic wrap. The braising liquid also keeps well and can be reheated for a quick meal the next day.
You can also freeze cooked roast for up to 3 months. Wrap individual portions in freezer-safe bags, removing as much air as possible. Thaw overnight in the refrigerator before reheating. Reheat gently in a covered pan with a splash of beef broth to keep the meat moist and prevent it from drying out.
Leftover roast is incredibly versatile. Use it in sandwiches, tacos, beef stew, or stir-fry. A slow roast beef only gets better the next day as the flavors continue to develop and meld together. This makes it one of the best meals for meal prep and busy weeknights.
Conclusion
How To Cook A Tender Roast In The Oven is a straightforward process once you understand the basics. Start with the right cut of meat, season it well, sear it for flavor, and cook it at the right oven temperature for the right amount of time. Add liquid and aromatics to keep things moist, and always use a meat thermometer to check for doneness.
The most important step people forget is resting the roast. Give it time, and the results will speak for themselves. With practice, you will be able to prepare a juicy roast that rivals any steakhouse or restaurant. Your family and guests will keep coming back for more.
Now that you have all the tools and knowledge, it is time to put them into action. Pick up a chuck roast from your local butcher, follow these steps, and enjoy the process. Cooking a tender roast in the oven is one of the most rewarding things you can do in the kitchen. Happy cooking.
Frequently Asked Questions
What is the best cut of beef for an oven roast?
The chuck roast is the best overall choice for beginners. It has great marbling, is affordable, and becomes fork-tender when cooked low and slow. Other excellent options include brisket, rump roast, and prime rib for special occasions.
How long does it take to cook a roast in the oven?
Cooking time depends on the size of the roast. A 3 to 4 pound roast takes about 3 to 3.5 hours at 325°F. A 4 to 6 pound roast needs 4 to 5 hours. Always use a meat thermometer to check for doneness rather than relying on the clock alone.
What temperature should I cook a roast at in the oven?
325°F is the ideal oven temperature for most beef roasts. This moderate heat allows the collagen to break down slowly, creating a tender and juicy result. Avoid temperatures above 375°F for larger cuts, as they can dry out the outer layers.
Do I need to cover a roast when cooking it in the oven?
Most roasts cook uncovered. This allows the surface to brown and develop a flavorful crust. However, if your roast is leaning toward well-done or you find it drying out, you can tent it loosely with foil during the last hour of cooking.
How do I know when a roast is done?
The only reliable way is to use a meat thermometer. For medium-rare, aim for 130°F to 135°F. For medium, aim for 135°F to 145°F. Remember that the temperature will rise 5 to 10 degrees during resting, so pull the roast out a few degrees early.
Can I cook a frozen roast in the oven?
It is not recommended. Cooking a frozen roast leads to uneven cooking, with the outside overcooking while the center is still thawing. Always thaw your roast in the refrigerator overnight before cooking for the best and safest results.