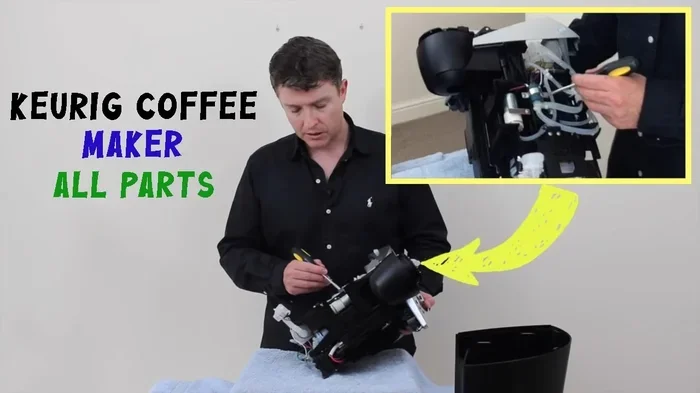
How To Completely Empty A Keurig Coffee Maker Properly
Knowing how to completely empty a Keurig coffee maker is essential for keeping your machine running smoothly and your coffee tasting great. This guide walks you through every step, from draining the water reservoir to deep cleaning internal parts. Follow our simple instructions to prevent buildup, extend your machine’s life, and enjoy a cleaner cup of coffee every morning.
Every coffee lover knows the frustration of a machine that just isn’t performing right. Whether your Keurig coffee maker is brewing slower than usual or your morning cup tastes off, the problem might be buildup inside the system. Learning how to completely empty a Keurig coffee maker is the first step toward better-tasting coffee and a longer-lasting machine.
Most people only give their Keurig a quick rinse now and then. But a complete emptying goes far beyond dumping leftover water from the reservoir. It means draining every drop, cleaning internal tubes, and removing mineral deposits that build up over time. This guide covers everything you need to know, from basic draining to a full Keurig deep clean that will make your machine feel brand new.
Whether you own a basic K-Classic or a newer model with a digital display, the process is straightforward. You do not need any special tools or technical skills. Just a few minutes, some common household items, and the willingness to get a little hands-on. By the end of this article, you will know exactly how to empty your Keurig properly and keep it in top shape for years to come.
Key Takeaways
- Regular Emptying Matters: Completely emptying your Keurig prevents mineral buildup, mold, and stale coffee flavors that ruin your morning cup.
- It’s Simple and Quick: You only need a few household supplies and about 15 to 30 minutes to fully empty and clean your machine.
- Descaling Is Key: Flushing vinegar or a descaling solution through the system removes hard water deposits that regular rinsing cannot reach.
- Avoid Common Mistakes: Never use harsh chemicals, skip the needle cleaning, or forget to air dry parts before reassembling.
- Maintenance Schedule: Empty and deep clean your Keurig every 3 to 6 months for best performance and taste.
📑 Table of Contents
- Why You Need to Completely Empty Your Keurig
- What You Will Need Before You Start
- Step-by-Step Guide to Completely Empty Your Keurig
- Comparison: Vinegar vs. Commercial Descaling Solution
- Common Mistakes People Make When Emptying Their Keurig
- How Often Should You Completely Empty Your Keurig
- Tips for Keeping Your Keurig Clean Between Deep Cleanings
- Related Appliance Cleaning Tips
- Final Thoughts
Why You Need to Completely Empty Your Keurig
A Keurig coffee maker is a convenient way to brew a quick cup of coffee at home or in the office. But convenience comes with a hidden cost: residue builds up inside the machine every time you brew. Over days, weeks, and months, this buildup can affect both the taste of your coffee and the performance of the machine.
Here is why a complete emptying matters so much:
- Mineral Deposits: Hard water leaves calcium and lime scale inside the water lines and heating element. This can slow down brewing and affect temperature.
- Stale Coffee Oils: Old coffee oils stick to the interior of the machine and turn rancid. This creates a bitter or off taste in your next cup.
- Mold and Bacteria: Standing water in the reservoir and hidden parts creates a perfect environment for mold growth. This is a real health concern.
- Clogged Needles: Coffee grounds and mineral buildup can clog the entry and exit needles, reducing flow and brewing pressure.
- Shorter Machine Life: Regular maintenance through proper Keurig maintenance can extend the life of your machine by several years.
Think of it this way. You would not let months of grime build up inside your car engine and expect it to run well. The same logic applies to your coffee maker cleaning routine. A little effort goes a long way.
What You Will Need Before You Start
Before you dive into the process, gather everything you need. Having all your supplies ready makes the job faster and smoother. Here is a simple checklist for your Keurig deep clean:
- White vinegar or a commercial descaling solution
- Fresh water (filtered is best, but tap works too)
- A soft cloth or microfiber towel
- A small brush (an old toothbrush works great)
- A clean sink or basin
- A dry towel for wiping down surfaces
- A shallow dish or tray to catch drips
That is it. You do not need any fancy equipment. Most of these items are already in your kitchen. If you do not have white vinegar on hand, a store-bought descaling solution works just as well and is specifically designed for coffee machines.
Step-by-Step Guide to Completely Empty Your Keurig
Now let us get into the actual process. Follow these steps carefully to ensure you fully empty and clean every part of your machine.
Step 1: Power Off and Unplug the Machine
Safety first. Always turn off your Keurig coffee maker and unplug it from the wall before you start. Let the machine cool down completely if you have just used it. This prevents burns and electrical hazards. Never attempt to clean a machine that is still plugged in or hot to the touch.
Give yourself a clear workspace on your countertop. Lay down a towel or tray to catch any water that spills during the process.
Step 2: Remove and Empty the Water Reservoir
Lift the water reservoir off the machine. Most Keurig models have a detachable reservoir that slides or snaps off easily. Carefully pour out any remaining water into the sink. Do not tip the reservoir too aggressively or you may splash water everywhere.
Once emptied, check the reservoir for any visible buildup. Use a soft cloth to wipe the inside walls. If you see white or chalky deposits, that is mineral scale, and you will need to descale later in the process.
Step 3: Remove the Drip Tray and K-Cup Holder
Slide out the drip tray from the bottom of the machine. Empty any water or coffee grounds that have collected there. Wash both the drip tray and the K-cup holder with warm soapy water. Use a small brush to scrub away any stuck-on grounds or residue.
For stubborn buildup, soak these parts in warm water for 10 to 15 minutes before scrubbing. Rinse them thoroughly and set them aside on a clean towel to air dry.
Step 4: Clean the Entry and Exit Needles
The needles that puncture the K-cup pod can become clogged with coffee grounds and mineral deposits. This is one of the most overlooked parts of Keurig cleaning but arguably the most important.
Locate the entry needle on the top of the machine (where the K-cup holder presses down) and the exit needle on the bottom (where coffee flows into your cup). Use a straight paperclip or the cleaning needle that may have come with your machine. Gently insert it into each needle opening and move it around to dislodge any debris.
Tip: Be gentle. The needles are sharp but also fragile. Forcing them can cause damage. A few gentle passes should clear out most blockages.
Step 5: Run a Vinegar or Descaling Flush
This is the heart of the descaling Keurig process. Fill the water reservoir halfway with white vinegar and the rest with fresh water. Alternatively, use a commercial descaling solution following the product instructions.
Place a large mug on the drip tray. Power on the machine and run a brew cycle without inserting a K-cup. Let the vinegar solution run through the system. Repeat this process until the reservoir is empty. You should see cloudy or discolored water coming out, which is normal. This is the mineral deposits being flushed out.
Once the reservoir is empty, refill it with fresh water only. Run 2 to 3 more brew cycles with just water to rinse out any remaining vinegar taste. This ensures your next cup of coffee does not taste like salad dressing.
Step 6: Wipe Down the Exterior
While the internal parts are drying, take a moment to clean the outside of the machine. Use a damp cloth with a mild dish soap to wipe down the body, the water reservoir area, and any buttons or touchscreens. Dry everything with a clean towel.
This step is easy to skip, but it matters. Dust and coffee splashes on the exterior can attract grime over time. A quick wipe keeps your machine looking and smelling fresh.
Step 7: Air Dry and Reassemble
Make sure all parts are completely dry before putting them back together. Moisture left inside can lead to mold growth and unpleasant odors. Lay the reservoir, drip tray, and K-cup holder on a clean towel and let them air dry for at least 30 minutes.
Once dry, reassemble everything. Plug the machine back in and run one final quick brew cycle with just water to flush any remaining particles. Your Keurig coffee maker is now completely empty and freshly cleaned.
Comparison: Vinegar vs. Commercial Descaling Solution
When it comes to descaling your Keurig, you have two main options. Both work well, but they have different pros and cons. Here is a quick comparison to help you decide:
| Feature | White Vinegar | Commercial Descaler |
|---|---|---|
| Cost | Very affordable | Moderate to expensive |
| Effectiveness | Good for light buildup | Excellent for heavy scale |
| Scent | Strong vinegar smell temporarily | Light or no scent |
| Availability | Found in every grocery store | Available online or at stores |
| Ease of Use | Simple, no special instructions | Follow package directions |
| Taste Residue | Requires extra rinsing | Usually rinse-free |
If you are dealing with heavy mineral buildup, a commercial descaler is the better choice. For routine maintenance every few months, white vinegar works just fine and costs a fraction of the price.
Common Mistakes People Make When Emptying Their Keurig
Even with the best intentions, people make mistakes during the cleaning process. Here are the most common ones to avoid:
- Skipping the Needle Cleaning: Many people focus only on the reservoir and forget about the needles. Clogged needles are one of the top reasons coffee tastes weak or off.
- Using Harsh Chemicals: Bleach, abrasive cleaners, or dishwashing pods should never go inside your Keurig. They can damage internal parts and leave harmful residues.
- Not Rinsing Enough: If you use vinegar, always run multiple water-only cycles afterward. Residual vinegar flavor will ruin your next several cups of coffee.
- Reassembling While Wet: Putting parts back together while they are still damp invites mold and mildew. Always let everything dry completely first.
- Ignoring the Drip Tray: The drip tray collects old coffee and water. If you do not clean it regularly, it becomes a breeding ground for bacteria and mold.
Avoiding these simple mistakes will save you time, money, and a lot of frustration. A little attention to detail makes all the difference in coffee machine maintenance.
How Often Should You Completely Empty Your Keurig
A good rule of thumb is to perform a complete emptying and cleaning every 3 to 6 months. However, your usage frequency and water quality may change this schedule.
If you use your Keurig every single day, aim for every 3 months. If you only brew occasionally, every 6 months should be fine. People who live in areas with hard water should clean more frequently because mineral buildup happens faster.
Here are some signs that it is time for a full Keurig emptying:
- Your coffee tastes different or off
- Brewing takes longer than usual
- You see white or chalky buildup around the water reservoir
- There is a strange smell when brewing
- The machine makes unusual noises during a brew cycle
Catching these signs early and acting on them keeps your coffee tasting great and your machine running efficiently. Regular Keurig upkeep is much easier than dealing with a badly clogged or grimy machine later on.
Tips for Keeping Your Keurig Clean Between Deep Cleanings
Between your full Keurig deep clean sessions, there are simple habits you can adopt to keep the machine in good shape:
- Empty the reservoir overnight: Do not leave water sitting in the reservoir for more than 24 hours. Stale water promotes mold and bacteria growth.
- Wipe the reservoir weekly: A quick wipe with a damp cloth once a week prevents buildup from forming.
- Use filtered water: Filtered water has fewer minerals, which means less scale buildup inside the machine.
- Rinse the K-cup holder after each use: A quick rinse under running water takes just seconds and prevents old grounds from accumulating.
- Run a water-only cycle weekly: Brewing plain water once a week flushes out residual coffee oils and keeps the lines clear.
These small habits add up over time. They mean your monthly or quarterly deep cleaning sessions will be quicker and easier. Think of them as the daily brushing that keeps your dentist visits short and painless.
Related Appliance Cleaning Tips
Just like maintaining your Keurig coffee maker, keeping other kitchen appliances clean is important for their performance and longevity. For example, if you are dealing with tough residue in your oven, a dishwasher tablet can work wonders for cleaning an oven without scrubbing. It is a surprisingly effective method that saves time and effort. Similarly, regular maintenance of your oven, such as using the Aqualift self-clean feature on a KitchenAid oven, helps prevent buildup and keeps your appliance running efficiently. The same principle applies to your coffee maker and all your other kitchen equipment: consistent care prevents big problems down the road.
Another helpful cleaning hack involves tackling tough residue. If you have ever dealt with melted plastic or stubborn buildup in your oven, you know how frustrating it can be. Check out our guide on how to clean melted plastic out of an oven for methods that also work well on tough coffee residue and mineral deposits in small kitchen appliances.
Final Thoughts
Learning how to completely empty a Keurig coffee maker properly is one of the simplest things you can do to improve your daily coffee experience. It takes just a little time and effort, but the results are well worth it. You will notice better-tasting coffee, faster brewing, and a machine that lasts longer.
Remember the key steps: power off and unplug, remove all parts, clean the reservoir and needles, run a vinegar or descaling flush, and always let everything dry before reassembling. Stick to a regular cleaning schedule, and your Keurig will reward you with fresh, great-tasting coffee every single morning.
Do not wait until something goes wrong. Start your Keurig cleaning routine today. Your future self and your morning coffee will thank you.
Frequently Asked Questions
How long does it take to completely empty a Keurig coffee maker?
A full emptying and cleaning process takes about 20 to 30 minutes. This includes disassembling parts, running vinegar cycles, rinsing, and air drying. The actual hands-on work is closer to 15 minutes, with the rest being passive waiting time.
Can I use lemon juice instead of vinegar to descale my Keurig?
Yes, lemon juice works as a natural descaling alternative. It is less acidic than vinegar but still effective at breaking down mineral deposits. Use the same method as vinegar: fill the reservoir halfway with lemon juice and the rest with water, then run brew cycles until the reservoir is empty.
Is it safe to use bleach to clean my Keurig?
No, you should never use bleach or harsh chemicals inside a Keurig. These substances can damage internal components and leave harmful residues that end up in your coffee. Stick to white vinegar, descaling solutions, or plain water for safe cleaning.
How do I know if my Keurig needs descaling?
Common signs include slower brewing, unusual noises during operation, a change in coffee taste, or visible white mineral buildup around the water reservoir. Many newer Keurig models also have a descale indicator light that alerts you when it is time to clean.
Can I put the Keurig water reservoir in the dishwasher?
Most Keurig reservoirs are dishwasher safe, but it is best to check your specific model’s manual. Hand washing with warm soapy water is the safest and most recommended method. The high heat and harsh detergents in some dishwashers can warp or damage certain plastic parts over time.
What happens if I do not empty and clean my Keurig regularly?
Without regular cleaning, mineral scale builds up inside the water lines and heating element. This reduces brewing efficiency, affects coffee taste, and can eventually cause the machine to malfunction. Mold and bacteria can also grow in standing water, creating potential health risks. Regular emptying prevents all of these problems.
=== CONCLUSION ===
Knowing how to completely empty a Keurig coffee maker properly is an essential skill for any coffee lover. It is simple, fast, and makes a huge difference in the taste and performance of your machine. By following the steps in this guide, you can keep your Keurig running like new and enjoy a fresher cup every time.
Make Keurig maintenance part of your regular routine. Set a reminder every few months, gather your supplies, and give your machine the care it deserves. A little effort now saves you from bigger problems later and keeps your morning coffee ritual enjoyable for years to come.