Your Guide to the Perfect Oven Chicken Breast Temperature
Knowing the right oven chicken breast temperature is the single most important factor in getting juicy, tender results. This guide walks you through the ideal internal temperature, baking times, and simple tips that turn ordinary chicken into a crowd-pleasing meal. Whether you cook boneless or bone-in breasts, these straightforward steps will help you cook with confidence every single time.
Chicken breast is one of the most popular proteins in home kitchens. It is lean, versatile, and fits into almost any meal plan. But here is the problem. Many people end up with dry, rubbery chicken every single time they put it in the oven.
The secret to juicy, flavorful oven chicken breast comes down to one thing. Temperature. Get the oven chicken breast temperature right, and everything else falls into place. The meat stays moist, the texture stays tender, and the flavor stays incredible.
In this guide, we will walk you through everything you need to know. You will learn the exact internal temperature to aim for, the best oven settings, how long to bake chicken breast, and simple tips that make a huge difference. Whether you are a beginner cook or someone who has struggled with dry chicken before, this article will change the way you prepare baked chicken breast in your kitchen.
Key Takeaways
- Safe Internal Temperature: Always cook chicken breast to 165°F (74°C) for food safety.
- Resting Matters: Letting chicken rest for 5-10 minutes keeps juices locked inside.
- Use a Thermometer: A reliable food thermometer removes all guesswork from cooking.
- Temperature Varies by Cut: Bone-in and boneless breasts need slightly different approaches.
- Oven Temperature Range: 375°F to 425°F works best for most oven-baked chicken recipes.
- Avoid Overcooking: Pulling chicken off heat a few degrees early prevents dry, tough meat.
- Seasoning Adds Flavor: Simple spices and marinades elevate plain chicken breast into something special.
📑 Table of Contents
- Why Oven Chicken Breast Temperature Matters So Much
- The Best Oven Temperature for Chicken Breast
- How Long to Cook Chicken Breast in the Oven
- Tips for Juicy, Flavorful Oven-Baked Chicken Breast
- Common Mistakes People Make When Baking Chicken Breast
- Expert Insights on Perfect Roasted Chicken Breast
- Key Takeaways
- Conclusion
Why Oven Chicken Breast Temperature Matters So Much
Cooking chicken breast might seem simple on the surface. You pop it in the oven, set a timer, and hope for the best. But there is a lot more going on beneath the surface. The chicken breast internal temperature determines whether your meat is safe to eat, juicy, and full of flavor.
When you cook chicken at the right baking temperature for chicken, the proteins in the meat cook evenly. The muscle fibers stay relaxed. The juices stay trapped inside. But when the heat is too high or the cooking time is too long, those proteins tighten up. They squeeze out moisture. The result is dry, tough chicken that nobody wants to eat.
Food safety is another big reason temperature control matters. Undercooked chicken can carry harmful bacteria like Salmonella. The United States Department of Agriculture recommends cooking all poultry to a minimum safe cooking temperature of 165°F (74°C). Using a food thermometer is the only reliable way to know your chicken has reached this point.
The Science Behind Chicken Breast Cooking
Here is a quick look at what happens inside chicken breast as it heats up. At around 140°F, the proteins begin to denature. This is when the meat starts to firm up. By 150°F, the muscle fibers contract significantly. Moisture starts to push out. At 165°F, the chicken is considered safe because harmful bacteria are destroyed at this point.
But here is a pro tip that many home cooks do not know. You can pull chicken off the heat at 160°F and let carryover cooking bring it up to 165°F. This small trick keeps the meat juicier because you avoid cooking it past the ideal point. Carryover cooking is the gentle rise in temperature that continues after you remove the chicken from the oven.
The Best Oven Temperature for Chicken Breast
Finding the right oven temperature for chicken breast depends on a few factors. The thickness of the breast, whether it is bone-in or boneless, and your personal texture preferences all play a role. However, there are some widely accepted ranges that work beautifully for most situations.
375°F: The Gentle Bake
Cooking roasted chicken breast at 375°F is a classic approach. This moderate temperature allows the meat to cook slowly and evenly. It is especially great for thicker breasts that need more time to reach the center without drying out on the outside.
At 375°F, a standard boneless chicken breast that is about one inch thick will typically take 20 to 25 minutes. Bone-in breasts may need 25 to 30 minutes. The slower cook gives the meat time to retain moisture and develop a gentle, golden exterior.
400°F: The Sweet Spot
Many chefs and home cooks agree that 400°F is the sweet spot for oven-baked chicken. This temperature strikes a perfect balance. It is hot enough to create a nice sear on the outside, but not so hot that it dries out the inside before the center is cooked through.
Boneless breasts at 400°F usually finish in 18 to 22 minutes. Bone-in breasts take about 22 to 28 minutes. The higher heat also helps render any fat on the skin, giving you a slightly crispy exterior that adds great texture to your dish.
425°F: The Fast Roast
If you are short on time, 425°F is your go-to chicken cooking temperature. The high heat cooks the chicken quickly, which means less time for moisture to escape. This method works best for thinner breasts or when you are cooking individual pieces.
Boneless breasts at 425°F may be done in just 15 to 18 minutes. Bone-in pieces take around 20 to 25 minutes. Because the cook time is shorter, you need to watch the chicken closely. Use your food thermometer to check for doneness right at the minimum time.
| Oven Temperature | Boneless Breast Time | Bone-In Breast Time | Best For |
|---|---|---|---|
| 375°F | 20-25 minutes | 25-30 minutes | Gentle, even cooking |
| 400°F | 18-22 minutes | 22-28 minutes | Balanced flavor and texture |
| 425°F | 15-18 minutes | 20-25 minutes | Quick cooking, crispy exterior |
How Long to Cook Chicken Breast in the Oven
Time and temperature go hand in hand when you are baking chicken breast. But time alone is not a reliable guide. Every oven is different. Every chicken breast is a different thickness. This is why relying on a food thermometer is far more accurate than trusting the clock alone.
Boneless Chicken Breast Timing
Boneless chicken breast is the most common cut people cook at home. It is lean, quick to prepare, and easy to slice for salads or sandwiches. Because there is no bone to conduct heat, the cooking time is generally shorter.
For a boneless breast that is about three-quarters of an inch thick, expect around 15 to 18 minutes at 400°F. A one-inch thick breast needs closer to 20 to 25 minutes. If the breast is particularly thick or uneven, you can pound it to a more uniform thickness before baking. This simple step ensures even cooking throughout.
Bone-In Chicken Breast Timing
Bone-in chicken breast takes longer to cook because the bone acts as an insulator. The heat has to travel through the meat surrounding the bone before the center reaches the right temperature. This means you need to add a few extra minutes to your cook time.
At 400°F, a bone-in breast typically needs 22 to 28 minutes. The bone also adds flavor to the meat during cooking. Some cooks swear that bone-in breasts taste richer and more succulent than their boneless counterparts. If you have the time, bone-in is absolutely worth the extra minutes.
How to Check for Doneness
The most reliable way to check chicken breast doneness is with an instant-read food thermometer. Insert the probe into the thickest part of the breast, avoiding any bone. You are aiming for 165°F at the center.
Here are a few extra tips for checking doneness correctly. Do not touch the probe to the pan or baking dish. Do not insert the thermometer near the edge where the meat is thinner. Take the temperature in at least two spots to make sure the heat has reached the center evenly.
Some people use the juice test as a backup. When you pierce the thickest part of the chicken, the juices should run clear, not pink. However, this method is not as reliable as using a thermometer. Always trust your food thermometer over visual cues.
Tips for Juicy, Flavorful Oven-Baked Chicken Breast
Getting the oven chicken breast temperature right is the foundation. But there are several other tips and tricks that take your chicken breast recipe from good to outstanding. These simple steps make a noticeable difference in every batch.
Brine or Marinate Before Cooking
Brining is one of the best-kept secrets for juicy chicken. A simple saltwater brine helps the meat absorb and hold onto moisture during cooking. You only need 30 minutes to two hours for a basic brine. Use about one tablespoon of salt per cup of water, and add any herbs or spices you like.
Marinating works in a similar way. Acidic ingredients like lemon juice, yogurt, or vinegar help tenderize the meat. Just do not marinate for more than a couple of hours, or the acid can break down the texture too much. A simple marinade of olive oil, garlic, and herbs works wonders for chicken breast seasoning.
Bring the Chicken to Room Temperature First
Take your chicken out of the refrigerator 20 to 30 minutes before cooking. This lets the meat warm up to room temperature before it hits the hot oven. Cold chicken cooking in a hot oven leads to uneven results. The outside overcooks while the center is still cold.
Room temperature chicken cooks more evenly throughout. The chicken breast internal temperature rises at a more consistent rate. This small step only takes a few minutes but makes a real difference in the final result.
Do Not Skip the Resting Period
Once your chicken comes out of the oven, resist the urge to cut into it right away. Letting the meat rest for 5 to 10 minutes allows the juices to redistribute. They settle back into the muscle fibers instead of running out onto the cutting board.
During resting, the internal temperature continues to rise slightly due to carryover cooking. This is another reason pulling the chicken at 160°F works so well. The final temperature reaches 165°F during the rest period, giving you perfectly safe and juicy meat.
Use Parchment Paper or a Silicone Mat
Lining your baking sheet with parchment paper or a silicone baking mat prevents the chicken from sticking. It also promotes even airflow around the meat. This small preparation step helps the outside of the chicken cook evenly without burning or sticking to the pan.
Let the Chicken Rest at Room Temperature After Cooking
After resting for 5 to 10 minutes, you can slice and serve. The oven chicken breast temperature will have stabilized by this point. You will notice that the meat is much juicier when you cut into it compared to chicken that was served immediately.
Common Mistakes People Make When Baking Chicken Breast
Even experienced cooks make mistakes when preparing baked chicken breast. Knowing what to avoid saves you from dry, disappointing results. Here are the most common pitfalls and how to steer clear of them.
Cooking Without a Thermometer
This is the number one mistake people make. Relying on cooking time alone or cutting into the chicken to check for doneness leads to inconsistent results. Some pieces end up overcooked while others are undercooked. A simple food thermometer takes all the guesswork out of the equation. It is an inexpensive tool that pays for itself in better meals.
Overcooking the Chicken
Chicken breast is a lean cut with very little fat. This means it dries out quickly once it passes the ideal temperature. Overcooking by just a few minutes can turn a juicy breast into a dry, chalky disappointment. Keep a close eye on the timer and pull the chicken as soon as it hits 160°F internally.
Using the Wrong Oven Rack Position
Where you place the baking sheet in the oven matters more than most people realize. The middle rack provides the most even heat distribution. If you place the chicken too close to the top, the top dries out before the center cooks. Too close to the bottom, and the bottom can burn.
Skipping the Seasoning Step
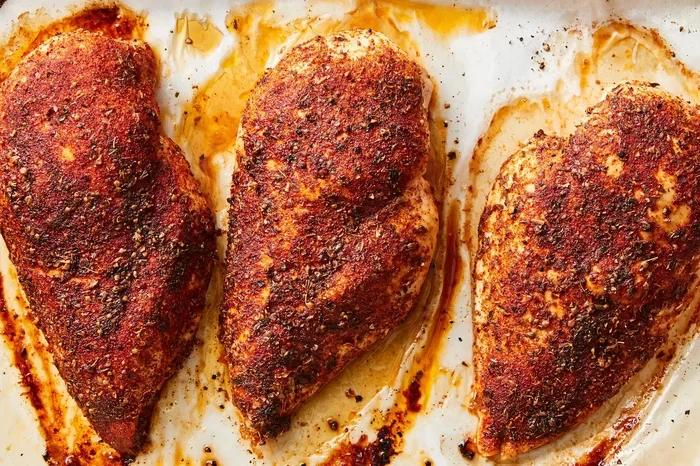
Plain chicken breast can taste bland without proper chicken breast seasoning. Salt is the most important seasoning. Apply it at least 15 minutes before cooking so it has time to penetrate the meat. From there, add your favorite herbs, spices, or a simple marinade to build layers of flavor.
Crowding the Pan
If you are cooking multiple breasts, give them space on the baking sheet. Crowding traps steam and prevents proper air circulation. The chicken steams instead of roasting, which leads to soggy skin and uneven cooking. Give each piece at least two inches of space for the best results.
Expert Insights on Perfect Roasted Chicken Breast
We spoke with home cooking experts and professional chefs to gather their top tips for achieving the perfect roasted chicken breast every time. Here is what they had to say.
Start with a hot oven. Preheating the oven is not optional. A properly preheated oven ensures the chicken starts cooking immediately at the right baking temperature for chicken. This seals the outside quickly and locks in moisture.
Butter or oil adds richness. Brushing the chicken breast with a thin layer of olive oil or melted butter before baking adds flavor and helps the skin crisp up. It also creates a barrier that slows moisture loss during cooking.
Pound to even thickness. Uneven breasts cook unevenly. The thinner parts dry out while the thick center is still undercooked. A quick session with a meat mallet or rolling pin solves this problem in seconds.
Experiment with temperatures. Some cooks swear by a two-stage approach. They start at a higher temperature for the first 10 minutes to get a good sear, then drop it down for the remainder of the cook. This technique produces a flavorful crust while keeping the inside moist.
Key Takeaways
- Target 165°F internally: This is the USDA safe temperature for all poultry. Use a food thermometer to confirm.
- 375°F to 425°F is the ideal range: Choose based on thickness and how much time you have.
- Rest the chicken for 5 to 10 minutes: This keeps juices inside the meat instead of on the cutting board.
- Brine or marinate for extra moisture: Even 30 minutes makes a noticeable difference in texture.
- Avoid common mistakes like overcooking and skipping the thermometer: These are the fastest ways to ruin a good chicken breast.
- Experiment with seasoning and oven techniques: Small changes lead to big improvements in flavor and texture.
Conclusion
Mastering the oven chicken breast temperature is one of the most valuable skills you can build in the kitchen. It transforms a simple, healthy protein into a meal that your whole family will love. The key is understanding the target internal temperature, choosing the right oven setting, and paying attention to the small details that make a big difference.
Always use a reliable food thermometer. Cook to at least 165°F internally but consider pulling the chicken at 160°F and letting carryover cooking finish the job. Let the meat rest before slicing. Brine or marinate for extra juiciness. And avoid the common mistakes that lead to dry, overcooked results.
Once you get comfortable with these principles, you will never have bland, dry chicken breast again. The oven chicken breast temperature becomes second nature. You will experiment with different seasonings, try new chicken breast recipes, and enjoy the confidence that comes from perfectly cooked poultry every single time. So preheat your oven, grab your food thermometer, and get ready to bake the best chicken breast of your life.
FAQs
What is the safe internal temperature for chicken breast?
The USDA recommends cooking all chicken breast to an internal temperature of 165°F (74°C). This temperature ensures that harmful bacteria like Salmonella are destroyed. Always use a reliable food thermometer to check, and let carryover cooking bring the temperature up if you pull the chicken at 160°F.
Is it better to bake chicken breast at 375°F or 400°F?
Both temperatures work well, but 400°F is often considered the sweet spot. It cooks chicken quickly enough to retain moisture while creating a nice golden exterior. If you prefer a gentler cook with more even results, 375°F is an excellent choice. The best oven chicken breast temperature ultimately depends on the thickness of your meat and your personal preference.
How long does it take to bake chicken breast at 400°F?
Boneless chicken breasts that are about one inch thick typically take 18 to 22 minutes at 400°F. Bone-in breasts need 22 to 28 minutes at the same temperature. Always use a food thermometer to check the internal temperature rather than relying on time alone, since every oven and every piece of chicken is slightly different.
Can I cook chicken breast at 350°F?
Yes, you can cook chicken breast at 350°F, but it takes longer. At this lower temperature, a boneless breast may need 25 to 30 minutes, and bone-in breasts could take 30 to 35 minutes. The lower heat produces very tender meat but may not create as much browning on the outside. If you choose this approach, be patient and use a thermometer to check for doneness.
Why is my oven-baked chicken breast always dry?
Dry chicken breast is almost always caused by overcooking. Chicken breast is a lean cut with very little fat, so it loses moisture quickly when cooked past the ideal temperature. Other common causes include not brining or marinating beforehand, skipping the resting period, or cooking at too high a temperature for too long. Using a food thermometer and pulling the chicken at 160°F makes a huge difference.
Should I cover chicken breast with foil while baking?
Covering chicken breast with foil is a personal choice. Foil traps steam and keeps the meat moist, but it also prevents the outside from crisping up. If you prefer juicy chicken with a softer exterior, tenting with foil for the first half of cooking works well. If you want a crispy golden exterior, leave the foil off for the entire bake. Either way, always check the chicken breast internal temperature to ensure it reaches 165°F.