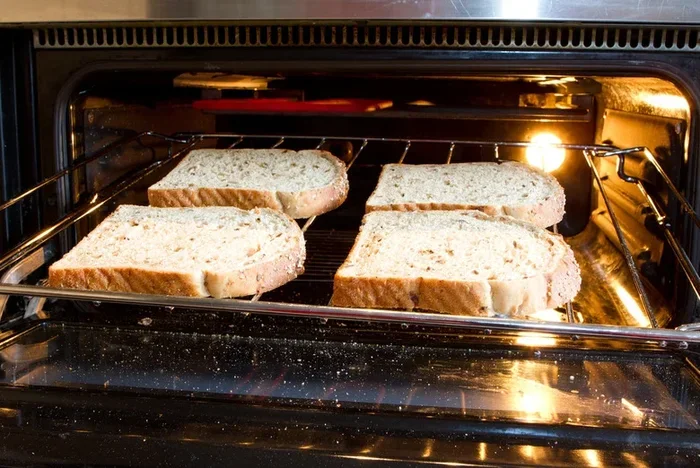
How To Make Toast In Oven Without Toaster Made Easy
Making toast in oven without toaster is simple, fast, and gives you perfect results every time. You just need a hot oven, a baking sheet, and your favorite bread. This guide covers everything from temperature settings to pro tips for golden-brown oven toast that tastes amazing.
Have you ever stood in your kitchen staring at a loaf of bread, wishing you had a toaster? Maybe yours broke, or maybe you never owned one in the first place. Either way, you can still enjoy perfectly crispy toast. The oven works wonders for this simple task.
Making toast in oven without toaster is easier than you think. It takes just a few minutes and gives you results that rival any toaster. Plus, you can toast multiple slices at once. This means no waiting around for one piece at a time.
In this guide, we will walk you through every step. You will learn the right temperatures, the best bread choices, and clever tricks that make your toast stand out. Whether you are camping, living in a small space, or just tired of unevenly toasted bread, this method has you covered.
Key Takeaways
- Oven toast works great: Your oven can replace a toaster and deliver even better crispy results.
- Temperature matters: Setting your oven between 375°F and 425°F is the sweet spot for perfect toast.
- Bread choice is key: Thinner slices and denser breads toast more evenly in the oven.
- Watch it closely: Oven toast can go from golden to burnt in seconds, so stay nearby.
- Add flavors easily: You can butter, garlic, or season your bread before toasting for extra deliciousness.
- No special tools needed: Just a baking sheet and parchment paper are enough to get started.
- It saves time too: You can toast multiple slices at once, which is great for families.
📑 Table of Contents
Why Make Toast In The Oven?
You might wonder why anyone would use an oven for toast. It seems like overkill for such a simple task. But there are real reasons why oven toast beats toaster toast in many ways.
Even Toasting Every Time
A toaster heats bread from the inside out using coils. But ovens surround the bread with heat on all sides. This means your bread gets toasted evenly. No more pale spots next to burnt edges.
Toast More Slices At Once
Most toasters only handle two or four slices. Ovens can fit six, eight, or even more. This is a game changer when you are making breakfast for a family or hosting guests. You save time and effort by toasting everything in one batch.
More Control Over Browning
Toasters usually have limited settings. Ovens give you full control. You can set the exact temperature and watch the bread through the window. This level of control means you get your toast exactly how you like it every single time.
It Works With Any Bread
Thick artisan loaves, baguettes, and large slices of sourdough often do not fit in a toaster. The oven handles all of these easily. You are not limited by the size of your toaster slots anymore.
What You Need To Get Started
One of the best things about making toast in the oven is how little you need. You probably already have everything in your kitchen right now.
Essential Tools
- Oven: A standard home oven works perfectly. Gas or electric, both do a great job.
- Baking sheet: A flat sheet pan is your best friend here. It holds the bread steady while it toasts.
- Parchment paper: This is optional but highly recommended. It prevents sticking and makes cleanup a breeze.
- A spatula or tongs: You need something to flip or remove the hot bread safely.
Best Breads For Oven Toast
Not all breads are created equal when it comes to oven toast. Some breads turn out amazing, while others fall flat. Here are the best options to try:
- White sandwich bread: Classic and reliable. It toasts quickly and evenly.
- Sourdough: Gives a slightly tangy flavor with a beautiful crispy crust.
- Baguette slices: Thick and crunchy. Perfect for garlic toast or bruschetta.
- Whole wheat: A healthier option that still gets wonderfully crispy.
- English muffins: Split them first, then toast for a classic breakfast treat.
- Rye bread: Dense and hearty. Toasts beautifully with a nutty flavor.
Avoid very soft or sweet breads like challah for now. They can get too brown quickly and lose their shape. Stick with breads that have a firmer structure for the best results.
Step By Step: How To Make Toast In Oven Without Toaster
Now let us get into the actual process. Follow these simple steps and you will have perfect toast in no time.
Step One: Preheat Your Oven
Turn on your oven and set it to 375°F (190°C). This is the ideal temperature for most bread. Let the oven fully heat up before you put the bread in. Preheating usually takes about 5 to 10 minutes. Do not skip this step. A hot oven from the start ensures even toasting.
You can also go higher at 400°F for a crunchier result. Just keep a close eye on the bread. Higher temperatures mean less time to watch but more risk of burning.
Step Two: Prepare Your Baking Sheet
Lay a sheet of parchment paper on your baking sheet. This is not required, but it helps a lot. The bread will not stick, and cleanup becomes effortless.
If you do not have parchment paper, a lightly greased baking sheet works too. Just use a thin layer of oil or butter on the surface.
Step Three: Arrange The Bread Slices
Place your bread slices on the baking sheet. Leave space between each slice. Air needs to circulate around the bread for even toasting. Do not stack or overlap the slices.
For a standard oven, you can fit about 4 to 6 slices on one sheet. If you have a larger oven, you can do even more. Just make sure the slices are spread out evenly across the sheet.
Step Four: Toast In The Oven
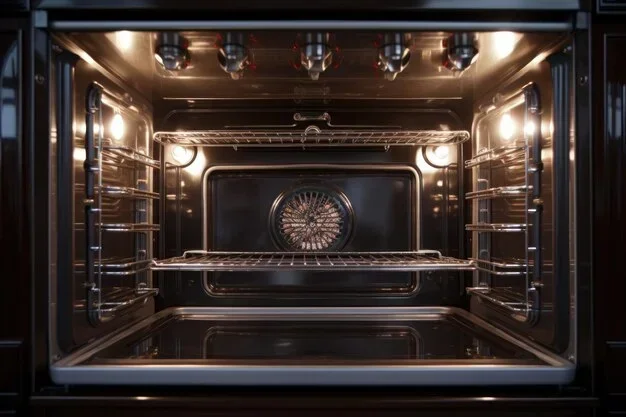
Place the baking sheet on the middle rack of your oven. This is the best position for even heat distribution. Set a timer for 3 to 4 minutes.
After the first 3 minutes, open the oven and check the bread. Look at the bottom color. If it is light golden, flip the slices over using tongs or a spatula. Then toast for another 2 to 3 minutes.
Some people prefer to only toast on one side. This gives you a crispy bottom with a softer top. It is all about personal preference. Experiment until you find your perfect level of crunch.
Step Five: Remove And Enjoy
Once the bread reaches your desired golden brown color, pull the baking sheet out. Use oven mitts to protect your hands. Transfer the toast to a plate or cutting board.
Let the toast cool for about 30 seconds. This allows the crust to set and stay crispy. Then add your favorite toppings and dig in.
Pro Tips For Perfect Oven Toast
Here are some expert tips that will take your oven toast to the next level. These small tricks make a huge difference in the final result.
Use The Broiler For Extra Crunch
Your oven’s broiler setting is a secret weapon for toast. After the bread has toasted at 375°F for a few minutes, switch to the broiler for the last 30 to 60 seconds. This gives you an extra crispy top layer. Watch it closely though. The broiler can burn bread in seconds.
Brush On Butter Before Toasting
For flavored toast, brush a thin layer of butter on the bread before it goes in the oven. The butter melts and browns, creating a rich, nutty flavor. You can also use olive oil for a healthier alternative.
Add Seasonings For Extra Flavor
Get creative with your seasonings. A sprinkle of garlic powder, cinnamon sugar, or everything bagel seasoning transforms plain toast into something special. Add these before the bread goes in the oven so the flavors meld together.
Rotate The Pan Halfway Through
Ovens have hot spots. To ensure even toasting, rotate your baking sheet 180 degrees halfway through the cooking time. This simple move prevents one side from over-toasting while the other stays pale.
Toast Thinner Slices
Thin slices of bread toast faster and more evenly in the oven. If you have a thick loaf, use a serrated knife to slice it thinner. Aim for about 1/4 inch thickness for the best results.
Keep An Eye On It
Oven toast requires more attention than toaster toast. Ovens vary in temperature and heat distribution. Stay nearby and check your bread frequently. It is better to check early and often than to come back to a tray of burnt bread.
Common Mistakes To Avoid
Even though making toast in the oven is simple, there are a few common mistakes that can ruin your results. Here is what to watch out for.
Skipping The Preheat
Putting bread in a cold or lukewarm oven leads to uneven toasting. The bread will dry out instead of crisping up. Always preheat your oven fully before adding the bread.
Overcrowding The Pan
When slices are too close together, they steam instead of toast. The trapped moisture makes the bread soft and soggy. Give each slice plenty of room for hot air to flow around it.
Using Too High A Temperature
It might seem tempting to crank up the heat to speed things up. But temperatures above 425°F can burn the outside of the bread while leaving the inside dry and hard. Stick to the 375°F to 400°F range for best results.
Forgetting To Flip
If you only toast on one side, you will get a pale top and a crispy bottom. Flipping the slices halfway through gives you balanced toasting on both sides. Unless you specifically want one-sided toast, make sure to flip.
Leaving The Toast In Too Long
Oven toast can go from perfectly golden to charcoal in a matter of seconds. Set a timer and check the bread regularly. Do not walk away and forget about it.
Oven Toast Vs Toaster Toast: A Comparison
How does oven toast really compare to traditional toaster toast? Let us break it down side by side.
| Feature | Oven Toast | Toaster Toast |
|---|---|---|
| Evenness of Toasting | Excellent – heat from all sides | Good – heat from coils inside |
| Batch Size | 4 to 8 slices at once | 2 to 4 slices at once |
| Control Over Browning | Full control with temperature | Limited to preset settings |
| Bread Size Flexibility | Handles any size or shape | Limited by slot width |
| Time Per Batch | 4 to 6 minutes | 1 to 3 minutes |
| Energy Use | Higher (heats full oven) | Lower (small heating elements) |
| Cleanup | Baking sheet and parchment | Crum tray, minimal effort |
| Flavor Options | Butter, seasonings added before toasting | Limited to what fits inside |
As you can see, oven toast wins in many categories. The main downside is time and energy use. But for special occasions, large groups, or when your toaster is broken, the oven is the clear winner.
Creative Variations Of Oven Toast
Once you master the basic method, you can get creative. Oven toast is a blank canvas for all kinds of delicious combinations.
Garlic Butter Toast
Mince a clove of garlic and mix it with softened butter. Spread this mixture on your bread slices before toasting. The result is fragrant, savory, and absolutely irresistible. This works great with baguette slices.
Cinnamon Sugar Toast
Mix cinnamon and sugar together. Brush the bread lightly with butter, then sprinkle the cinnamon sugar mixture on top. Toast in the oven until golden. This is a wonderful treat for weekend breakfast or brunch.
Italian Herb Toast
Combine dried oregano, basil, garlic powder, and a pinch of salt. Sprinkle this blend on buttered bread before toasting. It makes an excellent side for soups and pasta dishes.
Cheese Toast
Place a slice of cheese on top of the bread during the last minute of toasting. The heat melts the cheese perfectly. Add a slice of tomato or some ham for a quick and satisfying meal.
Avocado Toast In The Oven
Toast your bread in the oven, then top it with mashed avocado, salt, pepper, and a squeeze of lemon. The oven-toasted bread holds up better under the weight of avocado than many toaster results do.
Frequently Asked Questions
Can I use a microwave instead of an oven to make toast?
A microwave will not make true toast. It heats the bread by exciting water molecules, which makes the bread soft and chewy rather than crispy. If you want crispy bread, the oven or a toaster is the way to go. A microwave is better for reheating already toasted bread.
What temperature should I set my oven to for toast?
The ideal temperature is 375°F (190°C) for most bread types. If you want a crunchier result, you can go up to 400°F or 425°F. Just remember that higher temperatures require closer monitoring to prevent burning.
How long does it take to make toast in the oven?
It typically takes 4 to 6 minutes total, depending on your oven and how crispy you like your toast. Thin slices may be ready in 3 to 4 minutes, while thicker slices might need 5 to 7 minutes. Always check the bread frequently.
Do I need to flip the bread when toasting in the oven?
Yes, flipping the bread halfway through ensures even toasting on both sides. If you skip this step, one side will be much darker than the other. Use tongs or a spatula to flip carefully since the bread and pan will be hot.
Can I make toast in the oven without parchment paper?
Absolutely. Parchment paper is optional. You can use a lightly greased baking sheet instead. Just make sure the surface is coated with a thin layer of oil or butter to prevent the bread from sticking.
Is oven toast healthier than toaster toast?
Both methods produce similar nutritional results. The bread itself determines the health value. Oven toast does allow you to add toppings like butter or olive oil more evenly, which can enhance flavor without needing as much. There is no significant health difference between the two methods.
Final Thoughts
Making toast in oven without toaster is one of those simple kitchen skills that comes in handy more often than you might think. Whether your toaster is broken, you are camping, or you just want better toast, the oven delivers consistently excellent results.
The process is straightforward. Preheat to 375°F, arrange your bread on a baking sheet, toast for 3 to 4 minutes, flip, and toast for another 2 to 3 minutes. Add your favorite toppings and enjoy.
Remember the key takeaways. Use the right temperature. Do not overcrowd the pan. Watch your bread closely. And do not be afraid to experiment with flavors and toppings. Once you try oven toast, you might find you prefer it over toaster toast for good.
Now that you know how easy it is, give it a try today. Your next breakfast will be crunchier, more flavorful, and more satisfying than ever before. Happy toasting!


8 Comments