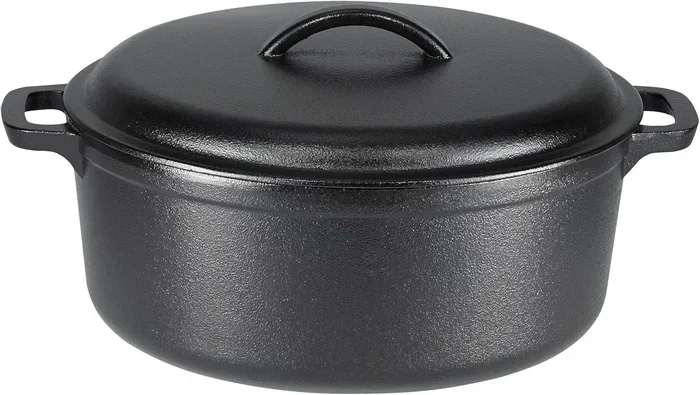
How To Cure Cast Iron Dutch Oven For Better Cooking
Curing a cast iron Dutch oven creates a natural non-stick surface that makes cooking easier and lasts for decades. This guide walks you through every step, from choosing the right oil to maintaining your seasoned cookware. You will learn simple methods that work whether your Dutch oven is brand new or needs revival. Follow our tips to avoid common mistakes and enjoy better cooking results every time.
Curing a cast iron Dutch oven is one of the best things you can do for your kitchen. It transforms a bare, rough piece of metal into a smooth, non-stick cooking surface that improves with every use. Whether you just bought a new one or found a vintage piece at a garage sale, this process sets the foundation for better cooking.
Many people skip this step and wonder why food sticks or rust appears. The truth is simple. A properly cured Dutch oven repels water, resists sticking, and distributes heat evenly. It becomes a kitchen companion that can last for generations.
In this guide, we will walk you through everything you need to know. From choosing the right oil to the final bake, every step matters. You will learn practical tips, avoid common mistakes, and understand how to keep your Dutch oven in top shape. Let us get started.
Key Takeaways
- Seasoning is essential: Curing builds a protective layer that prevents rust and food from sticking to your Dutch oven.
- Use the right oil: Flaxseed oil, grapeseed oil, and Crisco are top choices for creating a durable seasoning layer.
- High heat is key: Baking your Dutch oven at 450-500°F allows the oil to polymerize into a hard, smooth coating.
- Avoid soap and scrubbers: Harsh cleaners strip away your seasoning and can lead to rust formation.
- Re-season regularly: Even a well-cured Dutch oven needs touch-up seasoning after heavy use or if food starts sticking.
- Patience pays off: Multiple thin layers of seasoning create a better surface than one thick coat.
- Proper storage matters: Storing your Dutch oven in a dry place with the lid slightly open prevents moisture buildup.
📑 Table of Contents
- What Is Curing A Cast Iron Dutch Oven And Why It Matters
- How To Cure Cast Iron Dutch Oven Step By Step
- Best Oils For Seasoning Your Cast Iron Dutch Oven
- Common Mistakes To Avoid When Curing Cast Iron
- Maintaining Your Cured Cast Iron Dutch Oven
- Signs Your Cast Iron Dutch Oven Needs Re-Seasoning
- Expert Tips For The Best Results
- Key Takeaways
- Conclusion
What Is Curing A Cast Iron Dutch Oven And Why It Matters
Understanding The Curing Process
Curing means baking oil onto the surface of your Dutch oven cast iron at a high temperature. The heat causes the oil to polymerize, which means it forms a hard, plastic-like layer bonded to the metal. This layer becomes your seasoning. It protects the iron from moisture and creates a surface food slides across easily.
Think of it like painting a wall. You would not just slap on one thick coat and call it done. You apply thin layers and let each one dry properly. The same principle applies here. Multiple thin layers of polymerized oil build up to create a strong, smooth finish.
Why Curing Makes Cooking Better
A cured Dutch oven changes the way you cook. Here is what you gain:
- Natural non-stick surface: Food releases easily without heavy oils or sprays.
- Rust protection: The seasoning seals the iron, keeping moisture out.
- Even heat distribution: Cast iron retains and spreads heat uniformly across the bottom and sides.
- Flavor development: Over time, layers of seasoning add depth to the flavors of your food.
- Durability: A well-maintained Dutch oven can last 50 years or more.
Without curing, your cast iron cookware is vulnerable. Moisture causes rust. Food sticks and burns onto the surface. You fight your cookware instead of enjoying it. Curing fixes all of that.
How To Cure Cast Iron Dutch Oven Step By Step
Step One: Clean The Dutch Oven Thoroughly
Start with a completely clean surface. If your Dutch oven is new, it likely has a factory coating or machining residue. Wash it with warm water and a small amount of mild dish soap. Use a soft sponge to remove any dust or debris.
For vintage or used Dutch ovens, you may need to remove existing rust or old seasoning. Use a stiff brush or fine steel wool to scrub the surface. Rinse well and dry it completely with a towel. This step is crucial because any moisture left on the surface will cause rust during the curing process.
Step Two: Apply A Thin Layer Of Oil
Choose your preferred oil for cast iron and pour a small amount onto a clean cloth or paper towel. You want the cloth barely oily, not dripping. Wipe the entire surface of the Dutch oven inside and out, including the lid.
The key here is thin. Too much oil creates a sticky, uneven coating. A thin layer polymerizes properly and builds a smooth finish. Think of it like wiping a table with a lightly oiled cloth. You should not see pools of oil sitting on the surface.
Step Three: Bake The Dutch Oven Upside Down
Preheat your oven to 450-500°F. Place a sheet of aluminum foil on the bottom rack to catch any drips. Set the Dutch oven upside down on the upper rack. This positioning allows excess oil to drip off during baking.
Bake the Dutch oven for one hour. After the hour is up, turn off the oven and let it cool completely inside. This slow cooling helps the seasoning set properly. Do not rush this step by taking it out while the oven is still hot.
Step Four: Repeat For Multiple Layers
One round of baking is a good start, but multiple layers create a stronger seasoning. Repeat the oiling and baking process two to three more times. Each layer adds to the protection and smoothness of the surface.
After the final bake, your Dutch oven seasoning should look smooth and slightly glossy. Run your finger across the surface. It should feel dry and not greasy. If it feels sticky, you applied too much oil or did not bake long enough.
Best Oils For Seasoning Your Cast Iron Dutch Oven
Top Oil Choices For Curing
Not all oils work the same way for seasoning cast iron. The best oils have a high smoke point and polymerize well during baking. Here is a comparison of popular options:
- Flaxseed oil: Creates a hard, durable seasoning. It polymerizes at a lower temperature and is a favorite among cast iron enthusiasts. However, it can be brittle over time if applied too thickly.
- Grapeseed oil: A versatile choice with a high smoke point. It produces a smooth, flexible seasoning layer that holds up well to daily use.
- Crisco (shortening): Easy to apply and widely available. It creates a solid seasoning and is a great option for beginners.
- Avocado oil: High smoke point and neutral flavor. It works well but is more expensive than other options.
- Vegetable oil: A reliable everyday choice. It polymerizes decently and is affordable.
Oils To Avoid
Some oils do not polymerize properly and leave a sticky residue. Avoid using olive oil, butter, coconut oil, or any oil with a low smoke point. These will not cure correctly and can make your Dutch oven worse instead of better.
Common Mistakes To Avoid When Curing Cast Iron
Using Too Much Oil
This is the number one mistake people make. Excess oil does not bake off properly and leaves a gummy, sticky surface. Always wipe on a very thin layer. If you see oil pooling anywhere, you have used too much.
A good rule of thumb: the surface should look almost dry after wiping. You should barely see any oil. It feels like there is nothing on it, but that is exactly right.
Skipping The Preheat
Your oven needs to be fully preheated before the Dutch oven goes in. Putting a cold Dutch oven into a cold oven and then heating it slowly can cause uneven seasoning. Always preheat to the target temperature first.
Not Drying The Dutch Oven Completely
Water is the enemy of cast iron. If any moisture remains on the surface before baking, it can cause flash rust or prevent the oil from bonding properly. After washing, dry the Dutch oven immediately with a towel and then place it on a warm burner for a few minutes to remove any hidden moisture.
Using Soap And Still Being Afraid Of It
Many people believe you should never use soap on cast iron. Modern mild dish soap is perfectly fine for cleaning cast iron, especially during the initial curing process. The real danger is soaking cast iron in water for long periods or putting it away wet. A quick wash with soap and a thorough dry is perfectly safe.
Maintaining Your Cured Cast Iron Dutch Oven
Daily Cleaning Tips
After each use, let your Dutch oven cool slightly before cleaning. Rinse it with warm water and use a soft brush or sponge. For stuck-on food, add a small amount of coarse salt and scrub gently. Avoid using metal scouring pads or harsh abrasives that can damage your seasoning.
Never put your cast iron Dutch oven in a dishwasher. The harsh detergents and prolonged water exposure will strip the seasoning and cause rust. Hand washing is always the way to go.
Drying And Storing Properly
Dry your Dutch oven immediately after washing. Use a clean towel and then place it on a burner over low heat for a minute or two to ensure all moisture is gone. Once dry, apply a very light coat of oil to the interior surface.
When storing, leave the lid slightly ajar to allow air circulation. This prevents moisture from building up inside. If you stack other cookware on top, place a cloth or paper towel between items to avoid scratching the seasoning.
When To Re-Season Your Dutch Oven
Over time, your seasoning will wear down. You may notice food sticking more than usual, or you might see patches of bare iron. These are signs that your cast iron care routine needs a touch-up. Simply reapply oil and bake at 450°F for one hour. You do not need to strip the entire seasoning down to bare iron unless there is heavy rust.
Using Your Dutch Oven On Different Heat Sources
A cured Dutch oven works on a stovetop, in an oven, over a campfire, or even on a grill. The seasoning holds up well across different heat sources. Just avoid sudden temperature changes, such as placing a cold Dutch oven on a blazing hot burner. This thermal shock can crack the seasoning or even warp the iron.
Signs Your Cast Iron Dutch Oven Needs Re-Seasoning
Food Sticking Frequently
If you notice that eggs, pancakes, or other foods are sticking to the surface more than they used to, your seasoning is wearing thin. A well-maintained Dutch oven should release food easily with minimal sticking.
Visible Rust Spots
Even small rust spots mean moisture has reached the bare iron. Do not ignore these. Clean the rust off with steel wool, dry thoroughly, and apply a fresh layer of oil before baking. This is a quick fix that prevents further damage.
Dull Or Patchy Appearance
A healthy seasoning layer looks smooth and slightly dark. If your Dutch oven looks blotchy, faded, or has areas of bare silver metal, it is time for a re-seasoning session. A single round of oiling and baking at high heat can restore the surface quickly.
Unpleasant Odors During Cooking
If your Dutch oven starts producing a metallic or rancid smell when you cook, the old seasoning may be breaking down. Fresh seasoning eliminates this problem and gives your food a clean, neutral flavor.
Expert Tips For The Best Results
Use a dedicated brush for cast iron. A silicone basting brush or a dedicated lint-free cloth works great for applying oil. Avoid using paper towels that may leave fibers behind, as these can burn onto the surface during baking.
Let the oven cool naturally. After the final bake, do not open the oven door right away. Let the Dutch oven cool down gradually inside the closed oven. This slow cooling helps the seasoning layer set firmly.
Cook fatty foods first. After curing, cook something with a little fat, like bacon or roasted vegetables. This helps reinforce the seasoning layer and fills in any microscopic gaps in the coating.
Be patient with the process. Curing is not a one-time event. It is an ongoing practice. Each time you cook with oil and clean your Dutch oven properly, you add another micro-layer to your seasoning. Over months and years, this builds into an incredibly durable, natural non-stick surface.
Do not fear the stovetop. Many people only use their Dutch oven in the oven. But you can absolutely use it on the stovetop for searing, sautéing, and making sauces. Just keep the heat at medium or medium-low to protect the seasoning.
Key Takeaways
- Patience is essential: Multiple thin layers of seasoning create a better surface than one thick coat. Do not rush the curing process.
- Thin oil application is critical: Too much oil leads to a sticky, uneven finish. Wipe on a barely visible layer each time.
- High heat creates the bond: Baking at 450-500°F allows the oil to polymerize into a hard, durable coating that protects your Dutch oven.
- Proper cleaning preserves seasoning: Gentle hand washing, thorough drying, and light oiling after each use keep your Dutch oven in great shape.
- Re-seasoning is normal and easy: Even well-maintained Dutch ovens benefit from occasional touch-up seasoning to maintain peak performance.
- Avoid common pitfalls: Stay away from low-smoke-point oils, dishwashers, and prolonged water exposure to protect your investment.
- A cured Dutch oven improves with age: The more you use it, the better it gets. Each cooking session adds to the seasoning layers.
Conclusion
Curing a cast iron Dutch oven is a simple process that pays off for years. It does not require expensive products or complicated techniques. Just a little time, the right oil, and a hot oven. The result is a cooking surface that performs beautifully every time you use it.
Follow the steps in this guide, avoid the common mistakes, and maintain your Dutch oven with care. You will enjoy better cooking results, easier cleanup, and a piece of cookware that truly lasts a lifetime. Your Dutch oven cooking experience will never be the same once you experience the difference a proper cure makes.
Start today. Pick up your Dutch oven, grab a bottle of oil, and give it the treatment it deserves. Your future self, standing over a perfectly seared steak or a beautiful braise, will thank you.