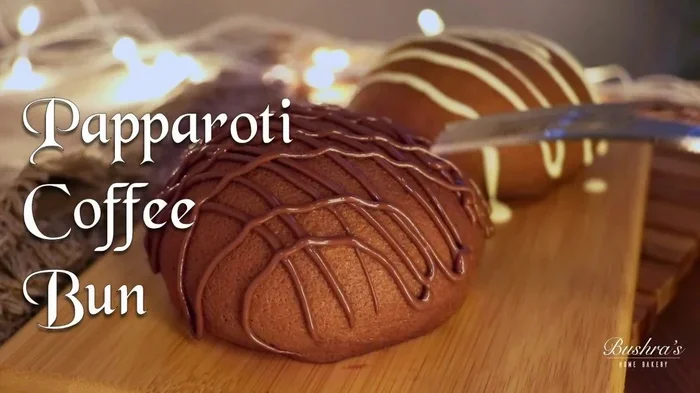
How To Make Papparoti Coffee Buns With Fresh Ingredients
Making Papparoti coffee buns at home is easier than you think. This guide walks you through everything from the soft enriched dough to the creamy coffee butter filling. You will learn the exact steps, tips, and tricks to bake bakery-quality coffee buns in your own kitchen.
There is something magical about a warm coffee bun fresh out of the oven. The smell of butter and coffee filling the kitchen is enough to make anyone smile. Papparoti coffee buns have gained a huge following around the world. People love their soft texture and rich coffee flavor. Now you can learn how to make papparoti coffee buns right at home.
This recipe uses fresh ingredients and simple steps. You do not need any special equipment. A basic oven and some patience are all you need. Whether you are a beginner baker or a seasoned pro, this guide will help you create bakery-quality buns. Let us dive into the process and get baking.
Key Takeaways
- Fresh ingredients make all the difference: Using quality butter, fresh yeast, and good coffee creates the authentic Papparoti taste.
- The dough is an enriched milk bread base: Soft, buttery, and slightly sweet, it gives the buns their signature fluffy texture.
- The coffee butter filling is the star: A simple mix of butter, coffee, and sugar creates that rich, aromatic filling.
- Proper proofing is essential: Letting the dough rise properly ensures light, airy buns with a beautiful crumb.
- You do not need a fancy oven: A standard home oven works perfectly for baking these buns to golden perfection.
- Cleanup is easy: A quick oven clean with a dishwasher tablet keeps your appliance spotless after baking sessions.
📑 Table of Contents
- What Makes Papparoti Coffee Buns Special
- Ingredients You Will Need
- Step-by-Step Instructions for Making Papparoti Coffee Buns
- Tips for Perfect Papparoti Style Coffee Buns
- Common Mistakes to Avoid When Making Coffee Buns
- Storing and Reheating Your Coffee Buns
- Variations to Try With Your Coffee Buns
- Why You Should Make Coffee Buns at Home
- Frequently Asked Questions
- Final Thoughts on Making Papparoti Coffee Buns
What Makes Papparoti Coffee Buns Special
Papparoti is a famous bakery chain known for its signature coffee buns. These buns are different from regular sweet rolls. They have a unique combination of soft milk bread and a creamy coffee butter filling. The result is a bun that is both rich and light at the same time.
The secret lies in the dough. It is an enriched dough, similar to brioche or milk bread. This means it has more butter, eggs, and milk than regular bread dough. The extra richness creates that pillowy soft texture people love. The coffee filling adds a bold flavor that pairs perfectly with the sweet dough.
The Dough: Soft and Enriched
The base dough for these buns is what sets them apart. It uses bread flour, milk, butter, eggs, and a touch of sugar and salt. The bread flour gives the dough strength and structure. The milk and butter make it incredibly soft. The eggs add richness and help with the golden color.
When you brown flour in the oven before mixing, you add a nutty depth of flavor. This is a trick that elevates the buns to the next level. The process of browning flour in the oven is simple but transformative. Just spread flour on a baking sheet and toast it until it turns a light golden color. Let it cool before using it in your recipe.
The Coffee Butter Filling
The filling is what gives these buns their name and their soul. It is made from softened butter, instant coffee, sugar, and a pinch of salt. You mix everything together until smooth and creamy. The result is a spreadable coffee butter that melts into the dough as it bakes.
You can adjust the coffee strength to your liking. Some people prefer a milder coffee flavor. Others like it strong and bold. Experiment with different amounts of coffee until you find your perfect balance. The filling should be sweet but not overpowering. It should complement the soft bun, not dominate it.
Ingredients You Will Need
Gathering the right ingredients is the first step to success. Using fresh, quality ingredients makes a huge difference in the final product. Here is what you need for both the dough and the filling.
For the Dough
- Bread flour (or all-purpose flour as a substitute) – 3 cups
- Warm milk – 1 cup (about 110°F or 43°C)
- Butter, softened – 4 tablespoons
- Eggs – 2 large
- Sugar – 3 tablespoons
- Salt – 1 teaspoon
- Active dry yeast – 2 teaspoons
- Vanilla extract – 1 teaspoon (optional)
For the Coffee Butter Filling
- Butter, softened – 6 tablespoons
- Instant coffee – 2 tablespoons
- Powdered sugar – 3 tablespoons
- Vanilla extract – 1/2 teaspoon
- Salt – a tiny pinch
Make sure your butter and eggs are at room temperature before you start. Cold ingredients do not mix well and can affect the texture of your dough. Taking 30 minutes to bring everything to room temperature saves you time and frustration later.
Step-by-Step Instructions for Making Papparoti Coffee Buns
Now comes the fun part. Follow these steps carefully and you will have beautiful homemade coffee buns in no time. The process is straightforward but does require some patience for rising.
Step 1: Activate the Yeast
Start by warming your milk until it is lukewarm. It should feel warm to the touch but not hot. Stir in the sugar and sprinkle the yeast over the top. Let it sit for about 5 to 10 minutes. You will see it become foamy and bubbly. This tells you the yeast is alive and active.
If your yeast does not foam, it may be old or expired. Always check the expiration date before you start. Using dead yeast is the most common reason for failed bread doughs.
Step 2: Mix the Dough
In a large mixing bowl, combine the flour and salt. Add the browned flour if you are using that technique. Make a well in the center and pour in the yeast mixture, softened butter, and eggs. Add the vanilla extract if you are using it.
Mix everything together with your hands or a stand mixer with a dough hook. Knead the dough for about 10 minutes until it becomes smooth and elastic. It should be slightly sticky but not wet. If it is too sticky, add a little more flour. If it is too dry, add a splash of milk.
Step 3: First Rise
Place the dough in a lightly greased bowl. Cover it with a damp kitchen towel or plastic wrap. Let it rise in a warm place for about 1 to 2 hours. The dough should double in size.
Proper rising is crucial for soft, airy buns. Do not rush this step. Cold kitchens slow down the rising process. If your kitchen is cool, place the bowl in the oven with just the light on. The gentle warmth helps the dough rise evenly.
Step 4: Prepare the Coffee Butter Filling
While the dough is rising, make the filling. In a bowl, combine the softened butter, instant coffee, powdered sugar, vanilla, and salt. Mix until everything is smooth and well combined. The consistency should be spreadable, like a thick paste.
If the filling is too firm, add a little more butter. If it is too loose, add more powdered sugar. You want it firm enough to spread easily but soft enough to melt into the dough during baking.
Step 5: Shape the Buns
Once the dough has risen, punch it down gently. This releases the air bubbles. Divide the dough into equal pieces, about 12 to 15 portions depending on how large you want your buns. Roll each piece into a ball.
Take each ball and flatten it into a circle. Place a spoonful of coffee butter filling in the center. Fold the edges up and pinch them together to seal the filling inside. Place the filled dough ball seam-side down on a lined baking sheet. Leave space between each bun for them to expand.
Cover the shaped buns with a towel and let them rise again for about 30 to 45 minutes. They should puff up slightly. This second rise ensures light and fluffy buns.
Step 6: Bake the Buns
Preheat your oven to 350°F (175°C). While it is heating, brush the tops of the buns with a little milk or beaten egg. This gives them a beautiful golden glaze after baking.
Place the baking sheet in the oven and bake for 18 to 22 minutes. The buns are done when they turn golden brown on top. The filling should be melted and oozing slightly out of the sides.
Remove the buns from the oven and let them cool on the baking sheet for 10 minutes. Then transfer them to a wire rack to cool completely. The buns will be soft and fluffy inside with a lightly crispy top.
Step 7: Enjoy Your Fresh Coffee Buns
These buns are best enjoyed warm. You can eat them as is or toast them lightly. If you want to reheat leftover buns, you can use your oven to toast them without a toaster. Just place them on a baking sheet at 300°F for a few minutes. They will taste almost as good as fresh.
Tips for Perfect Papparoti Style Coffee Buns
Baking great buns takes practice, but a few tips can help you get excellent results from the start. Here are some expert insights to improve your coffee buns every time.
Use Bread Flour for the Best Texture
Bread flour has more protein than all-purpose flour. This extra protein creates more gluten, which gives the dough its structure and chew. If you only have all-purpose flour, your buns will still be good. They will just be slightly softer and less structured.
For the most authentic papparoti coffee buns texture, bread flour is the way to go. It creates that slight chewiness that makes these buns so satisfying to bite into.
Do Not Skip the Browning Step
Browning the flour adds a subtle nutty flavor that is hard to replicate any other way. It also changes the color of the dough slightly, giving the buns a more golden appearance after baking. This small extra step makes a big difference in the final product.
Spread about 3 cups of flour on a baking sheet and bake at 300°F for 10 to 15 minutes. Stir it halfway through to ensure even browning. Watch it carefully so it does not burn.
Let the Dough Rest if It Gets Tough
Sometimes the dough can feel tight and difficult to shape. This usually means the gluten has tightened up. Let the dough rest for 15 to 20 minutes before you try shaping it again. The gluten will relax and the dough will become much easier to work with.
Keep the Filling Balanced
The ratio of coffee to butter is important. Too much coffee can make the filling bitter. Too little and you will not taste it. Start with the recipe amounts and adjust in small increments. Remember that the flavors concentrate slightly during baking.
Common Mistakes to Avoid When Making Coffee Buns
Even experienced bakers make mistakes. Knowing what to avoid can save you time and ingredients. Here are the most common errors people make when baking homemade coffee buns.
- Using water instead of milk: Milk makes the dough softer and richer. Water works in a pinch but the texture will be different.
- Over-kneading the dough: Knead until smooth, but do not overdo it. Over-kneaded dough can become tough and dense.
- Skipping the second rise: The second rise is what gives the buns their light texture. Skipping it results in heavy, dense buns.
- Too much filling: Overfilling makes the buns burst open during baking. Use about one tablespoon of filling per bun.
- Baking at too high a temperature: High heat browns the outside before the inside cooks through. Stick to 350°F for even baking.
- Not measuring flour correctly: Scooping flour directly from the bag packs it down. Spoon the flour into the measuring cup and level it off.
Storing and Reheating Your Coffee Buns
Fresh coffee buns taste best on the day you make them. But you can store them for later if needed. Place cooled buns in an airtight container at room temperature. They will stay soft for up to 2 days.
For longer storage, you can freeze the buns. Wrap each bun tightly in plastic wrap and place them in a freezer bag. They will keep in the freezer for up to 2 months. To reheat, wrap the bun in foil and warm it in the oven at 300°F for 5 to 8 minutes. The foil keeps the bun from drying out while the oven warms it through.
If you prefer a crispy top, remove the foil for the last 2 minutes of reheating. This gives you that fresh-from-the-oven texture. You can also reheat individual buns on a baking sheet. Just be careful not to overheat or the butter filling will leak out.
For those who love a slightly toasted texture, try making toast in the oven without a toaster. It is a simple technique that works beautifully for reheating bread-based baked goods like coffee buns.
Variations to Try With Your Coffee Buns
Once you master the basic recipe, you can get creative with variations. Here are some fun ideas to try:
- Chocolate coffee buns: Add 2 tablespoons of cocoa powder to the dough and use chocolate spread instead of coffee butter.
- Cinnamon coffee buns: Add 1 teaspoon of cinnamon to the filling for a warm, spicy twist.
- Maple coffee buns: Replace the sugar in the filling with maple syrup for a rich, autumnal flavor.
- Salted caramel coffee buns: Add a pinch of flaky sea salt on top before baking for a sweet and salty combination.
- Cookie butter coffee buns: Use Biscoff spread as the filling for a unique flavor profile.
Each variation changes the flavor profile while keeping the soft, fluffy bun base. Experiment with different combinations to find your favorite. These papparoti style buns are versatile and forgiving, so feel free to get creative.
Why You Should Make Coffee Buns at Home
There are many reasons to try making coffee buns at home. First, you control the ingredients. You know exactly what goes into your food. No preservatives, no artificial flavors. Just real, fresh ingredients.
Second, homemade buns taste better. The difference between a freshly baked bun and a store-bought one is night and day. The aroma alone is worth the effort. Your kitchen will smell incredible while these buns bake.
Third, it is a fun and rewarding activity. Baking connects you to food in a meaningful way. You learn new skills and create something delicious with your own hands. These coffee flavored bread buns make great gifts too. Package them in a nice box and share them with friends and family.
If you enjoy baking bread at home, you might also like to explore baking sourdough without a dutch oven. It is another rewarding bread baking project that uses similar techniques. Both recipes help you build confidence in the kitchen.
Frequently Asked Questions
Can I use instant yeast instead of active dry yeast?
Yes, you can substitute instant yeast for active dry yeast. Use the same amount and skip the activation step. Just add the instant yeast directly to the flour before mixing. Instant yeast is more forgiving and works well in enriched doughs like these coffee buns.
Can I make these buns without an oven?
You need some form of heat to bake these buns. A conventional oven works best, but you can also use a toaster oven. The key is maintaining a steady temperature of around 350°F. A toaster oven with a reliable temperature gauge can work well for smaller batches of coffee buns.
How long do these coffee buns last?
Fresh coffee buns stay soft for up to 2 days at room temperature when stored in an airtight container. In the refrigerator, they last up to 4 days but may lose some of their softness. Freezing is the best option for longer storage, keeping them fresh for up to 2 months.
Can I use decaf coffee in the filling?
Absolutely. Decaf coffee works perfectly if you want to enjoy these buns in the evening without the caffeine. The flavor will be slightly milder, but the rich buttery taste will still come through. Adjust the amount of coffee to your preference.
Why are my buns dense and not fluffy?
Dense buns usually result from one of a few issues. The yeast might be old and inactive, so always check the expiration date. The dough might not have risen long enough. Or the buns might have been over-kneaded, which tightens the gluten. Make sure to follow each step carefully for the lightest, fluffiest results.
Can I make the filling ahead of time?
Yes, you can prepare the coffee butter filling a day ahead. Store it in an airtight container in the refrigerator. Let it come to room temperature before spreading it on the dough. The filling should be soft and spreadable for the best results. If it is too firm from the fridge, warm it slightly in the microwave for a few seconds.
Final Thoughts on Making Papparoti Coffee Buns
Making papparoti coffee buns at home is a rewarding experience. The process is straightforward and the results are impressive. From the soft, enriched dough to the rich coffee butter filling, every bite is a treat. These buns are perfect for breakfast, an afternoon snack, or even a dessert.
Start with fresh ingredients and follow the steps carefully. Do not rush the rising process. Take your time and enjoy the journey. The first time you pull a tray of golden coffee buns out of the oven, you will know it was worth the effort.
Share them with people you love. Bake them for special occasions. Or simply enjoy them with a cup of coffee on a quiet morning. Whatever you do, these homemade coffee buns will become a favorite in your household. So put on an apron, preheat your oven, and start baking today.