How To Dry Thai Chili Peppers In Oven Step By Step
Drying Thai chili peppers in the oven is one of the simplest and most effective ways to preserve your harvest. This method lets you enjoy the heat and flavor of Thai chili peppers all year round without any special equipment. You will learn the exact temperature, timing, and storage tricks that keep your dried chilies perfectly crispy and full of flavor. Whether you are a home cook or a spicy food lover, this guide makes the process easy and rewarding. Follow along and turn fresh Thai chilies into a pantry staple you will love.
If you have ever grown Thai chili peppers or brought home a big bag from the market, you know how incredibly versatile they are. These tiny fiery pods pack a serious punch of flavor and heat that can transform any dish. But what happens when you have more chilies than you can use before they go bad? The answer is simple. You dry them. How To Dry Thai Chili Peppers In Oven is one of the most practical skills any home cook or gardener can learn.
Drying Thai chili peppers in the oven is a method that has been used for generations. It requires no fancy equipment, no complicated techniques, and very little effort. All you need is a basic oven, some fresh Thai peppers, and a little bit of patience. The result is a batch of beautifully dried chilies that you can use in cooking, grinding into flakes, or storing for months. This guide walks you through every single step so you can dry your Thai chili peppers with confidence and get outstanding results every single time.
Whether you are a beginner in the kitchen or a seasoned home cook looking to preserve your chili harvest, this article covers everything you need. We will talk about why oven drying works so well, what tools you need, the exact step-by-step process, the best oven settings, how to store your dried chilies, and creative ways to use them. Let us dive in and make your chili drying journey a success.
Key Takeaways
- Oven drying is the easiest method: You do not need a food dehydrator or special tools to dry Thai chili peppers at home.
- Low and slow is the key: Keeping your oven between 170°F and 200°F ensures even drying without burning.
- Proper storage lasts for months: Store your dried Thai chilies in airtight containers in a cool, dark place for up to 6 months.
- Multiple uses for dried chilies: Turn them into chili flakes, chili powder, or use them whole in soups, stews, and stir-fries.
- Preparation matters: Washing, drying, and slicing your peppers correctly before oven time leads to better results.
- Safety first: Wear gloves when handling hot Thai peppers to protect your skin and eyes.
- It saves money: Drying your own chilies at home is far cheaper than buying dried Thai chilies from stores.
📑 Table of Contents
- Why Drying Thai Chili Peppers In The Oven Is A Great Idea
- What You Need Before You Start
- Step By Step Guide To Drying Thai Chili Peppers In Oven
- Finding The Best Oven Settings For Drying Chili Peppers
- How To Store Dried Thai Chili Peppers Properly
- Fun And Tasty Ways To Use Your Dried Thai Chili Peppers
- Common Mistakes To Avoid When Drying Thai Chili Peppers
- Expert Tips For Perfect Oven-Dried Thai Chili Peppers Every Time
- Key Takeaways
- Conclusion
Why Drying Thai Chili Peppers In The Oven Is A Great Idea
Before we get into the how-to, it helps to understand why oven drying is such a popular choice. There are several reasons why this method stands out from other preservation techniques. Understanding these benefits will keep you motivated as you work through the process.
It Is Simple And Accessible
Almost every household has an oven. You do not need to buy a special food dehydrator or invest in expensive equipment. The oven drying method uses tools you already have in your kitchen. This makes it the most accessible way to preserve Thai chili peppers at home.
It Gives You Consistent Results
When you control the temperature and airflow inside your oven, you get predictable and even drying. Unlike air drying or sun drying, which depend heavily on weather conditions, oven drying works the same way every time. You get perfectly dried Thai chili peppers without worrying about humidity or rain.
It Preserves Flavor And Heat
Oven drying at low temperatures removes moisture while keeping the essential oils and capsaicin intact. This means your dried chilies retain their spicy kick and rich flavor. The chili preservation process locks in what makes Thai peppers so special.
It Saves Money
Buying dried Thai chilies from the store can be expensive, especially organic varieties. Drying your own peppers at home costs almost nothing beyond the electricity to run your oven. Over time, this method saves you a significant amount of money.
It Extends Shelf Life Dramatically
Fresh Thai chili peppers last only a week or two in the fridge. But properly dried chilies can last for six months or more when stored correctly. This extended shelf life means you always have spicy chilies ready whenever you need them.
What You Need Before You Start
Gathering your supplies before you begin makes the entire process smoother and more enjoyable. Here is everything you need to get started with drying Thai chili peppers in oven.
Fresh Thai Chili Peppers
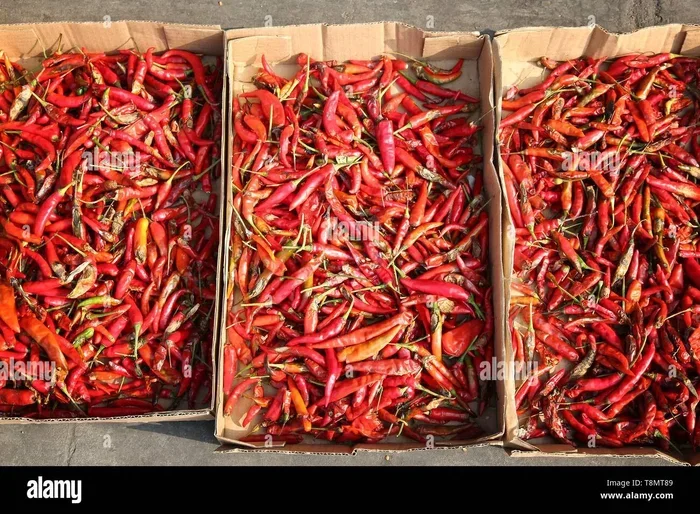
Start with fresh, firm Thai chili peppers. Look for peppers that are bright in color and free from soft spots or mold. Red Thai chilies and green Thai chilies both work well for drying. The riper and fresher your peppers, the better the final result will be.
Basic Kitchen Tools
You will need a few simple tools from your kitchen:
- A sharp knife or kitchen scissors for cutting the peppers
- A cutting board for prep work
- Baking sheets lined with parchment paper or silicone mats
- A colander or strainer for washing
- Clean kitchen towels or paper towels for drying the peppers
- Airtight containers or zip-lock bags for storage
Optional But Helpful Items
While not strictly necessary, these items can improve your experience:
- Disposable gloves: Thai chili peppers are very hot. Gloves protect your hands from capsaicin burn.
- A mandoline slicer for even, thin slices
- A small fan to improve airflow in your oven
- Labeling tape and a marker for dating your dried chilies
Safety Reminder
Thai chili peppers contain high levels of capsaicin, the compound that makes them spicy. This oil can irritate your skin, eyes, and lungs. Always wear gloves when handling hot peppers. Wash your hands thoroughly after touching them, even if you wore gloves. Avoid touching your face during the prep process.
Step By Step Guide To Drying Thai Chili Peppers In Oven
Now for the part you have been waiting for. Here is the complete how to dry Thai chili peppers in oven process broken down into clear, easy-to-follow steps. Follow each step carefully for the best results.
Step One: Wash Your Peppers
Start by rinsing your fresh Thai chili peppers under cool running water. Use your fingers to gently remove any dirt or debris. Pat them dry thoroughly with a clean kitchen towel or paper towels. Moisture is the enemy of drying, so make sure your peppers are as dry as possible before moving to the next step.
Step Two: Remove The Stems
Use a sharp knife to cut off the stem from each pepper. You can also twist the stem off by hand if the pepper is firm enough. Removing the stem creates a flat surface that helps air circulate better during the drying process.
Step Three: Slice The Peppers
Cut each pepper in half lengthwise. For thinner slices, cut each half into strips about one-quarter inch wide. Thinner slices dry faster and more evenly. If you want to dry whole small Thai chilies, you can leave them whole, but know that they will take longer to dry completely.
Step Four: Arrange On Baking Sheets
Lay your sliced peppers flat on baking sheets lined with parchment paper. Make sure the pieces do not overlap. Overlapping slices trap moisture and lead to uneven drying. If you need more baking sheets, use them. Giving each pepper slice space to breathe is essential for chili dehydration.
Step Five: Place In The Oven
Put the baking sheets on the middle rack of your oven. Leave the oven door slightly cracked open, about two to three inches. This allows moisture to escape and improves airflow. If you have an oven with a convection setting, use it. The fan inside a convection oven helps circulate hot air and speeds up the drying process.
Step Six: Dry At Low Temperature
Set your oven to the lowest temperature possible, ideally between 170°F and 200°F. Higher temperatures will cook the peppers instead of drying them. You want gentle, steady heat that draws out moisture slowly. Leave the peppers in the oven for four to eight hours depending on the thickness of your slices.
Step Seven: Check And Flip Regularly
Every one to two hours, open the oven and check on your peppers. Use oven mitts to avoid burns. Flip the slices over so they dry evenly on both sides. The peppers are done when they feel completely dry and brittle. They should snap easily when bent. Some pieces may dry faster than others, so remove the finished ones and keep the rest going.
Step Eight: Cool Completely
Once your oven dried chili peppers are ready, take them out of the oven and let them cool on the baking sheets. Cooling takes about 30 minutes to one hour. Do not store them while they are still warm, as trapped heat can create condensation and lead to mold.
Step Nine: Store Properly
Transfer your cooled dried Thai chilies into airtight containers. Glass jars with tight-fitting lids work perfectly. You can also use zip-lock bags, pressing out as much air as possible before sealing. Label each container with the date so you know when you dried them.
Finding The Best Oven Settings For Drying Chili Peppers
The oven temperature you choose makes a huge difference in the quality of your dried chilies. Getting this right is one of the most important parts of the entire chili drying process.
The Ideal Temperature Range
The sweet spot for drying Thai chili peppers is between 170°F and 200°F. This low temperature removes moisture slowly without cooking or scorching the peppers. If your oven does not go this low, crack the door open wider to let heat escape and keep the temperature down.
Why Low Heat Matters
High heat cooks the peppers and destroys the flavor compounds and capsaicin that make them valuable. Low heat gently evaporates the water content while preserving the spicy chili character that makes Thai peppers so desirable. Patience at low heat gives you the best end product.
Convection Vs. Conventional Oven
A convection oven is better for drying chili peppers because the built-in fan circulates hot air evenly around the food. If you only have a conventional oven, you can improve airflow by placing a small fan near the oven door. This simple trick mimics convection and helps your peppers dry more evenly.
How Long Does It Take?
Drying time varies based on several factors:
- Thickness of slices: Thinner slices dry in about four hours, thicker pieces may need six to eight hours
- Pepper size: Smaller Thai chilies dry faster than larger ones
- Oven model: Some ovens run hotter than others, so always check your peppers regularly
- Humidity levels: Drier climates speed up the process, humid kitchens slow it down
Quick Tip: The best way to check if your peppers are done is the snap test. Break a piece in half. If it snaps cleanly, it is fully dried. If it bends, it needs more time in the oven.
How To Store Dried Thai Chili Peppers Properly
Proper storage is just as important as the drying process itself. Even perfectly dried chilies can spoil if stored incorrectly. Follow these guidelines to keep your dried Thai peppers fresh for months.
Container Options
Glass jars with airtight lids are the best choice for storing dried chili peppers. They do not absorb odors and they keep moisture out completely. Mason jars work great. You can also use vacuum-sealed bags or heavy-duty zip-lock bags, but squeeze out all the air first.
Storage Location
Store your containers in a cool, dark, and dry place. A pantry or cupboard away from the stove works perfectly. Avoid storing dried chilies near a window where sunlight and heat can degrade their quality over time.
How Long Do They Last?
When stored properly, dried Thai chili peppers last for six months to one year. Ground chili powder has a shorter shelf life of about three to four months. Whole dried chilies last significantly longer than ground versions because they have less surface area exposed to air.
Signs Your Dried Chilies Have Gone Bad
Watch out for these warning signs that your dried peppers are no longer good:
- Visible mold or discoloration
- A musty or off smell
- Soft or flexible texture instead of brittle
- Insects or webbing inside the storage container
If you notice any of these signs, discard the batch and start fresh. Do not risk using spoiled dried chilies in your cooking.
Fun And Tasty Ways To Use Your Dried Thai Chili Peppers
Once you have dried your Thai chili peppers, the fun really begins. There are so many creative and delicious ways to use them in the kitchen. Here are some of the best ideas to inspire you.
Make Homemade Chili Flakes
Crush your dried Thai chilies into flakes using a mortar and pestle or a spice grinder. Homemade chili flakes are far more flavorful than store-bought ones. Sprinkle them on pizza, pasta, salads, or roasted vegetables for an extra kick of heat.
Grind Into Chili Powder
A spice grinder or blender turns dried Thai chilies into fine chili powder. This versatile seasoning works in marinades, rubs, soups, and stews. You can mix your homemade chili powder with salt, garlic powder, and other spices for a custom seasoning blend.
Add To Soups And Stews
Drop a whole dried Thai chili into your next pot of soup or stew. The pepper will rehydrate as it cooks, releasing its heat and flavor throughout the dish. Remember to remove the whole pepper before serving, or leave it in for those who love extra spice.
Make Chili Oil
Heat olive oil or vegetable oil in a pan and add your dried Thai chili slices. Let them simmer on low heat for about five minutes until they become crispy and fragrant. Strain the oil and you have homemade chili oil that is incredible on noodles, rice, or dumplings.
Use In Stir-Fries
Dried Thai chilies are a staple in many Asian stir-fry dishes. Crush them roughly and add them to your wok along with vegetables, protein, and sauce. They rehydrate quickly in the hot oil and deliver intense flavor and heat.
Create A DIY Spice Blend
Combine ground dried Thai chilies with garlic powder, onion powder, cumin, smoked paprika, and salt to create a custom all-purpose seasoning. Store it in a jar and use it on eggs, popcorn, roasted potatoes, or grilled meats.
Make Chili Salt
Pulse dried Thai chilies with coarse sea salt in a spice grinder until you get a chunky mixture. This chili salt is a fantastic finishing salt for grilled meats, fresh fruit, or even rimmed on a margarita glass.
Common Mistakes To Avoid When Drying Thai Chili Peppers
Even though oven drying is straightforward, there are a few common mistakes that can ruin your results. Knowing what to avoid saves you time and frustration.
Using Too High A Temperature
This is the number one mistake people make. Setting the oven too high cooks the peppers instead of drying them. Cooked chili peppers taste bitter and lose their vibrant color. Always keep the temperature low, between 170°F and 200°F.
Overlapping The Slices
Stacking or overlapping pepper slices traps moisture and creates uneven drying. Each slice needs direct exposure to the hot air. Use multiple baking sheets if you need to, and do not overcrowd them.
Skipping The Cooling Step
Storing dried chilies while they are still warm creates condensation inside the container. This moisture leads to mold and spoilage. Always let your peppers cool completely before putting them away.
Not Wearing Gloves
Thai chili peppers are extremely hot. Capsaicin oil gets on your hands and can burn your eyes, nose, and lips for hours if you touch your face afterward. Wearing disposable gloves during the entire prep process is a simple habit that prevents painful irritation.
Rushing The Process
Drying chili peppers requires patience. Trying to speed things up by raising the temperature leads to burnt exteriors and moist interiors. Let the low heat do its work over several hours for perfectly crispy results.
Expert Tips For Perfect Oven-Dried Thai Chili Peppers Every Time
Here are some pro tips that experienced cooks and chili growers swear by. These small adjustments can make a big difference in your final product.
Choose the right time of day: Dry your peppers in the morning when kitchen humidity tends to be lower. Lower humidity means faster and more efficient drying.
Rotate your baking sheets: Ovens have hot spots. Rotating your trays halfway through ensures all the pepper slices dry at the same rate.
Dry a test slice first: Before committing a full batch, dry one or two slices at your chosen temperature. Check them after three hours to see if the timing and heat level are right.
Keep the oven door cracked: This simple trick allows moisture to escape and prevents your kitchen from filling with steam. A slightly open door makes a noticeable difference in drying efficiency.
Label everything: It is easy to forget what you dried and when. A simple label with the date and pepper type keeps your pantry organized and helps you use your dried chilies before they lose their best quality.
Consider the food dehydrator alternative: While this guide focuses on oven drying, a food dehydrator is another excellent option. It uses even less energy and provides more consistent results. However, most people already have an oven, making the oven method the most practical choice for drying chili peppers at home.
Key Takeaways
- Oven drying is the easiest method: You do not need a food dehydrator or special tools to dry Thai chili peppers at home.
- Low and slow is the key: Keeping your oven between 170°F and 200°F ensures even drying without burning.
- Proper storage lasts for months: Store your dried Thai chilies in airtight containers in a cool, dark place for up to 6 months.
- Multiple uses for dried chilies: Turn them into chili flakes, chili powder, or use them whole in soups, stews, and stir-fries.
- Preparation matters: Washing, drying, and slicing your peppers correctly before oven time leads to better results.
- Safety first: Wear gloves when handling hot Thai peppers to protect your skin and eyes.
- It saves money: Drying your own chilies at home is far cheaper than buying dried Thai chilies from stores.
Conclusion
How To Dry Thai Chili Peppers In Oven is a skill that anyone can learn with just a little practice and patience. The process is straightforward, affordable, and incredibly rewarding. From washing and slicing your fresh peppers to storing them properly, each step plays an important role in creating high-quality dried chilies that will elevate your cooking for months to come.
Once you master the oven drying method, you will never run out of flavorful, spicy Thai chilies again. You will always have a supply of homemade chili flakes, chili powder, or whole dried peppers ready to use in your favorite recipes. The satisfaction of preserving your own harvest and using it in everyday cooking is truly special.
Start with a small batch your first time. Experiment with different temperatures and drying times until you find the method that works best for your oven and your preferences. Soon enough, drying Thai chili peppers will become a regular part of your kitchen routine. Enjoy the process, embrace the heat, and savor the incredible flavor of your homemade dried Thai chilies.
Frequently Asked Questions
Can I dry Thai chili peppers in the oven without a convection fan?
Yes, you absolutely can. A conventional oven works fine for drying Thai chili peppers. Simply crack the oven door open a couple of inches to let moisture escape. You can also place a small portable fan near the oven opening to improve airflow. The fan trick makes a noticeable difference even without a built-in convection system.
How do I know when my Thai chili peppers are fully dried in the oven?
Use the snap test to check for doneness. Break a piece of pepper in half. If it snaps cleanly and crisply, it is fully dried. If it bends or feels flexible, it still has moisture and needs more time. Fully dried Thai chilies should feel brittle and lightweight.
Can I dry Thai chili peppers at a higher temperature to save time?
It is not recommended. Higher temperatures cook the peppers instead of drying them, which ruins their flavor and color. Stick to the low temperature range of 170°F to 200°F. Patience gives you the best flavor and texture. Rushing the process leads to bitter, unevenly dried chilies.
How long do oven-dried Thai chili peppers last in storage?
Whole dried Thai chilies stored in airtight containers in a cool, dark place last for six months to one year. Ground chili flakes or chili powder have a shorter shelf life of about three to four months. Always check your stored chilies for any signs of moisture, mold, or insects before using them.
Can I use dried Thai chili peppers in place of fresh ones in recipes?
Yes, but keep in mind that dried chilies have a more concentrated flavor and heat. You will need less of them compared to fresh peppers. A good rule of thumb is to use about one-third to one-half the amount of dried chilies as you would fresh. You can also rehydrate dried chilies by soaking them in warm water for 20 to 30 minutes before using.
Is oven drying the best method for preserving Thai chili peppers?
Oven drying is one of the best methods for most home cooks because it requires no special equipment and delivers consistent results. Other methods like sun drying, air drying, and food dehydrators also work well. The best method depends on your climate, equipment, and how much time you have. For most people, the oven method offers the perfect balance of simplicity and quality.