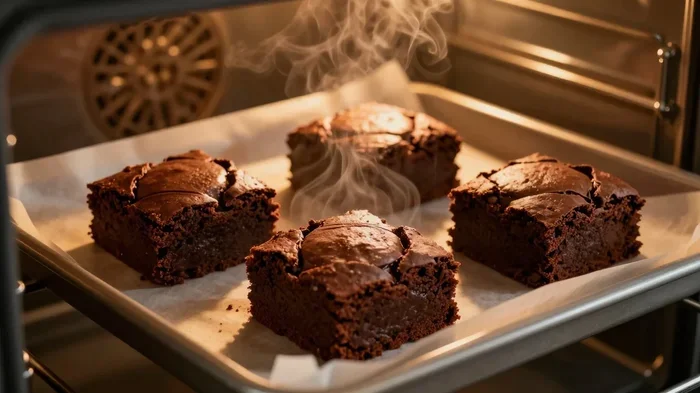
How To Cook Brownies In Oven And Get Amazing Results
Learning how to cook brownies in oven is one of the simplest ways to enjoy warm, homemade chocolate treats straight from your kitchen. This guide covers everything from ingredients and mixing to baking time and temperature for both fudgy and cakey styles. Follow our tips and you will pull out bakery-quality brownies every single time.
Key Takeaways
- Right Temperature Matters: Baking brownies at 350°F gives you the best balance of crispy edges and a fudgy center.
- Don’t Overmix The Batter: Stirring too much develops gluten and makes brownies tough instead of soft.
- Use Parchment Paper: It prevents sticking and makes removing brownies from the pan effortless.
- Know Your Desired Texture: Fudgy brownies need more fat and less flour, while cakey brownies rely on more flour and eggs.
- Let Them Cool Before Cutting: Cutting warm brownies causes crumbles and uneven slices.
- Store Properly To Keep Fresh: An airtight container at room temperature keeps brownies moist for up to five days.
📑 Table of Contents
- Why Oven-Baked Brownies Are Simply The Best
- Gathering The Right Ingredients For Perfect Brownies
- Step-By-Step Guide To Cooking Brownies In Oven
- Tips For Fudgy Versus Cakey Brownies
- Common Mistakes People Make When Baking Brownies
- Storing And Serving Your Homemade Brownies
- Expert Insights For Next-Level Brownies
- Frequently Asked Questions
- Conclusion
Why Oven-Baked Brownies Are Simply The Best
There is something magical about pulling a tray of warm oven-baked brownies out of your kitchen. The smell alone can make everyone in the house gather around the counter. Unlike boxed mixes or store-bought options, homemade brownies let you control every ingredient.
When you learn how to cook brownies in oven, you unlock a whole world of texture and flavor possibilities. You decide how fudgy or cakey they turn out. You choose the chocolate quality. You add exactly what you love.
Oven baking also gives you that perfect contrast. The edges turn slightly crisp and caramelized. The center stays soft and rich. No microwave brownie can replicate that experience. It is simply unmatched.
Whether you are a beginner in the kitchen or a seasoned home baker, mastering oven-baked brownies is a rewarding skill. The process is straightforward. The results are impressive. And the satisfaction of slicing into a perfect brownie you made yourself? Priceless.
Gathering The Right Ingredients For Perfect Brownies
The foundation of great brownies starts with quality ingredients. You do not need a long grocery list, but each item plays an important role. Here is what you will need for a classic batch.
Essential Ingredients For Homemade Brownies
- Unsalted Butter: Use one cup of melted butter for a rich, fudgy texture. The fat content is what makes brownies so indulgent.
- Granulated Sugar: About one and a half cups provides sweetness and helps create that crackly top.
- Cocoa Powder: Use half a cup of unsweetened cocoa powder for deep chocolate flavor.
- Eggs: Two large eggs bind everything together and add structure.
- Vanilla Extract: One teaspoon adds a subtle warmth that enhances the chocolate flavor.
- All-Purpose Flour: Half a cup gives the brownie just enough body without making it dense.
- Baking Soda: A small amount helps the brownies rise slightly.
- Pinch Of Salt: This balances sweetness and brings out the chocolate flavor.
- Chocolate Chips: Optional, but they add gooey pockets of melted chocolate throughout.
When you make brownies in oven, room temperature ingredients blend more smoothly. Take your eggs and butter out about thirty minutes before you start. This small step makes a bigger difference than you might think.
Substitutions You Can Try
Feel free to get creative with your brownie recipe. Swap butter for coconut oil if you want a dairy-free version. Use dark chocolate instead of cocoa powder for an even richer taste. Add a cup of chopped nuts for crunch. Each substitution changes the final result slightly, so experiment and find your favorite combination.
Step-By-Step Guide To Cooking Brownies In Oven
This is where the magic happens. Follow these steps carefully and you will have perfect brownies every time. The process is simple, but attention to detail makes all the difference.
Step One: Preheat Your Oven
Set your oven to 350°F. This is the ideal baking temperature for brownies. Preheating ensures the oven reaches the right heat before your batter goes in. Placing brownie batter into a cold oven leads to uneven baking and a disappointing texture.
Most ovens take about ten to fifteen minutes to preheat fully. Use an oven thermometer if you are unsure about your oven’s accuracy. Some ovens run hot or cold, and this affects your baking time significantly.
Step Two: Prepare Your Baking Pan
Grab a standard 9×13-inch baking pan. Line it with parchment paper, leaving some overhang on the sides. This simple trick makes removing brownies from the pan so much easier later.
You can also lightly grease the pan with butter or cooking spray. The parchment paper combined with greasing gives you the best results. Your brownies will slide out cleanly without sticking or breaking apart.
Step Three: Mix The Wet Ingredients
In a large mixing bowl, melt the butter and let it cool slightly. Stir in the sugar until well combined. Add the eggs one at a time, mixing after each addition. Pour in the vanilla extract and stir until smooth.
Do not overmix at this stage. The goal is just to combine everything evenly. Overmixing incorporates too much air, which can make your brownies cakey when you prefer them fudgy.
Step Four: Add The Dry Ingredients
In a separate bowl, whisk together the flour, cocoa powder, baking soda, and salt. Gradually add this dry mixture to the wet ingredients. Fold gently with a spatula until just combined.
Stop mixing as soon as you no longer see flour streaks. A few small lumps are perfectly fine. Remember, gentle mixing is the secret to soft, tender brownies.
If you are using chocolate chips, fold them in now. They will distribute evenly throughout the batter and create delicious pockets of melted chocolate in every bite.
Step Five: Pour And Spread The Batter
Transfer the batter into your prepared pan. Use a spatula to spread it evenly across the surface. Tap the pan gently on the counter a few times. This removes air bubbles and creates a denser, more fudgy texture.
The batter should be about half an inch to three-quarters of an inch thick. Thicker brownies need a few extra minutes in the oven. Thinner ones bake faster and can become dry if you leave them too long.
Step Six: Bake To Perfection
Place the pan on the middle oven rack. This position allows heat to circulate evenly around the brownies. Baking on the top rack can cause the top to burn, while the bottom rack can leave the base undercooked.
Bake for 25 to 30 minutes. The exact baking time depends on your oven and the texture you prefer. Start checking at the twenty-five-minute mark.
Use the toothpick test to check doneness. Insert a toothpick into the center of the brownies. If it comes out with moist crumbs, your brownies are done. If it comes out completely clean, they may be slightly overbaked.
Step Seven: Cool And Serve
Remove the pan from the oven and let it cool on a wire rack for at least twenty minutes. Cutting into hot brownies causes them to crumble and fall apart.
Once cooled, use the parchment paper overhang to lift the brownies out of the pan. Place them on a cutting board and slice into squares using a sharp knife. Wipe the blade between cuts for clean, professional-looking slices.
Tips For Fudgy Versus Cakey Brownies
One of the biggest debates in the brownie world is fudgy versus cakey. Both are delicious, but they require slightly different approaches. Understanding these differences helps you get amazing results every time you bake.
How To Make Fudgy Brownies
Fudgy brownies are dense, moist, and rich. They almost melt in your mouth. To achieve this texture, use more fat and less flour in your brownie mix. Reduce the flour to one-quarter cup instead of half a cup. Add an extra egg yolk for richness.
Fudgy brownies also benefit from a slightly longer baking time at a lower temperature. Some bakers reduce the oven to 325°F and bake for thirty-five minutes. This slow, gentle heat keeps the center soft while setting the edges.
How To Make Cakey Brownies
Cakey brownies are lighter and fluffier. They have a texture similar to a chocolate cake. To achieve this, increase the flour to three-quarters of a cup. Add an extra egg white, which creates more structure and lift.
Cakey brownies bake faster because they contain more protein. Check them at the twenty-two-minute mark. They should spring back slightly when you gently press the center.
Comparison Table: Fudgy Vs Cakey Brownies
- Fudgy Brownies: More butter and chocolate, less flour, denser texture, moist and gooey center.
- Cakey Brownies: More flour and eggs, lighter texture, slightly airy and spongy bite.
- Best For: Fudgy suits chocolate lovers who want intensity. Cakey suits those who prefer a lighter dessert.
- Baking Temperature: Both work well at 350°F, but cakey brownies may need one to two fewer minutes.
You can also make a hybrid brownie that falls somewhere in between. Simply adjust the ratios gradually until you find your perfect balance. There is no wrong answer here. It is all about what tastes best to you.
Common Mistakes People Make When Baking Brownies
Even experienced bakers sometimes make errors that affect the final result. Knowing these common pitfalls helps you avoid them and produces better brownies every time.
Overmixing The Batter
This is the number one mistake people make. When you mix the batter too much, you develop gluten in the flour. Gluten creates a chewy, tough texture instead of the soft, tender crumb you want. Mix just until the ingredients come together and stop.
Opening The Oven Door Too Often
Every time you open the oven door, heat escapes. This causes temperature fluctuations that can lead to uneven baking. Resist the urge to peek. Trust your timer and check the brownies only once near the end of the baking time.
Using The Wrong Pan Size
A pan that is too large produces thin brownies that overbake easily. A pan that is too small creates thick brownies that may stay raw in the center. Stick to a 9×13-inch pan for standard results. If you double the recipe, use a larger pan or bake in two batches.
Skipping The Parchment Paper
Some people skip this step to save time, but it always causes problems later. Brownies stick to the pan and break apart when you try to remove them. Parchment paper takes thirty seconds to add and saves you from a frustrating cleanup.
Not Letting Brownies Cool Properly
Warm brownies are soft and fragile. Cutting them too soon leads to messy, uneven slices. Patience pays off here. Wait at least twenty minutes before you even think about picking up a knife.
Storing And Serving Your Homemade Brownies
Once you have baked the perfect batch, proper storage keeps them fresh and delicious. How you store brownies depends on how quickly you plan to eat them.
Short-Term Storage
Place cooled brownies in an airtight container at room temperature. They stay fresh for up to five days. Layer them with parchment paper between each row to prevent sticking.
Do not refrigerate brownies unless necessary. The cold air dries them out and changes the texture. Room temperature storage preserves that soft, fudgy quality you worked hard to achieve.
Long-Term Storage And Freezing
Want to enjoy your brownies for weeks? Wrap individual squares tightly in plastic wrap and place them in a freezer-safe bag. Frozen brownies last up to three months.
To thaw, remove them from the freezer and let them sit at room temperature for about an hour. You can also warm them in the oven at 300°F for five minutes. This refreshes the texture and brings back that just-baked warmth.
Serving Suggestions
Plain brownies are wonderful on their own. But a few additions take them to the next level. Serve with a scoop of vanilla ice cream for a warm-and-cold contrast. Add a drizzle of salted caramel sauce for extra richness. Top with a dollop of whipped cream and a sprinkle of sea salt for an elegant presentation.
Brownies also make excellent gifts. Cut them into neat squares, wrap individually in plastic, and tie with a ribbon. Homemade brownie treats are always appreciated and look beautiful as a gift.
Expert Insights For Next-Level Brownies
Once you have mastered the basics, these professional tips will elevate your brownies from good to extraordinary.
Use Dutch-process cocoa powder. It has a deeper, smoother flavor compared to natural cocoa. The difference is subtle but noticeable in the final product.
Add a tablespoon of instant coffee. This does not make the brownies taste like coffee. Instead, it intensifies the chocolate flavor and creates a more complex taste profile.
Brown your butter before melting it. This adds a nutty, toasty flavor that complements the chocolate beautifully. Just be careful not to burn it.
Let the batter rest for thirty minutes before baking. This allows the flour to hydrate fully and the flavors to meld together. The result is a more cohesive, richer brownie.
Sprinkle flaky sea salt on top before baking. The salt crystals create a beautiful contrast with the sweet chocolate. This technique is used by professional bakeries and works beautifully at home.
Frequently Asked Questions
What temperature is best for baking brownies in the oven?
The ideal temperature for baking brownies is 350°F. This heat allows the edges to set and become slightly crisp while keeping the center soft and fudgy. If you prefer a more cakey texture, you can try 325°F for a gentler bake that rises more evenly.
How long should I bake brownies in the oven?
Most brownies bake for 25 to 30 minutes at 350°F. Start checking for doneness at the twenty-five-minute mark using the toothpick test. The toothpick should come out with a few moist crumbs, not completely clean, for the best fudgy texture.
Can I use a glass pan instead of a metal pan?
Yes, you can use a glass baking pan, but adjust your approach slightly. Glass pans heat up more slowly and retain heat longer, which can cause brownies to overbake on the bottom. Reduce the oven temperature by 25°F and check for doneness a few minutes earlier than you would with a metal pan.
Why are my brownies coming out too cakey?
Cakey brownies usually result from too much flour, too many eggs, or overmixing the batter. Each of these adds structure and air, which creates a lighter texture. To fix this, reduce the flour slightly, use fewer eggs, and mix the batter just until combined next time.
How do I know when brownies are done in the oven?
The toothpick test is the most reliable method. Insert a toothpick into the center of the pan. If it comes out with a few moist crumbs attached, the brownies are done. If it comes out completely clean or wet with batter, they need a few more minutes.
Can I freeze baked brownies and reheat them later?
Absolutely. Baked brownies freeze very well. Wrap individual squares tightly in plastic wrap and store them in a freezer-safe bag for up to three months. To reheat, let them thaw at room temperature or warm them in the oven at 300°F for about five minutes. They taste almost as fresh as the day you baked them.
Conclusion
Learning how to cook brownies in oven is one of the most rewarding skills you can build in the kitchen. The process is simple enough for beginners yet satisfying enough for experienced bakers to refine over time. With the right ingredients, the correct temperature, and a little patience, you will consistently produce brownies that rival any bakery.
Remember the key points. Use 350°F as your baseline temperature. Mix gently and avoid overworking the batter. Choose your preferred texture and adjust the ingredients accordingly. Let the brownies cool before you cut them. And store any leftovers properly so they stay fresh and delicious.
The beauty of homemade brownies is that you control every detail. You decide how chocolatey they are. You choose the sweetness level. You add the mix-ins that make them uniquely yours. Once you master the basic technique, the possibilities are truly endless.
So preheat that oven, gather your ingredients, and get ready to bake. Your kitchen is about to smell incredible, and your taste buds are in for a treat. Happy baking!