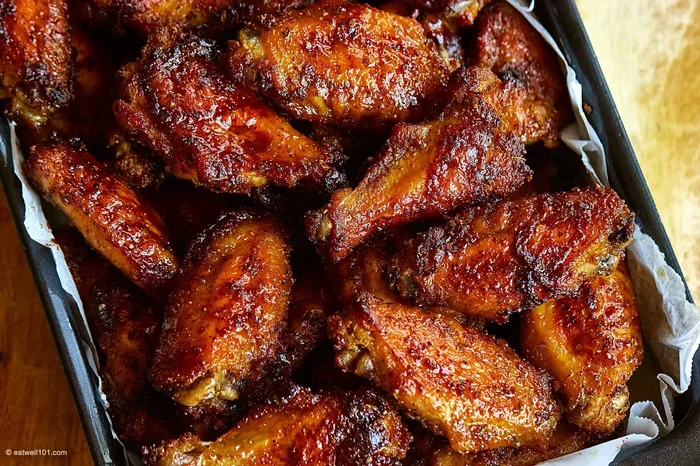
How to Bake Chicken Wings in Oven for Crispy Perfection
Discover how to bake chicken wings in oven for crispy, golden perfection without deep frying. This guide covers everything from choosing the best wings and secret techniques for extra crunch to step-by-step baking instructions and delicious homemade sauces. Whether you are a beginner or a seasoned cook, you will learn how to make oven-baked crispy wings that rival any takeout order.
There is nothing quite like biting into a perfectly crispy chicken wing. The crackle of the skin gives way to juicy, tender meat, and the flavor hits you right away. Whether you are hosting a game day party or just craving a delicious snack, how to bake chicken wings in oven is a skill everyone should have.
Deep frying works, but it comes with mess, splatter, and a lot of oil to deal with. Oven-baked wings give you that same satisfying crunch with way less effort and way less cleanup. Plus, when you bake wings at home, you control every ingredient. You decide how much salt goes in. You choose the seasoning. You pick the sauce. The result is a healthier, tastier wing that fits your exact preferences.
This guide walks you through everything you need to know. From picking the right wings and prepping them properly to nailing the perfect oven temperature and timing, we have got you covered. You will also find our favorite sauces, common mistakes to avoid, and pro tips that take your wings from good to absolutely incredible. Let us get started.
Key Takeaways
- Use a wire rack: Elevating wings on a rack ensures hot air circulates evenly, giving you crispy baked chicken wings on all sides.
- Baking powder is the secret: A light coating of baking powder dries out the skin and creates an incredibly crispy texture without deep frying.
- High heat matters: Baking at 425°F to 450°F renders fat and crisps the skin perfectly every time.
- Pat wings dry: Removing moisture from the surface before seasoning is the single most important step for crunchy chicken wings.
- Sauce at the end: Toss wings in sauce after baking to keep the crust crispy and avoid a soggy mess.
- Don’t skip the rest: Letting wings rest on a wire rack after baking keeps them crispy instead of steaming them in a pile.
📑 Table of Contents
- Why Oven-Baked Wings Are Better Than Fried
- Choosing the Best Chicken Wings for Baking
- The Secret to Crispy Baked Chicken Wings
- Step-by-Step: How to Bake Chicken Wings in Oven
- Delicious Sauces and Seasonings for Baked Wings
- Common Mistakes to Avoid When Baking Wings
- Pro Tips for Restaurant-Quality Oven Wings
- Frequently Asked Questions
- Conclusion
Why Oven-Baked Wings Are Better Than Fried
Before we dive into the recipe, let us talk about why baking is the better choice for most people. When you bake chicken wings in oven, you get all the flavor and crunch with a fraction of the fat and calories. Fried wings absorb oil during cooking, which adds unnecessary calories and can leave you feeling heavy. Baked wings, on the other hand, stay lighter while still delivering bold flavor.
There are practical benefits too. You do not need a deep fryer or a vat of hot oil. Your oven does all the work. There is no risk of burns from splattering grease. Cleanup is simple, and you can bake a large batch without worrying about oil temperature fluctuations. For busy weeknights or casual gatherings, oven-baked wings are honestly the smarter move.
Health Benefits of Baking Wings
When you fry food, it soaks up oil. That adds calories and saturated fat. Baking avoids this entirely. A serving of crispy baked wings can have significantly fewer calories than the fried version. If you are watching your fat intake or just want a lighter option, baking is the clear winner.
You also have full control over the ingredients. Instead of using heavy batter, you can rely on simple seasonings and a touch of baking powder to achieve that crispy skin. This means fewer processed ingredients and more whole foods on your plate. It is a win for flavor and nutrition at the same time.
Convenience and Cleanup
Let us be honest. Frying chicken wings is messy. Oil splatters on the stovetop, counters, and anywhere nearby. You need to cool and strain the oil, dispose of it properly, and scrub pots and pans. With oven baking, you line a sheet pan, place the wings on a rack, and let the oven do the work. When they are done, you toss the pan in the sink and you are basically finished.
The convenience factor alone makes oven baking the preferred method for home cooks. You can walk away while the wings cook, prepare other dishes or sides, and come back when the timer goes off. It is hands-off cooking at its finest.
Choosing the Best Chicken Wings for Baking
The foundation of great oven-baked crispy wings starts with the right cut of chicken. Not all wings are created equal, and knowing what to look for makes a big difference in the final result.
Whole Wings vs. Pre-Cut Wings
You will find two main options at the grocery store. Whole wings include the drumette, the flat, and the tip. Pre-cut wings come already separated into drumettes and flats, with the tips removed. For the best results, go with pre-cut wings or whole wings that you separate yourself. The tips burn easily in the oven, so removing them saves you from a crispy, unpleasant surprise.
Fresh vs. Frozen Wings
Fresh wings generally produce better results. They have a higher moisture content that helps the meat stay juicy during baking. If you use frozen wings, thaw them completely in the refrigerator before baking. Never bake wings straight from frozen, as the outside will overcook before the inside reaches a safe temperature. Thawed wings also season more evenly and crisp up better.
When shopping, look for wings that are plump and moist. Avoid wings that look dry or have a grayish tint. The skin should be smooth and intact. Good quality wings from a reputable butcher or grocery store will always taste better than the cheapest option.
How Much to Buy
A good rule of thumb is about six to eight wings per person if wings are the main event. If you are serving them alongside other dishes, four to five wings per person should be plenty. It is always better to have a few extra than to run out, so do not be shy about buying a little extra.
The Secret to Crispy Baked Chicken Wings
Here is the truth that separates average wings from amazing ones. The secret is not a fancy technique or expensive equipment. It is a combination of three simple steps: drying the skin, using the right seasoning, and managing oven temperature. Master these three things, and your chicken wings in the oven will be crispy perfection every single time.
Step One: Dry the Skin Thoroughly
Moisture is the enemy of crispy skin. The wetter the surface of the wing, the more steam gets trapped during baking, and steam makes things soggy. To avoid this, pat your wings completely dry with paper towels before anything else. Press firmly and repeat with fresh towels until no moisture comes off. Some cooks even let the wings sit uncovered in the refrigerator for a few hours or overnight. This air-drying step removes even more surface moisture and leads to an extra-crispy finish.
Step Two: Use Baking Powder, Not Flour
This is the game-changer most people overlook. A light dusting of baking powder on the wings draws out moisture from the skin during baking. As that moisture evaporates, the skin becomes thin, dry, and incredibly crispy. Regular flour creates a coating, but it can also turn doughy if not used carefully. Baking powder works differently. It chemically reacts with the moisture in the skin, creating that signature crunch without any batter or breading.
Make sure you use aluminum-free baking powder, not baking soda. They are not the same thing. Baking soda can leave a metallic taste and does not produce the same crispy effect. A light, even coating is all you need. Too much baking powder can make the wings taste bitter, so go easy.
Step Three: Bake at High Heat
Temperature is critical for crispy oven-baked wings. You want to bake at 425°F to 450°F. At this heat, the fat under the skin renders out quickly, and the skin crisps up instead of just drying out. Lower temperatures, like 375°F, tend to steam the wings and produce a softer, less satisfying texture.
Also, avoid opening the oven door too often. Every time you open it, the temperature drops, and the wings lose the consistent heat they need to crisp up. Trust the process, set your timer, and let the oven do its job.
Step-by-Step: How to Bake Chicken Wings in Oven
Now that you understand the science behind crispy wings, let us get into the actual recipe. This is the step-by-step process for how to bake chicken wings in oven perfectly every time.
Ingredients You Will Need
- 2 to 3 pounds chicken wings (drumettes and flats)
- 1 tablespoon baking powder (aluminum-free)
- 1 teaspoon salt
- 1/2 teaspoon black pepper
- 1/2 teaspoon garlic powder
- 1/2 teaspoon smoked paprika
- 1/4 teaspoon cayenne pepper (optional, for heat)
Step 1: Preheat and Prep
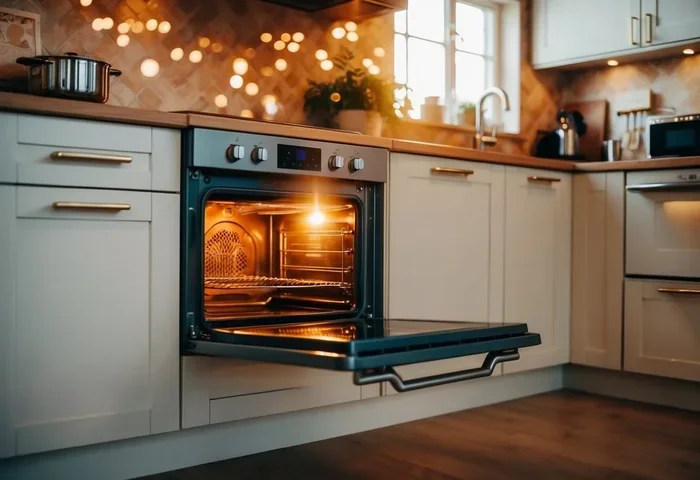
Preheat your oven to 425°F. While the oven is heating up, line a large baking sheet with foil or parchment paper. Place a wire rack on top of the sheet. The wire rack is essential. It allows hot air to flow underneath the wings, which promotes even browning and prevents the bottoms from getting soggy.
Step 2: Dry and Season the Wings
Pat the wings dry with paper towels. In a large bowl, combine the baking powder, salt, pepper, garlic powder, paprika, and cayenne. Add the wings to the bowl and toss them gently until every piece is evenly coated. Make sure there are no clumps of seasoning. The coating should be light and uniform.
Step 3: Arrange on the Rack
Place the wings on the wire rack in a single layer. Do not overlap or crowd them. Each wing should have space around it so air can circulate freely. If you need to bake in multiple batches, that is perfectly fine. Overcrowding the pan is one of the most common reasons wings come out steamed instead of crispy.
Step 4: Bake
Place the pan in the oven on the middle rack. Bake for 40 to 50 minutes, flipping the wings halfway through. Flipping ensures both sides get equally crispy. The wings are done when the skin is golden brown and the internal temperature reaches 165°F. Use a meat thermometer to check. It is the most reliable way to know they are fully cooked.
Step 5: Sauce and Serve
Once the wings are out of the oven, toss them in your favorite sauce while they are still hot. The warm skin absorbs the sauce without losing its crunch. If you prefer naked wings, simply sprinkle with a little extra salt and serve right away. Arrange on a platter and enjoy.
Delicious Sauces and Seasonings for Baked Wings
One of the best things about baked chicken wings is how versatile they are. You can keep them simple with salt and pepper, or go wild with bold, flavorful sauces. Here are some of our favorite combinations to try.
Classic Buffalo Sauce
The timeless favorite. Mix melted butter with hot sauce in a 1:1 ratio. Toss the hot wings in the mixture right after they come out of the oven. The heat of the wings helps the butter melt and coat every piece evenly. Serve with celery sticks and blue cheese dressing for the full experience.
Honey Garlic Wings
For something sweet and savory, combine honey, minced garlic, melted butter, and a splash of soy sauce. Warm the mixture in a saucepan until it thickens slightly. Toss the wings in the glaze and garnish with sesame seeds and chopped green onions.
BBQ Wings
Brush your wings with your favorite barbecue sauce during the last 10 minutes of baking. This lets the sauce caramelize slightly without burning. You can also dip the wings in extra sauce after baking for a more intense flavor.
Lemon Herb Wings
Mix olive oil, lemon juice, minced garlic, dried oregano, thyme, and a pinch of salt. Toss the wings in this mixture after baking for a bright, fresh flavor that pairs perfectly with a side salad.
Asian-Inspired Glaze
Combine soy sauce, rice vinegar, honey, sesame oil, and a touch of sriracha. Warm the glaze and toss the wings in it. Top with sliced scallions and sesame seeds for a restaurant-quality finish.
Common Mistakes to Avoid When Baking Wings
Even with the best recipe, small mistakes can ruin your crispy chicken wings. Here are the pitfalls to watch out for.
Skipping the Drying Step
This is the number one mistake home cooks make. If your wings are wet when they go on the pan, they will steam instead of roast. Always pat them bone dry. The extra minute or two it takes to dry them properly makes a huge difference in texture.
Overcrowding the Pan
Wings need space. When you pile them too close together, the steam has nowhere to go. The result is soggy, unevenly cooked wings. Use two sheet pans if you need to. It is better to bake in two batches than to crowd everything onto one pan.
Using the Wrong Temperature
Baking at too low a temperature is a common error. Wings baked at 350°F or 375°F take longer and often come out soft and pale. You want high heat, 425°F to 450°F, to render the fat and crisp the skin properly. Trust the high heat method for the best results.
Saucing Too Early
Adding sauce before or during baking can make the skin soft and sticky. Always sauce the wings after they come out of the oven. The residual heat is enough to help the sauce cling without compromising the crunch.
Not Letting Wings Rest
Once the wings are done, resist the urge to pile them in a bowl or on a plate. Let them rest on the wire rack for a few minutes. This keeps the steam away from the skin and preserves that beautiful crispiness. If you stack them, the bottom wings will get soggy fast.
Pro Tips for Restaurant-Quality Oven Wings
Take your baked chicken wings to the next level with these expert tips.
- Double-bake method: Bake the wings once at 425°F, remove them, increase the oven temperature to 450°F, and bake again for 10 minutes. This extra blast of heat makes the skin even crispier.
- Use a wire rack every time: Never bake wings directly on a sheet pan without a rack. The rack promotes airflow and prevents steaming.
- Season in stages: Season the wings before baking, then add a light sprinkle of salt immediately after they come out. This double-seasoning technique builds deep flavor.
- Let wings come to room temperature: Take them out of the refrigerator 20 to 30 minutes before baking. Wings that start at room temperature cook more evenly.
- Experiment with dry rubs: Try different spice blends to keep things interesting. Everything bagel seasoning, chili lime, or jerk seasoning all work beautifully on baked wings.
Frequently Asked Questions
Can I use baking soda instead of baking powder for crispy wings?
No, baking soda and baking powder are not interchangeable for this recipe. Baking powder is what creates the crispy skin effect. Baking soda has a different chemical composition and can leave a bitter taste. Always use aluminum-free baking powder for the best results.
How long does it take to bake chicken wings at 400°F?
At 400°F, wings typically need 50 to 60 minutes. However, for the crispiest result, we recommend baking at 425°F to 450°F, which reduces the cook time to 40 to 50 minutes. Higher heat crisps the skin faster and renders the fat more effectively.
Should I flip the wings halfway through baking?
Yes, flipping the wings halfway through ensures even browning on both sides. If you do not flip them, the top side may be perfectly crispy while the bottom side stays pale and soft. A quick flip at the 20- to 25-minute mark makes a noticeable difference.
Can I bake frozen wings directly from the freezer?
It is not recommended. Frozen wings take much longer to bake, and the outside tends to overcook before the inside reaches a safe temperature. Always thaw wings in the refrigerator overnight before baking for the best results.
What is the best way to keep wings crispy after saucing?
The key is to sauce the wings immediately after they come out of the oven while they are still very hot. The heat helps the sauce set on the surface without soaking into the skin. Serve them on a wire rack rather than a plate to prevent steam from softening the bottom.
Can I make oven-baked wings ahead of time?
You can bake them ahead and reheat them, but they will not be as crispy as fresh-out-of-the-oven wings. To reheat, place them on a wire rack in a 400°F oven for 5 to 8 minutes. This helps restore some of the crunch. For the best experience, bake them fresh and serve immediately.
Conclusion
How to bake chicken wings in oven is a simple process that yields impressive, crowd-pleasing results every time. With the right technique, you can create crispy baked chicken wings at home that taste just as good as anything from a restaurant or a deep fryer. The key is to dry the skin, use baking powder, bake at high heat, and sauce at the end.
Once you master the basics, you can get creative with seasonings and sauces. Try new flavor combinations, experiment with different spice rubs, and find your personal favorite. Once you start making oven-baked wings, you will never go back to frying again. They are healthier, easier, and honestly more delicious when you nail the technique.
So next time you are craving wings, skip the takeout and fire up your oven. With this guide in hand, you have everything you need to make perfect oven-baked crispy wings right in your own kitchen. Your family and friends will be impressed, and you will have leftovers for tomorrow’s lunch. Happy baking.