How To Make Low Calorie Coffee Creamer From Scratch
Making a low calorie coffee creamer at home is simple, affordable, and far healthier than store-bought options. You control every ingredient, skip artificial additives, and customize flavors to your liking. This guide covers easy recipes, storage tips, and common mistakes to help you create the perfect creamy addition to your daily brew.
Your morning cup of coffee deserves better than the sugary, artificial creamers sitting on grocery store shelves. Most commercial options are loaded with hidden sugars, preservatives, and ingredients you cannot pronounce. That is exactly why learning how to make low calorie coffee creamer from scratch is a game changer. You get full control over what goes into your cup, and the process is surprisingly simple.
Whether you are watching your calorie intake, cutting sugar, or just want a fresher taste, a homemade low calorie coffee creamer fits the bill perfectly. In this guide, we walk you through everything you need to know. From essential ingredients to step-by-step recipes, storage hacks, and common pitfalls, you will have all the tools to upgrade your daily coffee routine.
The best part? Most recipes take less than five minutes to prepare. No special equipment is needed. Just a few pantry staples and a jar with a lid. Let us dive in and explore how easy it really is to craft your own healthy creamer at home.
Key Takeaways
- Homemade creamer saves money: A single batch costs a fraction of store-bought brands and lasts up to two weeks in the fridge.
- You control what goes in: No artificial sweeteners, preservatives, or hidden sugars when you make your own low calorie coffee creamer.
- Multiple recipe options exist: From dairy-based to plant-based, there is a recipe for every dietary preference.
- Flavor customization is easy: Add vanilla, cocoa, cinnamon, or caramel for a gourmet touch without extra calories.
- Proper storage matters: Keeping your creamer in an airtight container ensures freshness and prevents spoilage.
- Common mistakes are easy to avoid: Using the wrong sweetener or skipping stabilizers can ruin texture and taste.
📑 Table of Contents
- Why Make Your Own Low Calorie Coffee Creamer?
- Essential Ingredients for Homemade Low Calorie Creamer
- Easy Low Calorie Coffee Creamer Recipes
- How to Store Your Homemade Low Calorie Coffee Creamer
- Tips for the Best Tasting Low Calorie Creamer
- Common Mistakes to Avoid When Making Low Calorie Creamer
- Expert Insights: Why Homemade Creamer Wins Every Time
- Frequently Asked Questions About Low Calorie Coffee Creamer
- Conclusion
Why Make Your Own Low Calorie Coffee Creamer?
Store-bought coffee creamers might seem convenient, but they come with hidden costs. Many popular brands contain trans fats, high fructose corn syrup, and artificial flavors. A single serving can pack more sugar than you realize. When you make your own low calorie coffee creamer, you eliminate all of that.
Here are the biggest reasons to start making your own:
- Ingredient transparency: You know exactly what is in every drop. No hidden sugars or chemical additives.
- Calorie control: Store-bought creamers often contain 30 to 60 calories per tablespoon. Homemade versions can drop that to 5 to 15 calories.
- Cost savings: A bottle of commercial creamer costs $3 to $6 and lasts only a week or two. Homemade batches cost a fraction of that and last longer.
- Flavor freedom: Want vanilla today and mocha tomorrow? You decide every flavor.
- Dietary flexibility: Whether you are dairy-free, keto, vegan, or just watching sugar, you can tailor the recipe to your needs.
Switching to a homemade low calorie coffee creamer is one of the easiest small changes you can make for better health. It takes almost no time, costs very little, and the results taste far superior to anything from a plastic bottle on the shelf.
Essential Ingredients for Homemade Low Calorie Creamer
Before you start, it helps to know what goes into a great low calorie coffee creamer. The base ingredients are simple and easy to find at any grocery store. You do not need specialty items or hard-to-source supplements.
Base Liquids
The foundation of any creamer is the liquid base. Here are the most popular options:
- Whole milk or skim milk: Classic and creamy. Skim milk offers fewer calories while still delivering a smooth texture.
- Almond milk: A popular non-dairy choice with only about 30 calories per cup. It blends well and adds a subtle nutty flavor.
- Coconut milk (light): Adds a rich, creamy consistency with a hint of natural sweetness. Light versions keep the calorie count low.
- Oat milk: Naturally sweet and velvety. A great option for those who want a dairy-free but creamy result.
Sweeteners
Traditional creamers rely heavily on sugar. For a low calorie version, consider these alternatives:
- Stevia: A natural zero-calorie sweetener derived from plants. A little goes a long way.
- Monk fruit sweetener: Another natural option with no calories and a clean, sweet taste.
- Honey: Use sparingly. It adds a touch of natural sweetness and trace nutrients.
- Maple extract: Provides flavor without adding significant calories when used in small amounts.
Flavor Boosters
This is where homemade creamer really shines. You can add depth and complexity without any extra calories:
- Vanilla extract: The most classic addition. A few drops transform plain creamer into something special.
- Cinnamon: Adds warmth and sweetness naturally. Great for fall and winter mornings.
- Cocoa powder: Unsweetened cocoa gives you a mocha flavor without the sugar.
- Almond extract: A nutty, aromatic option that pairs beautifully with almond milk.
- Coconut extract: Complements coconut milk perfectly for a tropical twist.
Stabilizers and Thickeners
Commercial creamers use stabilizers to keep the mixture smooth and prevent separation. At home, you can achieve similar results with simple additions:
- Gelatin: A small amount helps the creamer stay emulsified and creamy.
- Xanthan gum: Just a pinch prevents the liquid from separating. Use sparingly to avoid a gummy texture.
- Coconut cream: Adds natural thickness and richness without artificial thickeners.
With these ingredients on hand, you are ready to start making your own low calorie coffee creamer. Having everything prepped before you begin makes the process quick and enjoyable.
Easy Low Calorie Coffee Creamer Recipes
Now for the fun part. Here are three simple recipes you can make right away. Each one is designed to be low in calories, free of artificial ingredients, and delicious in your morning cup.
Recipe 1: Classic Vanilla Low Calorie Creamer
This is the simplest place to start. It takes under three minutes and uses ingredients you likely already have in your kitchen.
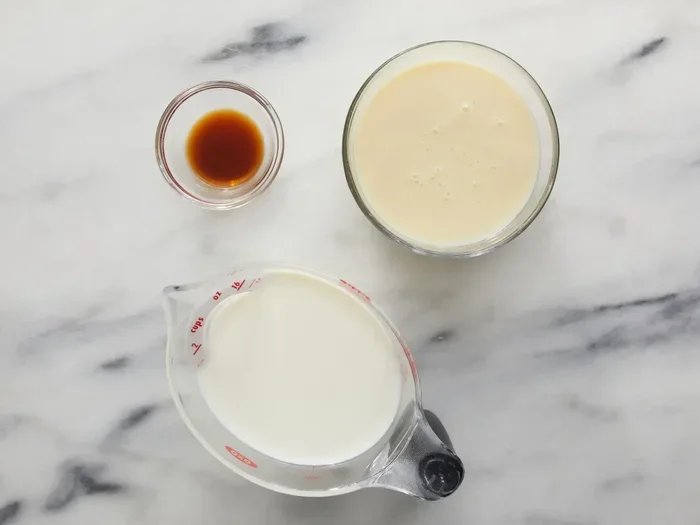
Ingredients:
- 1 cup skim milk
- 2 tablespoons almond milk (unsweetened)
- 1 teaspoon vanilla extract
- 1 to 2 drops liquid stevia (adjust to taste)
- A pinch of xanthan gum (optional, for thickness)
Instructions:
- Combine the skim milk and almond milk in a small jar or bottle.
- Add the vanilla extract and stevia drops.
- If using xanthan gum, sprinkle it in and shake or stir vigorously.
- Seal the jar and shake well for 30 seconds.
- Refrigerate for at least one hour before using.
This vanilla creamer stays fresh for up to 10 days in the refrigerator. It adds about 15 calories per tablespoon to your coffee. The vanilla gives it a warm, familiar flavor that pairs perfectly with any roast.
Recipe 2: Keto-Friendly Coconut Mocha Creamer
Following a keto or low carb diet? This recipe delivers rich mocha flavor with minimal calories and no sugar.
Ingredients:
- 1 cup light coconut milk
- 2 tablespoons unsweetened almond milk
- 1 tablespoon unsweetened cocoa powder
- 1 teaspoon coconut extract
- 2 to 3 drops monk fruit sweetener
- A pinch of salt
Instructions:
- Whisk the cocoa powder into the coconut milk until fully dissolved. No lumps should remain.
- Add the almond milk, coconut extract, and monk fruit sweetener.
- Add a pinch of salt to balance the sweetness.
- Stir or shake the mixture until smooth and well combined.
- Pour into a sealed container and refrigerate for at least two hours.
This mocha creamer keeps well for up to two weeks in the fridge. It adds roughly 10 calories per tablespoon. The cocoa gives it a deep, rich flavor that feels indulgent without the guilt.
Recipe 3: Cinnamon Oat Milk Creamer
For a dairy-free option with natural sweetness and cozy warmth, this oat milk creamer is a winner.
Ingredients:
- 1 cup oat milk (unsweetened)
- 1/2 teaspoon ground cinnamon
- 1/2 teaspoon vanilla extract
- 1 to 2 drops stevia (optional)
- 1 teaspoon coconut cream (for added richness)
Instructions:
- Pour the oat milk into a jar or bottle.
- Add the cinnamon, vanilla extract, and stevia if using.
- Add the coconut cream and stir or shake until fully blended.
- Let it sit in the refrigerator for at least one hour to let the flavors meld.
- Shake before each use, as natural separation may occur.
This creamer lasts about 7 to 10 days in the fridge. It adds approximately 8 calories per tablespoon. The cinnamon adds natural sweetness, so you may find you do not even need the stevia.
How to Store Your Homemade Low Calorie Coffee Creamer
Proper storage is key to keeping your homemade creamer fresh and safe. Unlike store-bought versions loaded with preservatives, your creamer lacks artificial shelf-life extenders. That means you need to be a bit more careful with storage.
Here are the best practices for storing your low calorie coffee creamer:
- Use an airtight container: A glass jar with a tight-fitting lid works perfectly. It keeps out odors and prevents the creamer from absorbing flavors from your fridge.
- Refrigerate immediately: Never leave your creamer at room temperature for more than two hours. Bacteria grow quickly in dairy-based mixtures.
- Label and date your container: Write the date you made the creamer on the lid. This helps you track freshness and avoid using it past its prime.
- Shake before each use: Natural separation is normal. A quick shake restores the smooth consistency.
- Use within 10 to 14 days: Most homemade creamers last about two weeks. If you notice any off smell, color change, or clumping, discard it immediately.
If you want to make larger batches, consider using smaller jars. This reduces the number of times you open the container, which helps extend freshness. Keeping your kitchen clean also matters. After preparing your creamer, wash your jars and utensils thoroughly. A quick wipe-down of your counters and any spills helps maintain a hygienic workspace. For cleaning kitchen surfaces and appliances, a dishwasher tablet can be surprisingly effective, even for tough messes in the oven or on stovetops. It is a simple habit that keeps your cooking area fresh and ready for your next batch.
Tips for the Best Tasting Low Calorie Creamer
Making a great low calorie coffee creamer is easy once you know a few pro tips. These small adjustments make a big difference in flavor, texture, and overall satisfaction.
Use Cold Ingredients
Always start with cold milk or plant-based milk. Cold liquids blend more smoothly and create a creamier texture. If you use warm ingredients, the mixture may curdle slightly when added to hot coffee.
Add Sweetener Gradually
It is easy to over-sweeten. Add sweetener drop by drop, tasting as you go. You can always add more, but you cannot take it away. This is especially important with concentrated sweeteners like stevia and monk fruit.
Let Flavors Develop
Homemade creamer tastes best after sitting in the fridge for a few hours. The flavors have time to meld and deepen. Making your creamer the night before ensures it is ready and delicious in the morning.
Experiment with Ratios
Every coffee is different. Some brews are bold and dark, while others are light and delicate. Adjust your creamer ratio accordingly. Start with one tablespoon per cup and increase or decrease based on your preference.
Keep It Simple
You do not need a long ingredient list. The best low calorie creamers use just three to five ingredients. Overcomplicating the recipe can lead to strange textures or flavors that clash with your coffee.
Match the Creamer to Your Milk
Consider what type of milk you drink your coffee with. If you use almond milk in your cup, an almond-based creamer blends seamlessly. Mismatching bases can sometimes create a slightly grainy or separated texture.
Common Mistakes to Avoid When Making Low Calorie Creamer
Even simple recipes have pitfalls. Avoiding these common mistakes ensures your homemade low calorie coffee creamer turns out perfectly every time.
- Using too much xanthan gum: A little goes a long way. Too much creates a slimy, gel-like texture that ruins the creamer. Stick to a tiny pinch.
- Skipping the stabilizer: Without some form of thickener, dairy-based creamers tend to separate quickly. A small amount of xanthan gum or gelatin keeps the mixture smooth.
- Using flavored extracts generously: A few drops of vanilla or almond extract is enough. Too much can make the creamer taste artificial or overpowering.
- Storing in the wrong container: Plastic containers can absorb odors over time. Glass jars are the best choice for keeping your creamer tasting fresh.
- Ignoring expiration dates on ingredients: Even though the creamer is homemade, the milk or plant milk you use has its own shelf life. Always check freshness dates before starting.
- Not shaking before use: Natural separation is completely normal and not a sign of spoilage. A quick shake restores the creamy consistency.
Taking a few extra minutes to avoid these mistakes saves you from wasting ingredients and ending up with a disappointing result. A little attention to detail goes a long way in producing a creamer that rivals anything you can buy at the store.
Expert Insights: Why Homemade Creamer Wins Every Time
Nutritionists and food experts consistently recommend homemade creamers over commercial alternatives. The reasons are clear and well-documented.
Registered dietitians point out that most store-bought creamers contain partially hydrogenated oils, which are a source of trans fats. These fats raise bad cholesterol levels and increase heart disease risk. When you make your own low calorie coffee creamer, you completely avoid these harmful ingredients.
Food scientists also note that homemade creamers lack the emulsifiers and stabilizers found in commercial products. While these additives extend shelf life, they can cause digestive discomfort for sensitive individuals. A simple, clean ingredient list is easier on your stomach and your overall health.
Beyond health benefits, culinary experts appreciate the creative freedom homemade creamers offer. You can experiment with seasonal flavors, adjust sweetness levels, and create a product that perfectly matches your coffee and personal taste. It is one of the easiest kitchen upgrades you can make.
Keeping your kitchen equipment in good shape also supports your creamer-making journey. For instance, maintaining your oven and kitchen appliances ensures everything works efficiently. If you own a Kitchenaid oven, learning how to use the Aqualift self clean function helps keep your appliance running smoothly. A clean, well-maintained kitchen makes the entire cooking and prep process more enjoyable and hygienic.
Frequently Asked Questions About Low Calorie Coffee Creamer
Can I use non-dairy milk for all the recipes?
Absolutely. All three recipes work perfectly with non-dairy milks like almond milk, oat milk, or coconut milk. Non-dairy options tend to be lower in calories already, making them ideal for a low calorie coffee creamer. Just check the label for added sugars and choose unsweetened versions whenever possible.
How long does homemade coffee creamer last in the fridge?
Most homemade creamers stay fresh for 7 to 14 days when stored in an airtight container in the refrigerator. Dairy-based creamers tend to last closer to 7 to 10 days, while plant-based versions can stretch to 14 days. Always check for signs of spoilage like off smells, discoloration, or curdling before using.
Can I make a batch without any sweetener at all?
Yes, you can. Many people enjoy their coffee black or with just a splash of plain milk. If you prefer unsweetened creamer, simply skip the sweetener and add a splash of vanilla extract for flavor. The creamer will still add creaminess and richness to your cup without any calories from sweeteners.
Is xanthan gum safe for daily use in small amounts?
Yes. The tiny amount used in coffee creamer, usually less than 1/8 teaspoon per batch, is perfectly safe for daily consumption. Xanthan gum is a widely used food additive that helps with texture and stability. If you prefer to avoid it entirely, gelatin is a suitable alternative for dairy-based creamers.
Can I freeze homemade coffee creamer?
It is not recommended. Freezing can cause dairy and plant milks to separate and change texture. After thawing, the creamer may look curdled or grainy. It is best to make small batches that you can use within the recommended storage timeframe.
Will homemade creamer work in iced coffee?
Yes, homemade creamer works beautifully in both hot and iced coffee. For iced coffee, consider making the creamer a bit slightly sweeter, as cold temperatures dull sweetness perception. Shake well before adding to your iced coffee, as separation happens more noticeably when the creamer is cold.
Conclusion
Making your own low calorie coffee creamer is one of the simplest, most rewarding changes you can make to your morning routine. It takes just minutes, costs very little, and gives you complete control over what goes into your cup. No more guessing about hidden sugars, artificial flavors, or questionable ingredients. Just clean, simple, delicious creamer that you made yourself.
With the recipes and tips in this guide, you have everything you need to get started. Try the classic vanilla version first, then experiment with mocha, cinnamon, or other flavors as you grow confident. Each batch is an opportunity to fine-tune the taste and texture until it is exactly how you like it.
Your coffee is the first thing you consume each day. Making it healthier with a homemade low calorie coffee creamer is a small step that adds up to big benefits over time. You will taste the difference, feel better, and wonder why you ever settled for store-bought creamer in the first place.
Start today. Grab a jar, pick a recipe, and enjoy a cleaner, creamier, more intentional cup of coffee tomorrow morning. Your taste buds and your health will thank you.