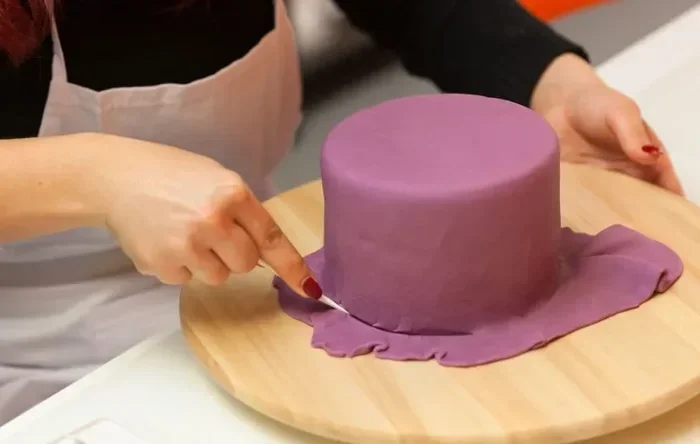
How To Harden Fondant In The Oven For Perfect Results
Learning how to harden fondant in the oven is a game-changer for cake decorators. This guide walks you through the exact temperature, timing, and preparation steps to get firm, long-lasting fondant pieces. Whether you are making fondant figurines, flowers, or cake toppers, oven hardening gives you professional results at home. You will also learn common mistakes to avoid and quick fixes for problems. By the end, you will feel confident creating stunning, durable fondant decorations every single time.
There is something truly magical about watching a plain cake transform into a stunning work of art. How to harden fondant in the oven is one of the most valuable skills any cake decorator can learn. Fondant gives cakes a smooth, polished look that buttercream simply cannot match. But left untreated, fondant stays soft and delicate. That makes it fragile and prone to damage during transport or display.
The oven method solves this problem completely. By applying gentle, controlled heat, you turn soft sugar paste into firm, durable decorations that hold their shape for months. This technique works for fondant flowers, figurines, letters, and intricate cake toppers. In this article, we will walk you through every single step. You will learn the right temperature, the perfect timing, and the common mistakes that trip up beginners. Let us dive in and get your fondant game to the next level.
Key Takeaways
- Low and slow is the rule: Always use a low oven temperature between 200°F and 225°F to harden fondant without melting it.
- Prep matters: Rolling fondant thin and letting it air dry before baking leads to much better results.
- Timing varies by size: Small fondant pieces may only need 10 to 15 minutes, while larger figures can take up to an hour.
- Avoid common pitfalls: Too much heat, thick pieces, or skipping the drying step causes cracks, bubbles, or melting.
- Storage extends life: Properly stored hardened fondant can last for months, keeping your cake decorations looking fresh.
- Alternative methods exist: Air drying and using a dehumidifier are great options if you prefer not to use an oven.
- Practice makes perfect: Your first few attempts may need adjustment, but you will master the technique quickly with patience.
📑 Table of Contents
- Why Hardening Fondant Matters for Cake Decorating
- Preparing Your Fondant for Oven Hardening
- The Oven Hardening Process Step by Step
- Tips for Perfectly Hardened Fondant Every Time
- Troubleshooting Common Fondant Hardening Problems
- Comparing Oven Hardening to Other Methods
- Storing and Using Hardened Fondant Pieces
- Expert Insights on Oven Hardening Techniques
- Key Takeaways
- Conclusion
Why Hardening Fondant Matters for Cake Decorating
Not all fondant is created equal when it comes to holding shape. Freshly rolled fondant is soft, pliable, and delicate. It works beautifully for covering cakes because it drapes smoothly over the surface. But when you create three-dimensional pieces like characters, flowers, or standalone decorations, softness becomes a real problem.
Hardened fondant holds its form. It does not bend, sag, or lose detail. This is especially important for wedding cakes, themed birthday cakes, and show-stopping display pieces. Fondant hardening also protects your decorations from humidity, which is one of the biggest enemies of sugar-based crafts. A properly hardened piece can sit on a cake for weeks without changing shape or texture.
There are several ways to harden fondant. Air drying is the most common and requires no equipment at all. Using tylose powder or CMC powder mixed into the fondant adds structural strength. But the oven method is the fastest and most reliable option for achieving professional-grade firmness. It is especially useful when you are working on a tight deadline and cannot wait days for pieces to air dry.
The Science Behind Oven Hardening
Here is what actually happens when you put fondant in the oven. Fondant is primarily made of sugar, water, and gelatin or glycerin. When heat is applied, the water evaporates slowly. As the moisture leaves, the sugar molecules bond tighter and form a rigid structure. This is why low heat is so important. High heat causes the water to escape too quickly, which leads to cracking and bubbling.
Think of it like drying clay. If you bake clay too fast, it cracks. The same principle applies to sugar paste. Gentle, even heat removes moisture at a controlled rate. This preserves the shape and detail of your fondant pieces. It also prevents the sugar from caramelizing or turning brown, which can ruin the appearance of white or pastel decorations.
Preparing Your Fondant for Oven Hardening
Preparation is the step most people skip, and it is also the step that makes the biggest difference. Rushing into the oven without proper prep leads to uneven results, wasted pieces, and a lot of frustration. Taking a few extra minutes to prepare your fondant will save you hours of fixing problems later.
Choosing the Right Fondant Recipe
Not all fondant recipes respond the same way to heat. Store-bought fondant works well for oven hardening because it already contains stabilizers. homemade fondant can also work, but the results vary depending on the recipe. Fondant that is too wet will take longer to harden and may not set properly. Fondant that is too dry will crack in the oven.
Here are some tips for choosing or making the right fondant:
- Use quality store-bought fondant for consistent results, especially when you are just starting out.
- Add tylose powder to homemade fondant for extra strength and better oven performance.
- Knead the fondant thoroughly before shaping. This removes air bubbles and creates a smooth, uniform texture.
- Avoid fondant with high moisture content. If the fondant feels sticky or tacky, it needs more kneading or a dusting of cornstarch.
Shaping and Drying Before Baking
Before anything goes near the oven, your fondant pieces need to be shaped and partially dried. This step is often overlooked but it is essential for the best results. Start by rolling your fondant to the right thickness. For most decorations, a thickness of about 1/8 inch works perfectly. Thicker pieces need more time in the oven and are more likely to crack.
Use cookie cutters for uniform shapes. For figurines and sculpted pieces, use your hands and simple tools like clay shapers or toothpicks. Once shaped, let the pieces air dry for at least 30 minutes before baking. This initial drying removes surface moisture and helps the piece hold its shape during the oven process. You will notice the fondant feels firmer and less sticky after this short resting period.
Place the shaped pieces on a parchment-lined baking sheet. Make sure they do not touch each other. Giving each piece space allows heat to circulate evenly around every decoration. This small step prevents pieces from sticking together or losing their fine details.
The Oven Hardening Process Step by Step
This is where the magic happens. The oven hardening process is simple, but precision matters. Follow these steps carefully, and you will get fantastic results every time.
Step One: Set the Right Temperature
The ideal temperature for hardening fondant in the oven is between 200°F and 225°F. This is a very low temperature, much lower than what you would use for baking cookies or cakes. The goal is not to cook the fondant. The goal is to gently evaporate the moisture inside it while preserving its shape and color.
Always preheat your oven before placing the fondant inside. Use an oven thermometer to verify the temperature. Many home ovens run hotter or cooler than their displayed settings. An inaccurate oven can mean the difference between perfectly hardened fondant and a melted mess.
Here is a quick temperature guide for reference:
- 200°F: Best for delicate pieces like fondant flowers and thin decorations. This is the safest option for beginners.
- 210°F: Great for medium-thickness pieces and fondant toppers. A solid all-around temperature for most projects.
- 225°F: Use only for thicker pieces that need faster drying. Monitor closely to prevent browning or cracking.
Step Two: Place Fondant in the Oven
Once your oven reaches the target temperature, place the baking sheet with fondant pieces on the middle rack. The middle rack provides the most even heat distribution. Avoid placing pieces on the top or bottom rack, as these zones tend to have more intense heat.
Keep the oven door slightly ajar during the process. This allows moisture to escape and prevents steam from building up inside. You can prop the door open with a wooden spoon or oven mitt. The slight gap also helps regulate temperature and prevents the oven from getting too hot.
Set a timer for 10 minutes to start. Check the pieces frequently during the first session. You are looking for firmness and a slight change in texture. The fondant should feel dry to the touch but should not change color significantly.
Step Three: Monitor and Flip
After the first 10 minutes, carefully remove the baking sheet. Use oven mitts to protect your hands. Gently touch the bottom of each piece to check for firmness. If the piece still feels soft or cool, it needs more time.
Flip each piece over carefully. This ensures both sides dry evenly. Return the tray to the oven for another 5 to 10 minutes. Continue this process of checking and flipping until the fondant feels firm and lightweight. Most pieces need between 15 and 30 minutes total in the oven, depending on their size and thickness.
Larger sculpted pieces like figurines may need up to an hour of total drying time. Remove them periodically to check progress. If you notice any browning or color changes, lower the temperature immediately. A slight golden tint is okay for some projects, but significant browning means the heat is too high.
Tips for Perfectly Hardened Fondant Every Time
Even with the best preparation, things can go wrong. These expert tips will help you avoid common problems and achieve consistently great results with your fondant hardening projects.
Quick Tips for Success
- Start with room temperature fondant. Cold fondant is stiff and difficult to shape. Warm it in your hands for a few minutes before working with it.
- Use a fan in the room. Good air circulation speeds up both air drying and oven drying. It also helps prevent moisture buildup in the oven.
- Dust with cornstarch sparingly. Too much cornstarch creates a powdery residue that can show on finished pieces. Use just enough to prevent sticking.
- Invest in an oven thermometer. This inexpensive tool takes the guesswork out of temperature control and dramatically improves results.
- Work in a dry environment. Humidity is the enemy of fondant. If your kitchen is humid, use a dehumidifier or air conditioner while working.
- Practice with scrap pieces first. Before committing your best fondant to the oven, test with leftover pieces to find the perfect timing and temperature for your specific oven.
Common Mistakes to Avoid
Even experienced decorators make mistakes. Here are the most common errors when hardening fondant in the oven and how to avoid them:
- Using too high a temperature. This is the number one mistake. High heat melts fondant, causes colors to bleed, and creates an uneven texture. Always stick to the low temperature range.
- Skipping the air dry step. Placing wet fondant directly in the oven traps moisture inside. This leads to steaming, bubbling, and poor results.
- Overcrowding the baking sheet. Pieces that touch each other will stick together and lose detail. Give every piece plenty of space.
- Opening the oven door too often. Each time you open the door, the temperature drops significantly. This creates uneven drying and extends the total time needed.
- Ignoring the size and thickness of pieces. A thick figurine and a thin flower need very different drying times. Adjust accordingly based on the size of each piece.
Troubleshooting Common Fondant Hardening Problems
Sometimes things do not go as planned. That is completely normal, especially when you are learning how to harden fondant in the oven. Here are solutions to the most common problems you might encounter.
What To Do If Fondant Cracks
Cracking usually happens when fondant dries too fast or is too thin in certain areas. If you notice cracks forming during oven drying, lower the temperature by 10 to 15 degrees immediately. You can also try brushing a tiny amount of water on the cracked area and gently pressing it back together while it is still warm.
Prevention is easier than repair. Roll fondant to an even thickness throughout. Use a rolling pin with thickness rings for consistency. Also, make sure your fondant is properly kneaded before shaping. Under-kneaded fondant has uneven moisture distribution, which leads to cracking in the oven.
What To Do If Fondant Melts or Droops
If your fondant pieces start to melt or lose their shape, the oven temperature is too high. Remove the tray immediately and let the pieces cool completely. You may be able to reshape them if they are still warm and pliable. Once fully cooled, melted fondant cannot be salvaged and will need to be remade.
To prevent melting in the future, double-check your oven temperature with a thermometer. Reduce the temperature by 10 degrees and try again. Also, make sure your fondant pieces are not too thick. Thin, even pieces are much more forgiving than thick ones.
What To Do If Fondant Turns Brown or Discolored
Browning happens when the oven temperature is too high or the fondant stays in too long. Sugar caramelizes at relatively low temperatures, which is why even 225°F can cause discoloration on some pieces. If browning occurs, you have gone too hot or too long.
To prevent discoloration, stay in the 200°F to 210°F range and check pieces frequently. White fondant is especially prone to yellowing. If you need to keep pieces pure white, use the lowest effective temperature and the shortest drying time possible. Some decorators also add a tiny drop of white gel food coloring to maintain brightness during drying.
Comparing Oven Hardening to Other Methods
There are several ways to harden fondant, and each has its own advantages. Understanding the differences helps you choose the best method for each project.
Oven Hardening vs. Air Drying
Air drying is the simplest method. You simply leave shaped fondant pieces out in a dry, well-ventilated area for 24 to 48 hours. It requires no equipment and no heat. However, air drying is slow and results can vary based on humidity levels. In humid climates, air drying can take several days or may not fully harden the fondant at all.
Oven hardening is much faster. Most pieces are ready in 15 to 30 minutes. The results are more consistent because you control the temperature and environment. The trade-off is that you need an oven and must monitor the process carefully. For cake decorators who work on tight timelines, oven hardening is the clear winner.
Oven Hardening vs. Using Tylose Powder
Tylose powder, also known as CMC powder, is a binding agent that you mix into fondant before shaping. It creates a stronger, more elastic fondant that holds its shape better. Fondant with tylose can air dry more effectively and is less prone to cracking.
Oven hardening works well on its own or in combination with tylose. Using both methods together produces the firmest, most durable results. Tylose gives the fondant internal structure, while the oven removes moisture for external firmness. For professional cake decorators, this combination is the gold standard.
Storing and Using Hardened Fondant Pieces
Once your fondant pieces are fully hardened, proper storage keeps them looking great for months. Let pieces cool completely at room temperature before storing. Placing warm fondant in an airtight container creates condensation, which softens the hard surface you worked so hard to achieve.
Store hardened fondant pieces in airtight containers or zip-lock bags. Add silica gel packets to absorb any residual moisture. Keep containers in a cool, dry place away from direct sunlight. Properly stored fondant decorations can last for six months or more without any loss of shape or quality.
When attaching hardened fondant to a cake, use edible glue or a small amount of water as adhesive. Press the piece gently onto the cake surface. Hardened fondant pieces are sturdy enough to handle during transport, but they should still be treated with care. Avoid stacking heavy items on top of delicate decorations.
Expert Insights on Oven Hardening Techniques
Professional cake decorators have been using oven hardening techniques for decades. Here are some insider tips that can elevate your results from good to exceptional.
Many experts recommend doing a test run with a small piece of fondant before committing your best work to the oven. This test piece tells you exactly how your specific oven behaves. Every oven has hot spots and temperature variations. A simple test run helps you understand your oven’s unique quirks and adjust accordingly.
Another expert tip is to use a wire rack instead of a flat baking sheet. A wire rack allows air to circulate underneath the fondant pieces, promoting even drying on all sides. This is especially helpful for thicker pieces that need longer drying times. Simply place the wire rack on top of a baking sheet to catch any drips or residue.
Some decorators also like to brush a thin layer of edible lacquer or confectioners glaze on hardened fondant pieces after they come out of the oven. This adds a subtle sheen and provides an extra layer of protection against humidity and handling. It is a small step that makes a noticeable difference in the finished look and durability of your decorations.
Key Takeaways
- Low and slow is the rule: Always use a low oven temperature between 200°F and 225°F to harden fondant without melting it.
- Prep matters: Rolling fondant thin and letting it air dry before baking leads to much better results.
- Timing varies by size: Small fondant pieces may only need 10 to 15 minutes, while larger figures can take up to an hour.
- Avoid common pitfalls: Too much heat, thick pieces, or skipping the drying step causes cracks, bubbles, or melting.
- Storage extends life: Properly stored hardened fondant can last for months, keeping your cake decorations looking fresh.
- Alternative methods exist: Air drying and using a dehumidifier are great options if you prefer not to use an oven.
- Practice makes perfect: Your first few attempts may need adjustment, but you will master the technique quickly with patience.
Conclusion
How to harden fondant in the oven is a skill that opens up a world of creative possibilities for cake decorating. With the right temperature, proper preparation, and a little patience, you can create firm, durable fondant pieces that look professional and last for months. The oven method is fast, reliable, and gives you consistent results that air drying simply cannot match.
Remember to start low and slow with temperatures between 200°F and 225°F. Always air dry your pieces before baking. Watch them closely during the drying process and flip them regularly for even results. Avoid the common mistakes of overheating, overcrowding, and skipping preparation steps. With these guidelines in mind, you are well on your way to creating beautiful, long-lasting fondant decorations that will impress everyone who sees your cakes.
Now it is your turn. Gather your fondant, preheat your oven, and try these techniques on your next cake project. You will be amazed at how much better your decorations look and hold up. Happy decorating, and enjoy the process of creating something truly special with fondant hardening techniques that really work.
Frequently Asked Questions
Can you harden fondant in a regular home oven?
Yes, absolutely. A regular home oven works perfectly for hardening fondant. The key is to keep the temperature low, between 200°F and 225°F. Most home ovens work great for this purpose, and you do not need any special equipment beyond a basic oven thermometer to ensure accuracy.
How long does it take to harden fondant in the oven?
The time depends on the size and thickness of the fondant piece. Small, thin pieces like fondant flowers typically need 10 to 15 minutes. Medium-sized pieces like letters and shapes take about 15 to 25 minutes. Larger sculpted figurines may need 30 minutes to an hour of total drying time with periodic checking.
What temperature should I use to harden fondant in the oven?
The ideal temperature range is 200°F to 225°F. This low heat gently removes moisture without melting or browning the fondant. Always preheat your oven and use a thermometer to verify the temperature, as many ovens run hotter or cooler than their displayed settings.
Can you overheat fondant in the oven?
Yes, overheating fondant is a real risk. Too much heat causes the sugar to caramelize, which turns white fondant brown and melts the shape. If you notice any browning or melting, remove the pieces immediately and lower the temperature for future attempts. Prevention through careful temperature control is the best approach.
Do I need to air dry fondant before putting it in the oven?
Yes, air drying for at least 30 minutes before oven drying is strongly recommended. This initial drying removes surface moisture and helps the piece hold its shape during baking. Skipping this step can lead to steaming, bubbling, and poor results inside the oven.
Is oven-hardened fondant safe to eat?
Yes, oven-hardened fondant is safe to eat as long as you use food-grade fondant and keep the temperature below caramelization point. The oven drying process simply removes moisture and does not make the fondant unsafe. However, hardened fondant is quite firm and may not have the best texture when eaten on its own.