How To Clean Your Cuisinart Coffee Maker K Cup Side
Keeping your Cuisinart coffee maker K Cup side clean ensures great-tasting coffee every single morning. This guide walks you through simple, proven steps to remove buildup, descale, and maintain every part of the K Cup mechanism. You will learn quick daily habits and deep cleaning methods that save time and money.
Nothing beats the convenience of a Cuisinart coffee maker K Cup side for a quick morning cup. But here is the thing most people overlook. That handy K Cup mechanism collects coffee oils, mineral deposits, and residue over time. If you ignore it, your coffee starts tasting bitter or flat.
Cleaning the K Cup side of your Cuisinart machine is not hard. It takes just a few minutes and uses things you already have at home. In this guide, we walk you through every step. You will learn how to do a quick daily rinse, a weekly deep clean, and a monthly descale. By the end, you will know exactly how to keep your machine running like new.
Whether you brew one cup or several, the K Cup side handles the pods that make your morning routine so easy. Taking care of it means better flavor, fewer jams, and a machine that lasts longer. Let us get into it.
Key Takeaways
- Daily rinsing prevents buildup: A quick rinse after each brew keeps the K Cup side free from coffee residue and oils.
- Vinegar and water descale effectively: A simple vinegar solution removes hard water deposits from the K Cup mechanism and internal pathways.
- Deep cleaning every month extends lifespan: Regular deep cleaning prevents clogs, improves brew temperature, and keeps coffee tasting fresh.
- Household items work great: Dish soap, baking soda, and white vinegar are all you need for a thorough clean.
- Reassemble carefully after cleaning: Proper reassembly ensures the K Cup side functions smoothly and leaks stay away.
- Descale every 3 to 6 months: Depending on your water hardness, descaling should happen regularly for best performance.
📑 Table of Contents
- Why Cleaning the K Cup Side Matters
- What You Need to Clean the K Cup Side
- How To Clean the K Cup Side Step by Step
- Common Mistakes People Make When Cleaning
- How Often Should You Clean Your Cuisinart Coffee Maker?
- Pro Tips for Keeping the K Cup Side Pristine
- When to Call a Professional
- Final Thoughts
Why Cleaning the K Cup Side Matters
The K Cup side of your Cuisinart coffee maker is where the magic happens. This is the part that punctures the pod, releases hot water, and brews your coffee. Over time, coffee oils build up on the needles and inside the housing. Mineral deposits from water also accumulate in the pathways.
When buildup forms, several problems start showing up. Your coffee might brew slower than usual. The taste can turn sour or bitter. In worse cases, the machine might clog entirely and stop working. A clogged K Cup side can even cause leaks around the pod area.
Regular cleaning solves all of these issues. It keeps the needles sharp and clear. It prevents bacteria from growing inside the dark, warm housing. And it ensures every cup tastes exactly the way it should. Think of it as maintaining any other kitchen tool you use daily.
Most people wait until something goes wrong before cleaning. Do not make that mistake. A little prevention goes a long way. The next sections show you exactly how to do it right.
What You Need to Clean the K Cup Side
Before you start, gather a few simple supplies. You do not need any fancy products. Most of what you need is already in your kitchen.
Essential Cleaning Supplies
- White vinegar: This is your best friend for descaling and dissolving mineral buildup.
- Dish soap: A few drops cuts through coffee oils easily.
- Warm water: Hot enough to dissolve residue but not boiling.
- A soft cloth or sponge: For wiping down the exterior and removable parts.
- A small brush or old toothbrush: Perfect for scrubbing hard-to-reach spots around the needles.
- Baking soda: A gentle abrasive that helps remove stubborn stains.
Optional but Helpful Tools
- A paperclip or needle for clearing clogged needles.
- A small bowl or container for soaking parts.
- Cotton swabs for detailed cleaning around the K Cup housing.
Having everything ready before you start makes the process smooth and fast. You will not need to stop midway to find a tool.
How To Clean the K Cup Side Step by Step
Now let us get into the actual cleaning process. Follow these steps carefully for the best results. Each step targets a different part of the K Cup mechanism.
Step 1: Power Off and Unplug the Machine
Safety comes first. Always turn off your Cuisinart machine and unplug it before cleaning. Wait a few minutes for it to cool down completely. The K Cup area can still be warm right after brewing.
Remove any K Cup pod still in the holder. Dispose of it properly. This gives you full access to the area you need to clean.
Step 2: Remove the K Cup Holder
Most Cuisinart single serve models have a removable K Cup holder. Pull it out gently. You will see the pod puncture needles on the top and bottom. These are the spots where the most buildup occurs.
If your model does not detach easily, check your user manual. Some holders lift straight up while others require a slight twist. Once removed, rinse the holder under warm water to remove loose grounds and oils.
Step 3: Clean the Needles
The needles are small but extremely important. They poke through the K Cup pod to let water in and coffee out. When clogged, they slow down brewing and affect taste.
Use a paperclip or the brush tip of a toothpick to gently clear each needle. Work carefully so you do not bend them. Dip the tip in warm soapy water and wipe away any visible residue.
For a deeper clean, soak the holder in warm soapy water for 15 to 20 minutes. This softens stubborn coffee oils. Then scrub gently with a soft brush and rinse thoroughly.
Step 4: Descale the Internal Pathways
Descaling is the process of removing mineral deposits from inside the machine. Hard water contains calcium and magnesium that build up over time. These deposits restrict water flow and reduce brewing temperature.
Fill the water reservoir with equal parts white vinegar and water. Run a full brew cycle without a K Cup pod. Let the vinegar solution run through the machine completely. This cleans the internal pathways including those connected to the K Cup side.
After the cycle finishes, run two to three plain water cycles. This rinses out any vinegar taste. Your machine is now descaled and ready for fresh brewing.
Step 5: Wipe Down the Exterior
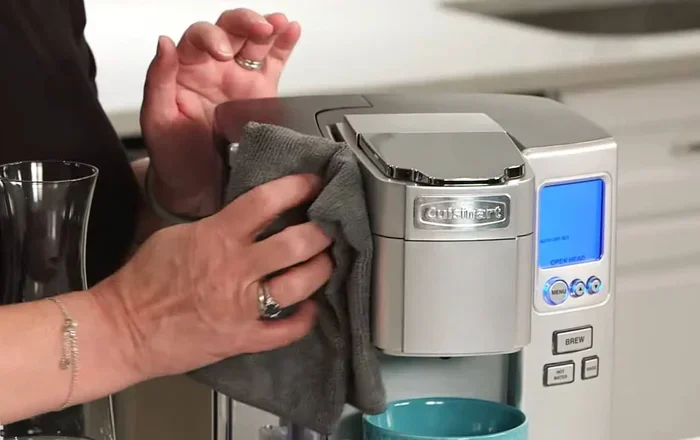
Do not forget the outside. Use a damp cloth with a drop of dish soap to wipe the K Cup housing area. Pay attention to the seam where the holder meets the machine. Coffee spills often collect there.
Dry everything with a clean towel before reassembling. Moisture left inside can lead to mold or mildew over time.
Common Mistakes People Make When Cleaning
Even with the best intentions, people make mistakes that can damage their machine or reduce cleaning effectiveness. Here are the most common ones to avoid.
Using Harsh Chemicals
Some people reach for bleach or abrasive cleaners. These can damage the plastic components of the K Cup side. Stick to vinegar, baking soda, and mild dish soap. They work just as well without the risk.
Skipping the Rinse Cycles
After descaling with vinegar, always run plain water cycles. Skipping this step leaves a lingering taste that affects your next few cups of coffee. It is a small step that makes a big difference.
Not Cleaning Often Enough
Many users clean their machine only when problems appear. By then, buildup has already caused damage. Clean the K Cup side at least once a month for best results. If you have hard water, clean every two weeks.
Forgetting the Needles
The needles get overlooked during routine cleaning. But they are the most critical part of the K Cup mechanism. A clogged needle means uneven brewing and poor extraction. Clean them every time you do a full maintenance session.
Reassembling While Still Wet
Putting parts back together while they are still damp can trap moisture inside the machine. This creates a breeding ground for bacteria. Always dry every piece completely before reassembly.
How Often Should You Clean Your Cuisinart Coffee Maker?
The frequency of cleaning depends on how often you use your machine. Here is a simple schedule to follow.
| Cleaning Task | Frequency | Time Required |
|---|---|---|
| Quick rinse of K Cup holder | After every 5 to 10 brews | 2 minutes |
| Needle cleaning | Once a week | 5 minutes |
| Full K Cup side cleaning | Every 2 weeks | 15 minutes |
| Descale with vinegar | Every 3 to 6 months | 30 minutes |
| Deep clean all removable parts | Monthly | 20 minutes |
Following this schedule keeps your machine in top shape. You will notice better coffee flavor, faster brewing, and fewer mechanical issues. It is a small investment of time for a big payoff.
If you also use other small kitchen appliances, keeping them clean matters too. For example, cleaning your Oster toaster oven regularly prevents flavor transfer and keeps it running efficiently. The same principle applies to your coffee maker.
Pro Tips for Keeping the K Cup Side Pristine
Beyond regular cleaning, a few extra habits make a huge difference. These tips help you maintain the K Cup side between deep cleanings.
Use Filtered Water
Filtered water reduces mineral buildup significantly. It means you descale less often and your coffee tastes cleaner. Consider installing a filter on your water line or using filtered water in the reservoir.
Remove Pods Promptly
Do not leave used K Cup pods sitting in the holder. Remove them right after brewing. This prevents residue from hardening and becoming harder to clean later.
Run a Water-Only Cycle Weekly
Once a week, run a full water cycle without a pod. This flushes out any remaining coffee oils and keeps the pathways clear. It takes less than a minute and adds very little to your routine.
Store the Machine Properly
Keep your Cuisinart machine in a dry, clean area. Dust and kitchen grime can settle into the K Cup side and affect performance. A simple cover or placement away from splashing helps.
Deep Clean Like a Pro
For a truly thorough deep clean, you can take apart more components than just the holder. Some models allow you to remove the water reservoir and the drip tray for a full wash. If you want inspiration for deep cleaning other kitchen appliances, check out our guide on how to deep clean a Ninja Air Fryer Oven for methods that apply to multiple machines.
When to Call a Professional
Most K Cup side issues respond well to home cleaning. But sometimes, professional help is the right call. If you notice persistent leaks even after cleaning, the internal seals may be worn. If the machine fails to brew after a full descale, there could be a deeper mechanical issue.
Cuisinart offers customer support and warranty service for most models. Check your warranty before attempting any major repairs. In many cases, a simple part replacement solves the problem without needing a technician.
Regular maintenance greatly reduces the chance of needing professional service. A clean machine runs better, lasts longer, and saves you money in the long run.
Final Thoughts
Cleaning the K Cup side of your Cuisinart coffee maker is one of the easiest ways to protect your investment. It takes just a few minutes and delivers noticeably better coffee. The steps are simple enough for anyone to follow, whether you are a beginner or a seasoned coffee lover.
Make cleaning part of your routine. A quick rinse after brewing, a weekly needle check, and a monthly deep clean keep everything running smoothly. Your morning cup will taste fresher, and your machine will last for years.
Start today. Grab some vinegar, a soft brush, and give your K Cup side the attention it deserves. Once you see the difference in your coffee, you will never skip a cleaning session again.
Frequently Asked Questions
Can I use lemon juice instead of vinegar to descale my Cuisinart coffee maker?
Yes, lemon juice works as a natural descaling alternative. It contains citric acid that dissolves mineral deposits effectively. However, vinegar is slightly stronger and more commonly recommended for tough buildup.
How do I know if my K Cup side needs cleaning?
Signs include slower brewing, weird tastes, leaking around the pod area, or visible residue on the needles. If your coffee tastes off or the machine makes unusual noises, it is probably time for a clean.
Can I put the K Cup holder in the dishwasher?
Most Cuisinart K Cup holders are dishwasher safe. Check your user manual to confirm. Hand washing is gentler and allows you to inspect the needles more closely for buildup.
How long does the descaling process take?
A full descaling cycle takes about 30 minutes. This includes running the vinegar solution through the machine and then rinsing with two to three plain water cycles. The actual hands-on time is much shorter.
Is it safe to clean the K Cup needles with a paperclip?
Yes, a paperclip works well for clearing clogged needles. Just be gentle and do not apply too much force. Bent needles can cause leaks and uneven brewing. If a needle seems damaged, consider replacing the K Cup holder assembly.
Can I use soap directly on the K Cup needles?
It is best to avoid putting soap directly on the needles. Soap residue can end up in your next cup of coffee. Instead, use a damp cloth or a brush dipped in soapy water, then rinse the needles thoroughly with plain water.
=== CONCLUSION ===
Taking care of your Cuisinart coffee maker K Cup side is simple, fast, and incredibly rewarding. A clean machine brews better coffee, lasts longer, and saves you from costly repairs. The steps in this guide give you everything you need to keep your machine in excellent shape all year round.
Start with a quick daily rinse, build up to weekly needle cleaning, and do a full descale every few months. These small habits add up to big results. You will taste the difference in every cup, and your machine will thank you for it.
Make cleaning your K Cup side a non-negotiable part of your coffee routine. Your future self will enjoy fresher, better-tasting coffee every single morning. Happy brewing!