How to Install Your Miele Coffee Machine Step by Step
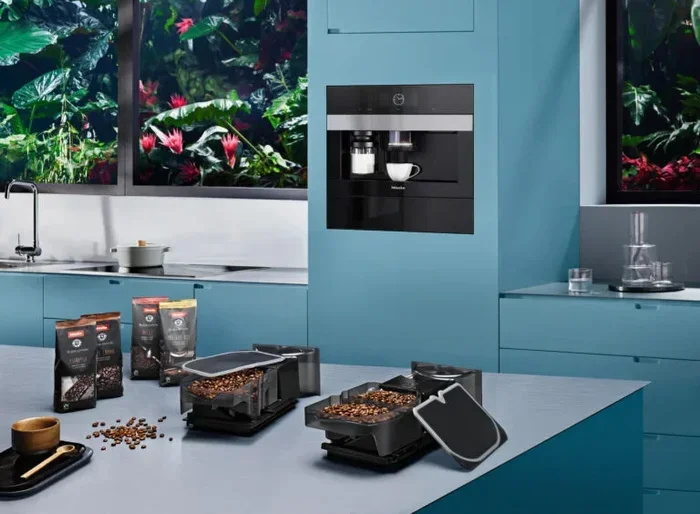
Installing your Miele coffee machine is simpler than you think. This guide walks you through every step, from unboxing to that first perfect cup. You will learn how to set up the water system, install the grinder, and run your first brew cycle with confidence.
Key Takeaways
- Plan your setup space: Choose a flat, stable surface near a water source and power outlet before you begin.
- Inspect every part: Unbox carefully and check all components against the included checklist to avoid missing pieces.
- Install the water filter correctly: Proper filter placement ensures clean taste and protects your machine from limescale buildup.
- Grinder setup matters: Adjusting the coffee grinder settings before your first brew makes a huge difference in flavor.
- Run a cleaning cycle first: Always perform a rinse cycle before brewing your actual coffee to flush out any dust or residue.
- Register your warranty: Don’t forget to register your Miele coffee machine online to activate your full warranty coverage.
📑 Table of Contents
- How to Install Your Miele Coffee Machine Step by Step
- What You Will Need Before You Start
- Unboxing and Inspecting Your Miele Coffee Machine
- Setting Up the Water System and Filter
- Installing the Coffee Grinder and Grounds Container
- Connecting Power and First-Time Setup
- Running Your First Brew and Final Checks
- Maintenance Tips After Installation
- Registering Your Warranty and Getting Support
- Conclusion
How to Install Your Miele Coffee Machine Step by Step
So you just got a shiny new Miele coffee machine. Maybe it was a gift. Maybe you saved up for it yourself. Either way, you are probably excited to make your first cup. But before you do, you need to set it up properly. A Miele coffee maker setup might seem intimidating at first, especially if you have never installed a bean-to-cup machine before. The good news? It really is not that hard.
In this guide, we will walk you through every single step. You will learn what tools you need, how to position the machine, and how to get the water system ready. By the end, you will be brewing coffee like a pro. We kept this guide simple and practical so you can follow along without any confusion. Let us get started.
Installing a coffee machine the right way matters more than most people realize. A proper setup affects taste, performance, and how long your machine lasts. Taking a few extra minutes now saves you headaches later. Think of it as the foundation for thousands of great cups of coffee ahead.
What You Will Need Before You Start
Before you touch the box, gather a few things. This way, you will not need to stop halfway through and hunt for a tool. Preparation is the secret to a smooth installation.
Essential Tools and Items
- A clean, dry cloth for wiping down the machine
- A flat, sturdy surface near a water source
- A power outlet that is easily accessible
- The included water filter (check the box contents)
- Fresh, cold water for the initial rinse
- Your Miele user manual (keep it handy)
You do not need any special tools. No screwdrivers. No drill. Miele designs their machines for easy coffee machine installation right out of the box. Just make sure your kitchen counter or table is level and strong enough to hold the machine. A wobbly surface can cause problems with the grinder and the brewing process later on.
Also, check that your water source has standard household pressure. Most Miele machines work fine with normal tap water pressure. But if you have very low water pressure, you might want to look into a booster. This small detail can make a big difference in how well your Miele bean-to-cup machine performs.
Unboxing and Inspecting Your Miele Coffee Machine
Now comes the fun part. Carefully open the box and remove all the packaging materials. Take your time here. Miele uses protective foam and plastic wraps to keep everything safe during shipping. You do not want to accidentally toss out a small part thinking it is packaging.
Check All Components
Lay everything out on a clean surface. Go through the included parts list in your manual. You should typically find the following:
- The main coffee machine unit
- The water tank
- The coffee bean container
- The grinder component
- The drip tray and container
- The water filter
- The power cable
- A quick-start guide
If anything looks damaged or missing, contact Miele customer support right away. Do not try to use a damaged part. A Miele coffee machine is a long-term investment, and getting replacement parts early keeps your warranty intact.
Once you have confirmed everything is there, give each piece a gentle wipe with a clean, damp cloth. This removes any dust that may have settled during shipping. Do not use harsh chemicals. A simple damp cloth works perfectly.
Setting Up the Water System and Filter
The water system is the heart of your Miele coffee maker. Getting it set up correctly is one of the most important steps in the whole process. A properly installed water system ensures clean water flows through the machine every time you brew.
Installing the Water Filter
Start with the water filter. Miele includes a filter in the box for a reason. This filter removes chlorine, limescale particles, and other impurities from your water. Clean water means better-tasting coffee and a longer-lasting machine.
Here is how to install it:
- Soak the filter in cold water for about five minutes
- Rinse it under running water for 30 seconds
- Place the filter into the water tank holder
- Slide the holder back into the machine until it clicks
Make sure the filter sits snugly in its holder. A loose filter can let unfiltered water pass through. This defeats the whole purpose. After the filter is in place, fill the water tank with fresh, cold water. Do not use hot water. Cold water helps the filter activate properly.
You might also want to check your water hardness level. Miele machines work best with soft to moderately hard water. If you live in an area with very hard water, consider replacing the filter more frequently. This simple habit protects your Miele coffee machine from buildup and keeps it running smoothly.
Connecting the Water Supply
If your model supports a direct water connection, now is the time to set it up. Miele offers a water line kit that you can purchase separately. This kit lets you connect the machine directly to your kitchen faucet. It means you never have to refill the tank manually.
Follow these steps for a direct water connection:
- Turn off your kitchen faucet
- Attach the T-connector to the faucet
- Connect the water line to the machine’s inlet valve
- Turn on the faucet and check for leaks
Take your time with this. A small leak today can become a big problem tomorrow. If you are not comfortable with plumbing connections, just use the manual fill method. It works perfectly fine and gives you more flexibility with where you place the machine.
Installing the Coffee Grinder and Grounds Container
The grinder is what makes Miele machines stand out from other coffee makers. Freshly ground beans produce a richer, more aromatic cup of coffee. Setting up the grinder correctly is essential for getting the best results from your Miele espresso machine.
Attaching the Grinder Unit
Open the bean hopper on top of the machine. You will see the grinder assembly underneath. Here is what to do:
- Remove the grinder component from its packaging
- Align it with the slots inside the bean hopper
- Push it gently until it locks into place
- Fill the hopper with your favorite coffee beans
- Start with a medium setting for general use
- Make small adjustments, one setting at a time
- Note what works best for your taste preferences
- Clean the grinder chute if you switch between bean types
- Make sure the water tank is full
- Place a large container under the coffee spout
- Select the cleaning or rinse function on the display
- Let the machine run through the full cycle
- Repeat if the water still looks cloudy
- Select your desired coffee strength from the menu
- Choose the cup size that fits your preference
- Place your mug under the spout
- Press the start button
- Water filter is properly seated
- Water tank is filled to the correct level
- Bean hopper has enough beans
- Drip tray and container are in place
- Power cord is securely plugged in
- Machine is on a stable, level surface
- Warranty registration is complete
- Machine does not turn on: Check that the power cord is fully inserted and the outlet is working
- No water flows: Make sure the water tank is seated properly and the filter is not blocking the intake
- Coffee tastes weak: Try adjusting the grind size finer or increasing the coffee strength setting
- Grinder is noisy: Check for stuck beans or debris in the grinder chute
- Leaking water: Inspect the water tank and connections for cracks or loose fits
Do not overfill the hopper. Leave about a centimeter of space at the top. Overfilling can cause beans to jam the grinder. Start with a moderate amount and adjust based on how much coffee you drink each day.
Setting the Grind Size
Miele machines let you adjust the grind size. This is a powerful feature because different brewing methods need different grind levels. A finer grind works better for espresso, while a coarser grind suits filter coffee.
Here are some quick tips for setting your grind:
Think of it like seasoning food. You start with a little and add more until it tastes just right. The same applies here. Once you find your ideal setting, stick with it for a while before making further changes.
Connecting Power and First-Time Setup
Now that the water system and grinder are ready, it is time to connect power. This is the step that brings your Miele coffee machine to life.
Placement and Power Connection
Place your machine on the prepared surface. Make sure there is at least four inches of clearance on all sides. This allows proper airflow and gives you room to open the bean hopper and drip tray. Do not push the machine flush against the wall.
Plug the power cable into a grounded outlet. Never use an extension cord or a power strip with a coffee machine. These can overheat and create safety hazards. The machine draws a fair amount of power during grinding and brewing, so it needs a direct connection.
Once plugged in, the display panel will light up. You might see a welcome screen or a setup wizard. Follow the on-screen prompts to set your language, time, and date. These basic settings personalize your machine and make it easier to use every day.
Running the Initial Cleaning Cycle
Before you brew your first real cup of coffee, run a cleaning cycle. This is something many people skip, but it really matters. New machines can have tiny dust particles or manufacturing residue inside the brewing unit. Flushing these out first ensures your coffee tastes clean and fresh.
To run the cleaning cycle:
You might want to run this cycle two or three times the first time. Better safe than sorry. After the water runs clear, your machine is ready for its first proper brew.
Running Your First Brew and Final Checks
This is the moment you have been waiting for. Brewing your first cup of coffee with a freshly installed Miele coffee machine. But before you add your favorite mug, let us do a few final checks.
Testing the Brew
Add freshly ground coffee to the grounds container. You can use either beans in the hopper or pre-ground coffee if you prefer. Then follow these steps:
Watch the machine work its magic. You should hear the grinder activate, followed by the gentle sound of water flowing through the coffee grounds. The aroma alone is worth the wait.
When the cycle finishes, check the coffee. Does it look right? Is the crema on top smooth and rich? Does the taste match what you expected? If something feels off, do not worry. You can adjust the strength, grind size, or water temperature and try again.
Adjusting Brewing Temperature
Miele machines let you fine-tune the brewing temperature. This is a feature that serious coffee lovers appreciate. The ideal temperature for extracting coffee flavors is between 195 and 205 degrees Fahrenheit. Too hot, and the coffee tastes bitter. Too cool, and it tastes weak and sour.
Start with the default setting. Then adjust by one or two degrees if needed. Keep notes on what works best for each type of coffee you brew. Over time, you will develop a personal profile that gives you the perfect cup every single time.
Final Setup Checklist
Before you step away from the machine, run through this quick checklist:
Taking these few minutes to double-check everything pays off in the long run. A well-set-up Miele coffee machine gives you consistent results day after day. It also reduces the need for repairs and maintenance down the road.
Maintenance Tips After Installation
Your machine is installed and working beautifully. Now you need to keep it that way. Regular maintenance is the key to enjoying great coffee for years. Miele machines are built to last, but they do need some care.
Daily Cleaning Routine
Make it a habit to clean a few parts every day. Empty the grounds container after each use. Rinse the drip tray and coffee spout. Wipe down the exterior with a soft, damp cloth. These small actions prevent buildup and keep your machine looking and performing its best.
Weekly and Monthly Tasks
Once a week, remove and rinse the water filter under cold water. Check the grinder chute for any stuck beans or residue. Once a month, run a full descaling cycle using Miele’s recommended descaling solution. Descaling removes mineral buildup that can affect taste and machine performance.
Think of descaling like changing the oil in a car. You might not see the buildup, but it affects performance over time. Skipping this step can lead to clogs and reduced brewing quality. Your machine will thank you for staying on top of it.
You can also refer to guides on cleaning other kitchen appliances for inspiration. For instance, learning how to clean oven with dishwasher tablet without scrubbing gives you a great idea of using simple household products for tough grime. The same mindset applies to keeping your coffee machine spotless.
Troubleshooting Common Issues
Sometimes things do not go perfectly the first time. Here are a few common issues and how to fix them:
Most issues are easy to fix with a little patience. If problems persist, consult your user manual or contact Miele support. They are very helpful and can walk you through more advanced troubleshooting steps.
Just like taking care of your kitchen appliances, proper care of your coffee machine ensures it runs smoothly for years. Speaking of appliance care, if you ever need to clean other parts of your kitchen, learning how to use Aqualift self clean on Kitchenaid oven is another great skill to have in your household maintenance toolkit.
Registering Your Warranty and Getting Support
This is one of the final steps people forget. After you finish the Miele coffee machine setup, take five minutes to register your warranty online. Miele offers comprehensive warranty coverage on their coffee machines, but you need to register to activate it.
Visit the Miele website and enter your machine’s serial number. You will find this number on a sticker inside the bean hopper or on the back of the unit. Keep your registration confirmation in a safe place. If you ever need warranty service, this documentation makes the process much faster and smoother.
Miele also offers excellent customer support through phone, email, and live chat. Whether you have questions about setup or need help with a later issue, their support team is knowledgeable and responsive. Do not hesitate to reach out whenever you need assistance.
Taking care of your machine also means keeping it clean inside and out. Occasionally, you may encounter stubborn residue or buildup that needs extra attention. Just as you would handle a tough cleaning challenge elsewhere in the kitchen, knowing how to handle residue carefully is important. For example, if plastic or tough residue ever gets into areas it should not be, understanding how to how to clean melted plastic out of an oven can give you insight into handling tough residues safely without damaging surfaces.
These small connections between kitchen appliance care add up. They help you become a more confident and capable home cook and coffee enthusiast.
Conclusion
Installing your Miele coffee machine does not have to be a stressful experience. With the right preparation and a clear step-by-step approach, you can have your machine up and running in under an hour. You learned how to unbox and inspect your machine, set up the water system and filter, install the grinder, connect power, and run your first brew cycle.
Remember that proper setup is the foundation for years of great coffee. Take the time to do each step carefully. Do not rush through the cleaning cycle or skip the filter installation. These small efforts make a big difference in taste and machine longevity.
Now that your Miele coffee maker setup is complete, enjoy every cup. Experiment with grind sizes, coffee strengths, and brew settings to find what suits your palate best. Your new machine is ready to deliver café-quality coffee in the comfort of your own home. Cheers to many delicious mornings ahead.
Frequently Asked Questions
How long does it take to install a Miele coffee machine?
Most people complete the full installation in 30 to 60 minutes. The time depends on whether you are using a direct water connection or just the manual fill method. Unboxing and inspecting parts usually takes about 10 minutes, and the actual setup takes another 20 to 30 minutes.
Do I need to install a water filter every time I set up a Miele coffee machine?
Yes, always use the water filter that comes with your machine or a replacement Miele filter. The filter removes impurities and chlorine from the water, which protects the internal components and improves the taste of your coffee. Replace the filter every two to three months for best results.
Can I install a Miele coffee machine anywhere in my kitchen?
You can place it almost anywhere as long as you have a flat surface, a nearby power outlet, and access to water. Make sure there is enough clearance on all sides for airflow and easy access to the bean hopper, water tank, and drip tray. Avoid placing it near a heat source or in direct sunlight.
What should I do if my Miele coffee machine leaks after installation?
First, check that the water tank is properly seated in its holder. Next, make sure the drip tray is not overflowing. If the leak persists, inspect the water connections if you are using a direct water line. If you cannot find the source, contact Miele customer support for guidance. Most leaks are caused by a simple misalignment that is easy to fix.
Is it necessary to run a cleaning cycle before the first use?
Absolutely yes. New coffee machines can contain dust, manufacturing residue, or tiny particles from the production process. Running at least one cleaning cycle flushes out these impurities. This ensures your first cup of coffee tastes clean and fresh, not stale or metallic.
How do I register my Miele coffee machine warranty?
Visit the official Miele website and look for the warranty registration section. Enter your machine’s serial number, which you can find on a sticker inside the bean hopper or on the back of the unit. Fill in your contact details and submit the form. You will receive a confirmation email that serves as your warranty proof.
=== CONCLUSION ===
Setting up your Miele coffee machine is a rewarding process that sets the stage for countless perfect cups of coffee. Follow each step carefully, take your time, and enjoy the journey from unboxing to that first delicious brew. Your new machine is built to last, and with proper care and regular maintenance, it will serve you well for many years to come.