How To Make Frozen Chicken Wings Crispy In The Oven
Learning how to make frozen chicken wings crispy in the oven is easier than you think. This guide walks you through every step, from prep to plating, so you get perfectly crunchy wings without a deep fryer. You will discover the right temperature, timing, and seasoning tricks that turn frozen wings into restaurant-quality snacks. Whether you are feeding a crowd or craving a quick treat, this method delivers crispy, juicy results every single time.
There is nothing quite like biting into a perfectly crispy chicken wing. The crunch gives way to juicy, tender meat, and the flavor hits all the right notes. Now imagine getting that same satisfying result straight from a bag of frozen wings. It sounds too good to be true, but it is not. You can absolutely achieve crispy, delicious oven-baked wings from frozen, and this guide will show you exactly how.
If you have ever tried baking frozen wings and ended up with soggy, rubbery results, you are not alone. The problem is not your oven. The problem is the method. With the right temperature, the right tools, and a few simple tricks, frozen wings can turn out even better than some takeout options. This article covers everything you need to know about how to make frozen chicken wings crispy in the oven, from prep work to the final sauce toss.
Whether you are a weeknight dinner hero or the grill master of your friend group, mastering this technique will change the way you cook frozen wings forever. No more waiting for them to thaw. No more soggy disappointments. Just crispy, golden, finger-licking goodness straight from your oven.
Key Takeaways
- High heat is the secret: Baking at 425°F to 450°F creates the crispiness you love without deep frying.
- Use a wire rack: It lets hot air circulate around every wing, ensuring even crunch on all sides.
- Pat wings dry first: Removing surface moisture before baking is the single biggest step toward crispy skin.
- Season generously: A good blend of salt, paprika, garlic powder, and black pepper elevates frozen wings dramatically.
- Flip halfway through: This simple trick prevents soggy bottoms and gives you uniform crispiness.
- Sauce after baking: Tossing wings in sauce after they come out of the oven keeps the crust perfectly crunchy.
- No thawing required: You can bake frozen wings directly, saving time and keeping the skin dry for maximum crisp.
📑 Table of Contents
- Why Oven-Baked Frozen Wings Are a Game-Changer
- What You Need to Get Started
- Step-by-Step Guide to Crispy Frozen Wings
- Tips for Maximum Crispiness
- Saucing and Serving Ideas
- Common Mistakes to Avoid
- How This Method Compares to Other Cooking Methods
- Expert Insights on Perfect Baked Wings
- Frequently Asked Questions
- Conclusion
Why Oven-Baked Frozen Wings Are a Game-Changer
Deep frying is the traditional way to get super crispy wings, but it comes with downsides. It requires a lot of oil, creates a big mess, and fills your kitchen with grease. Oven baking is a cleaner, simpler, and healthier alternative. You get crispy skin without the splatter and the guilt.
When you bake frozen wings in the oven, the dry heat works to remove moisture from the skin. This is exactly what creates that satisfying crunch. The process is hands-off, too. You can prep your wings, toss them on a baking sheet, and focus on other things while the oven does the work.
Another big advantage is consistency. A good oven-baked wing recipe gives you reliable results every time. You do not have to guess when the oil is hot enough or worry about uneven frying. The oven heats evenly, and with the right setup, your wings cook uniformly from edge to edge.
Many people also love that oven-baked wings are easier to scale. Want to feed a party of ten? Just use two sheet pans. Want a quick snack for two? One pan does the job. The flexibility makes this method perfect for any occasion, from casual Tuesday dinners to game-day gatherings.
What You Need to Get Started
The Right Ingredients
The beauty of oven-baked frozen wings is that you need very little beyond the wings themselves. Here is what you will want on hand:
- Frozen chicken wings: Buy a good quality bag from your local grocery store. Look for wings with the skin still intact for the best crunch.
- Olive oil or melted butter: A light coating helps the seasoning stick and promotes browning.
- Salt: Kosher salt or sea salt works best. It draws out moisture and seasons deeply.
- Garlic powder: This adds a savory depth that complements the chicken perfectly.
- Paprika: Smoked or sweet paprika gives color and a subtle warmth.
- Black pepper: Freshly ground black pepper adds a gentle bite.
- Optional seasonings: Cayenne pepper for heat, onion powder for sweetness, or dried herbs like thyme and oregano.
The Tools You Will Need
You do not need fancy equipment to make crispy frozen wings. A few basics will get the job done beautifully.
- Large baking sheet: A rimmed sheet pan keeps everything contained and makes cleanup easy.
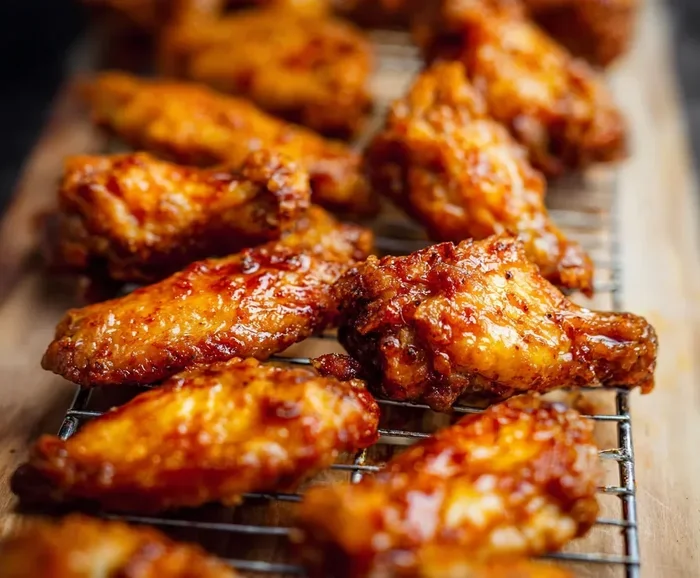
- Wire cooling rack: This is the single most important tool. Placing wings on a rack over the baking sheet allows hot air to flow underneath, which is the key to even crispiness.
- Parchment paper or aluminum foil: Lining the sheet pan makes cleanup a breeze and prevents sticking.
- A large mixing bowl: For tossing wings with oil and seasoning.
- Tongs: For flipping wings halfway through cooking without making a mess.
- A meat thermometer: This ensures your wings reach a safe internal temperature of 165°F without overcooking.
Step-by-Step Guide to Crispy Frozen Wings
Step 1: Preheat Your Oven
Start by preheating your oven to 425°F. This high temperature is essential for crisping the skin. If your oven runs cool, you can bump it up to 450°F. A hot oven is the foundation of crispy wings, so do not skip this step or rush it. Give your oven at least 15 to 20 minutes to reach the right temperature before the wings go in.
Step 2: Prep the Baking Sheet
Line your baking sheet with parchment paper or aluminum foil. Then place the wire rack on top. The rack should fit snugly inside the sheet pan so it does not wobble. This setup is what separates crispy wings from soggy ones. Without the rack, wings sit in their own juices and steam, which prevents the skin from crisping.
Step 3: Season the Wings
Place your frozen wings in a large mixing bowl. Drizzle with a small amount of olive oil or melted butter. Add your salt, garlic powder, paprika, black pepper, and any other seasonings you like. Toss everything together until the wings are evenly coated.
Do not be shy with the seasoning. Frozen wings can taste bland if you do not give them enough flavor. A generous coating of salt and spices makes a huge difference. The oil helps the seasonings adhere to the skin and promotes browning in the oven.
Step 4: Arrange on the Rack
Transfer the seasoned wings to the wire rack. Spread them out in a single layer with space between each piece. Overcrowding is the enemy of crispiness. When wings touch or overlap, steam gets trapped, and that steam softens the skin. If you have a lot of wings, use two sheet pans or bake in batches.
Step 5: Bake and Flip
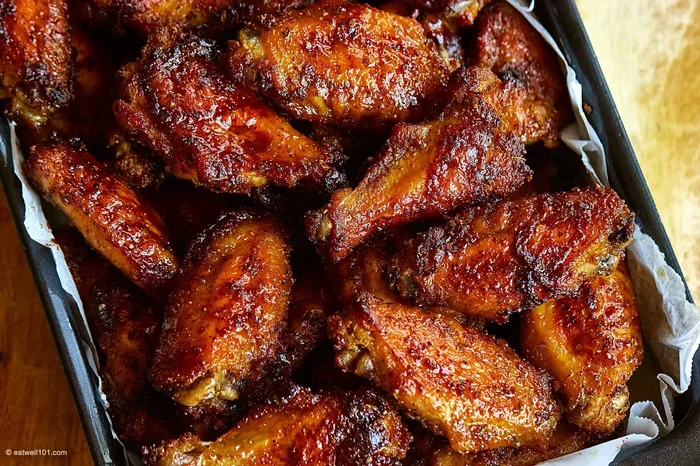
Place the baking sheet in the oven on the middle rack. Bake for about 25 minutes, then open the oven and flip each wing using tongs. This ensures both sides get equally crispy. After flipping, bake for another 20 to 25 minutes, or until the skin is golden brown and the internal temperature reaches 165°F.
The total cook time usually falls between 45 and 55 minutes. Thicker wing pieces may need a few extra minutes. Use your meat thermometer to check doneness. The juices should run clear, and the meat should be firm to the touch.
Step 6: Sauce and Serve
Once the wings are done, remove them from the oven. If you want to add sauce, toss them in a large bowl with your favorite wing sauce while they are still hot. The heat helps the sauce stick to the crispy skin without making it soggy.
Let the sauced wings rest for a couple of minutes before serving. This allows the sauce to set and the skin to stay crispy. Serve with celery sticks, carrot sticks, and your favorite dipping sauce. Ranch, blue cheese, and honey mustard are all classic choices that pair wonderfully with crispy baked wings.
Tips for Maximum Crispiness
Getting wings crispy in the oven is not just about temperature and time. A few extra tricks can take your results from good to absolutely perfect. Here are some expert tips that make a real difference.
Do Not Thaw the Wings
You might be tempted to thaw your frozen wings before baking. Resist that urge. Thawing adds moisture to the skin, and moisture is the enemy of crispiness. Baking wings straight from the freezer keeps the skin dry, which is exactly what you want for that shattering crunch.
If you are worried about uneven cooking, just make sure you flip the wings halfway through. This compensates for any temperature differences and ensures both sides get crispy.
Use a Wire Rack, Every Single Time
This cannot be stressed enough. A wire rack elevates the wings above the baking sheet, allowing hot air to circulate underneath. Without it, the bottom side of the wings steams against the pan and turns soft. The rack is the difference between crispy and soggy.
If you do not have a wire rack, you can improvise by placing a few balls of aluminum foil under the wings to lift them slightly. It is not as effective, but it helps.
Blot Excess Moisture Before Seasoning
Even straight from the freezer, wings can have surface moisture. Before you season them, pat them dry with paper towels. This removes the thin layer of frost and ice that forms on frozen wings and helps the skin crisp up faster.
This one simple step can dramatically improve your results. It takes just a minute or two, but it makes a noticeable difference in the final texture of your wings.
Increase the Heat for the Last 10 Minutes
For an extra-crispy finish, crank the oven temperature up to 475°F during the last 10 minutes of baking. This blast of high heat deepens the golden color and adds an extra crunch to the skin. Watch them closely during this phase so they do not burn.
Let Them Rest Before Saucing
When wings come out of the oven, let them sit on the rack for a few minutes before tossing them in sauce. This brief rest allows the skin to firm up and re-crisp slightly. If you sauce them immediately, the hot sauce can soften the crust.
Saucing and Serving Ideas
Saucing wings the right way is an art form. The goal is to add flavor without sacrificing that beautiful crunch you worked so hard to achieve. Here are some tried-and-true methods and sauce ideas.
The best approach is to toss wings in sauce after they come out of the oven. Use a large bowl and add just enough sauce to coat each wing lightly. Too much sauce will pool on the bottom and make the skin soft. A light, even coating is all you need.
Here are some popular sauce options that pair perfectly with oven-baked wings:
- Classic Buffalo: Hot sauce melted with butter. Tangy, spicy, and irresistible.
- Honey Garlic: Honey, minced garlic, melted butter, and a splash of soy sauce. Sweet and savory.
- BBQ: Your favorite barbecue sauce brushed on during the last 5 minutes of baking.
- Parmesan Garlic: Grated Parmesan, garlic, butter, and a sprinkle of Italian herbs.
- Lemon Pepper: Lemon juice, black pepper, olive oil, and a pinch of salt. Light and zesty.
For serving, keep it classic. A platter of crispy wings with a side of blue cheese dip and celery sticks never fails to impress. You can also serve them with a simple coleslaw, corn on the cob, or a fresh green salad for a complete meal.
Common Mistakes to Avoid
Even with the best recipe, small mistakes can ruin your crispy wings. Here are the most common pitfalls and how to avoid them.
Overcrowding the pan. This is the number one mistake people make. When wings are too close together, they steam instead of roast. Give each wing plenty of space. If you have to bake in multiple batches, do it. The results are worth the extra effort.
Using a low oven temperature. Some recipes call for baking at 375°F or lower. While this works for thawed wings, frozen wings need higher heat to crisp up properly. Stick with 425°F or above for the best results.
Skipping the flip. If you do not turn the wings halfway through, one side will be crispy and the other will be soft and pale. Flipping ensures even browning and crunch on all sides.
Saucing too early. Adding sauce before the wings are fully baked can make the skin chewy and soft. Always sauce after the wings come out of the oven, and do it while they are still hot so the sauce adheres properly.
Not using a meat thermometer. Guessing when wings are done can lead to undercooked or overcooked meat. A simple instant-read thermometer takes the guesswork out and ensures perfectly cooked wings every time.
How This Method Compares to Other Cooking Methods
There are several ways to cook frozen chicken wings, and each has its pros and cons. Here is how oven-baking stacks up against other popular methods.
| Method | Crispiness | Ease | Health Factor | Best For |
|---|---|---|---|---|
| Oven Baking | High | Very Easy | Healthy (minimal oil) | Weeknight meals, large batches |
| Deep Frying | Very High | Moderate | Higher in fat and calories | Restaurant-style crunch |
| Air Frying | High | Easy | Healthy (minimal oil) | Small batches, quick cooking |
| Boiling then Baking | Medium | More Steps | Healthy | Even cooking, tender meat |
Oven baking strikes the best balance between ease, crispiness, and health. You do not need special equipment, and the results rival deep-fried wings in crunch and flavor. Air frying is also excellent, but most air fryers cannot hold a full batch of wings. The oven method scales easily and requires less monitoring.
Expert Insights on Perfect Baked Wings
Professional chefs and food experts agree on a few key principles when it comes to baking frozen wings. First, always start with a hot oven. A cold oven will thaw the wings too slowly and create steam, which prevents crisping. Second, keep the skin dry. Any excess moisture on the surface will turn into steam in the oven and soften the skin.
Chef Michael Symon once said that the secret to great wings is patience. Do not rush the process. Let the oven do its job, and resist the urge to open the door too often. Every time you open the oven, you lose heat and introduce moisture, which can affect crispiness.
Another tip from the pros is to season wings the night before if you have time. Tossing frozen wings with salt and letting them sit in the fridge overnight draws out even more moisture from the skin. When you bake them, the skin dries out further and becomes incredibly crispy. This technique is called dry-brining, and it works wonders.
For those who love extra flavor, try adding a light dusting of cornstarch to your seasoning blend. The cornstarch creates an ultra-thin, crunchy coating on the skin that amplifies the crispiness. Just a tablespoon or two mixed into your dry seasonings is all you need.
Frequently Asked Questions
Can I bake frozen chicken wings without thawing them first?
Yes, absolutely. In fact, baking wings from frozen is the recommended method for achieving crispy skin. Thawing adds moisture, which can make the skin soggy. Simply season the frozen wings and bake them at a high temperature, flipping halfway through for even crispiness.
How long does it take to bake frozen wings at 425°F?
It typically takes about 45 to 55 minutes at 425°F. The exact time depends on the size of the wings and how many you are baking. Flip them halfway through, and use a meat thermometer to confirm they reach an internal temperature of 165°F.
Why are my oven-baked wings not crispy?
The most common reasons are overcrowding the pan, skipping the wire rack, or not baking at a high enough temperature. Make sure each wing has space to breathe, use a rack for air circulation, and keep your oven at 425°F or higher. Also, pat the wings dry before seasoning to remove surface moisture.
Should I use foil or parchment paper on the baking sheet?
Parchment paper is the better choice for crispy wings. It allows air to flow freely and prevents sticking without interfering with the cooking process. Aluminum foil works too, but it can trap heat and moisture underneath the wings, which may reduce crispiness.
What is the best sauce for oven-baked wings?
It depends on your taste. Classic Buffalo sauce is a crowd favorite for its spicy, tangy kick. Honey garlic offers a sweet and savory balance, while BBQ sauce adds smoky depth. The key is to toss wings in sauce after baking so the crispy skin stays crunchy.
Can I make crispy wings in an air fryer instead of an oven?
Yes, an air fryer works wonderfully for frozen wings and can produce crispy results in about 20 to 25 minutes. However, air fryers have smaller capacities, so you may need to cook in batches. The oven method is better for large gatherings and requires less hands-on attention.
Conclusion
Learning how to make frozen chicken wings crispy in the oven is a skill that will serve you well in the kitchen. It is simple, reliable, and produces results that rival any restaurant or deep-fried version. With the right temperature, a wire rack, and a few seasoning tricks, you can turn a bag of frozen wings into a crispy, flavorful masterpiece.
The key takeaways are straightforward. Keep your oven hot, use a rack, flip the wings halfway, and sauce them after baking. Avoid common mistakes like overcrowding the pan or using too low a temperature. And remember, patting the wings dry before seasoning is a small step that makes a big difference.
Now that you have all the tools and knowledge, it is time to put them to use. Grab a bag of frozen wings, preheat your oven, and give this method a try. Your taste buds will thank you. Whether you are cooking for yourself, your family, or a crowd of friends, these crispy oven-baked wings are guaranteed to be a hit. Happy cooking!