Can You Bake Pottery In An Oven At Home Successfully
Yes, you can bake pottery in an oven at home, but success depends on choosing the right clay type and following proper temperature guidelines. Baking pottery in an oven works best with polymer clay and certain low-fire natural clays. This guide walks you through every step, from preparation to finishing, so your home-baked pottery turns out beautiful and durable.
Have you ever wondered if you can bake pottery in an oven at home? Maybe you have a kiln alternative in mind, or you simply want to try DIY pottery without investing in expensive equipment. The good news is that baking pottery in an oven is absolutely possible, and thousands of crafters do it every day.
Whether you are working with polymer clay or experimenting with natural clays, your kitchen oven can become a powerful tool for ceramic crafting at home. But there are important things to know. Not all clays behave the same way, and getting the temperature wrong can ruin your piece in minutes. This guide will walk you through everything you need to succeed.
We will cover clay types, exact temperatures, timing, common mistakes, and pro tips that most beginners miss. By the end, you will feel confident enough to start your first home pottery baking project today.
Key Takeaways
- Polymer clay is the best option for oven baking: it cures evenly at controlled home oven temperatures between 230°F and 275°F.
- Natural clays need careful handling: low-fire earthenware can be oven-baked, but it requires slow drying and lower heat.
- Precise temperature control is critical: overheating ruins clay, while underbaking leaves it fragile and crumbly.
- Always pre-dry your pottery before baking: removing moisture prevents cracking and ensures even curing.
- A dedicated oven thermometer helps a lot: home ovens often run hotter or cooler than their dial suggests.
- Slow cooling prevents thermal shock: let your pottery cool inside the turned-off oven for the best results.
- Home oven baking is a viable kiln alternative: it won’t match professional results but works great for hobby projects.
📑 Table of Contents
- What Happens When You Bake Pottery In An Oven
- Types Of Clay You Can Bake At Home
- Step-By-Step Guide To Baking Pottery In Your Oven
- Temperature And Timing For Different Clay Types
- Common Mistakes People Make When Baking Pottery
- Expert Tips For Perfect Home-Baked Pottery
- Is It Safe To Bake Pottery In A Kitchen Oven
- Frequently Asked Questions
- Final Thoughts On Baking Pottery In An Oven
What Happens When You Bake Pottery In An Oven
How Heat Transforms Clay
When you apply heat to clay, something remarkable happens. The water inside the clay evaporates, and the particles fuse together. This process is called clay curing. For polymer clay, heat causes a chemical reaction that hardens the material into a solid, durable form. For natural clays, the heat drives out moisture and partially vitrifies the material, making it stronger.
The key difference lies in temperature. Polymer clay cures at relatively low temperatures, usually between 230°F and 275°F. Natural clays need much higher heat, which is why traditional pottery uses kilns. But some low-fire clays can handle the heat of a home oven, especially when you take a slow and steady approach.
Understanding this transformation helps you appreciate why precision matters. Too little heat, and your piece stays soft or crumbly. Too much heat, and it can crack, warp, or release harmful fumes. This is why oven-baked ceramics require attention to detail.
Oven-Baked Vs Kiln-Fired Pottery
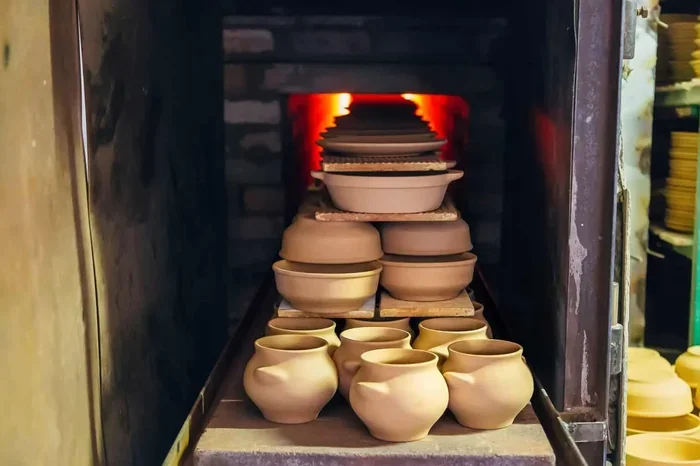
A kiln reaches temperatures between 1000°F and 2400°F depending on the type of pottery. These extreme temperatures fully vitrify natural clay, making it waterproof and extremely durable. Kiln-fired ceramics are the gold standard for professional pottery.
An oven, on the other hand, tops out around 500°F to 550°F in most homes. This is enough for polymer clay and some low-fire projects, but it cannot fully replicate kiln conditions. Think of oven baking as a practical home kiln alternative that works well for crafts, decorative pieces, and hobby projects.
Here is a quick comparison of the two methods:
- Temperature range: Oven goes up to 550°F, while kilns reach 1000°F to 2400°F.
- Clay compatibility: Ovens work with polymer clay and some low-fire clays. Kilns handle all clay types.
- Durability: Kiln-fired pieces are stronger and more waterproof. Oven-baked pieces are good for display and light use.
- Cost: Home ovens cost nothing extra. Kilns range from $500 to $5000 or more.
- Accessibility: Anyone with an oven can bake pottery. Kilns require dedicated space and ventilation.
For most hobbyists and beginners, baking pottery in an oven offers the best balance of convenience, cost, and creative freedom.
Types Of Clay You Can Bake At Home
Polymer Clay For Oven Baking
Polymer clay is the undisputed champion of home pottery baking. Brands like Sculpey, Fimo, and Kato are specifically formulated to cure in a standard home oven. They come in dozens of colors, can be mixed, sculpted, and textured in endless ways.
One of the biggest advantages of polymer clay is its forgiving nature. If you make a mistake before baking, you can rework the piece. Once baked, however, it becomes hard and permanent. This makes it perfect for ceramic crafting at home because you get room to experiment without wasting materials.
Polymer clay is not technically ceramic. It is a PVC-based material that cures through heat. But the end result looks and feels like ceramic pottery. People use it to make jewelry, figurines, ornaments, coasters, and even small bowls.
Quick tip: Always condition your polymer clay before shaping it. Knead it with your hands for about five minutes until it becomes soft and pliable. This prevents cracking after baking.
Natural Clay And Low-Fire Options
If you prefer working with natural clay, you have options too. Earthenware and some low-fire stoneware clays can be partially cured in a home oven. These clays are designed for lower firing temperatures compared to porcelain or high-fire stoneware.
However, natural clay behaves differently from polymer clay. It contains water, and that water must leave slowly. If you rush the process, steam builds up inside the piece and causes cracking. This is why slow drying and gradual heating are so important when you bake natural pottery clay at home.
Some popular low-fire natural clays include:
- Earthenware clay: Fires at low temperatures and works well with oven curing for small pieces.
- Air-dry clay: Does not need an oven at all, but oven-baking can speed up the drying process for thicker pieces.
- Paper clay: A lightweight option that dries quickly and can handle low oven temperatures.
- Terracotta clay: A classic low-fire clay that responds well to gentle oven baking.
Keep in mind that oven-baked natural clay will not be as strong or waterproof as kiln-fired pieces. It works beautifully for decorative items and light-use crafts.
Step-By-Step Guide To Baking Pottery In Your Oven
Preparing Your Clay Piece
Before you even turn on the oven, preparation is everything. Start by making sure your pottery piece is completely dry. For natural clays, this means air-drying for 24 to 48 hours depending on thickness. For polymer clay, make sure the shape is firm and there are no soft spots.
Check your piece for any thin areas or delicate details. These are the spots most likely to crack during baking. If your piece has thin walls, consider reinforcing them with a wire armature or extra clay.
Place your piece on a baking surface. Many people use a ceramic tile, a piece of cardboard covered in foil, or a dedicated clay baking sheet. Avoid using surfaces you also use for food, as clay chemicals can leave residue.
Setting Up Your Oven
Now it is time to set up your oven. First, make sure your oven is clean inside. Any food residue or grease can affect the baking process and create smoke.
Place an oven thermometer inside. This is one of the most important steps most people skip. Home ovens are notoriously inaccurate, and even a 25-degree difference can ruin your pottery. An inexpensive thermometer from any hardware store takes the guesswork out.
Set your oven to the temperature recommended by your clay manufacturer. For most polymer clays, this is around 265°F to 275°F. For natural clays, start at a lower temperature, around 200°F to 225°F, and increase gradually.
Here is a quick setup checklist:
- Clean the oven interior thoroughly.
- Place an oven thermometer on the middle rack.
- Preheat to the target temperature.
- Line a baking sheet with foil or parchment paper.
- Keep a separate ventilation fan running if possible.
Baking And Cooling Process
Once your oven reaches the right temperature, place your pottery piece inside on the middle rack. Avoid placing it near the heating elements or the oven door, as these areas have the most temperature fluctuation.
For polymer clay, baking typically takes 15 to 30 minutes per quarter inch of thickness. A piece that is half an inch thick might need 30 to 60 minutes. Always follow the manufacturer’s guidelines for the specific brand you are using.
For natural clays, the process is slower. Start at a low temperature and increase it gradually over the course of an hour. This slow ramp-up allows moisture to escape evenly and reduces the risk of cracking.
When the baking time is up, turn off the oven but do not open the door yet. Let your pottery cool inside the oven as it comes down to room temperature naturally. This slow cooling prevents thermal shock, which is one of the leading causes of cracks in oven-baked ceramics.
Temperature And Timing For Different Clay Types
Polymer Clay Baking Temperatures
Getting the temperature right for polymer clay is crucial. Each brand has its own recommended range, so always check the packaging. Here is a general guide:
- Sculpey Original: Bake at 275°F for 15 minutes per quarter inch of thickness.
- Fimo Professional: Bake at 230°F for 30 minutes per quarter inch of thickness.
- Kato Polyclay: Bake at 300°F for 10 to 15 minutes per quarter inch of thickness.
- Premo Sculpey: Bake at 275°F for 30 minutes per quarter inch of thickness.
The most common mistake is overbaking. While polymer clay is forgiving, exceeding the recommended temperature by even 25 degrees can cause browning, brittleness, or release of fumes. If you are unsure, start with a lower temperature and bake for a longer time.
Another important point: do not bake polymer clay and food in the same oven at the same time. While polymer clay is non-toxic when baked properly, it is best to use a dedicated oven or at least cover your food tightly to avoid any chemical exposure.
Natural Clay Drying And Baking Times
Natural clay requires a gentler approach. Here is a typical schedule for oven-baking low-fire natural clay:
- Air-dry first: Let your piece dry at room temperature for 24 to 48 hours until it is completely dry to the touch.
- Preheat slowly: Place the piece in a cold oven and set the temperature to 200°F.
- Gradual increase: After 30 minutes, increase the temperature by 50°F every 15 minutes until you reach 250°F.
- Hold at temperature: Maintain 250°F for 1 to 2 hours depending on the thickness of your piece.
- Slow cooling: Turn off the oven and let the piece cool inside for at least 2 hours before removing it.
This gradual process mimics what a kiln does, just at a much lower intensity. It gives you the best chance of a crack-free result when you bake pottery in an oven at home.
Common Mistakes People Make When Baking Pottery
Overheating And Underbaking
The two most common problems are overheating and underbaking. Overheating happens when the oven temperature is too high or the piece stays in too long. You might notice browning, warping, or a burnt smell. In polymer clay, overheating can release irritating fumes.
Underbaking is equally problematic. If the clay does not reach the full curing temperature, it will remain soft, crumbly, or prone to breaking. This is especially common when people reduce baking time because they are in a hurry.
The fix is simple: use an oven thermometer and follow the recommended time and temperature exactly. Patience pays off when you are baking pottery at home.
Skipping The Drying Phase
One mistake beginners make with natural clay is putting a wet piece directly into the oven. The trapped moisture turns to steam, expands, and causes the piece to crack or even explode. Always air-dry natural clay thoroughly before any oven exposure.
For polymer clay, this is less of an issue because the material does not contain water. But if your polymer clay feels soft or sticky, it may not have been conditioned properly. Always knead it thoroughly before shaping.
Using The Wrong Clay Type
Not every clay is safe for oven baking. Some modeling clays, like self-hardening clay meant for air-drying only, will not cure properly in an oven. They might dry on the outside but stay soft inside, leading to a weak and unstable finished piece.
Always check the label before you buy. Look for terms like “oven-bake,” “polymer,” or “low-fire.” If it says “air-dry only,” do not put it in the oven.
Expert Tips For Perfect Home-Baked Pottery
Using A Thermometer
I cannot stress this enough: buy an oven thermometer. It costs under ten dollars and eliminates the biggest variable in home pottery baking. Place it at rack level where your pottery sits, and check it before every baking session.
Home ovens can be off by 25 to 50 degrees. That might not sound like much, but for clay curing, those degrees make all the difference. A reliable thermometer gives you confidence and consistency, which is the foundation of great home pottery baking.
Adding A Home Kiln Alternative
If you want to push beyond polymer clay and try firing natural clay at home, consider a home kiln alternative. Some potters use a pit fire setup in their backyard or a raku kiln for small pieces. These methods require more setup but produce results much closer to traditional kiln firing.
For everyday DIY pottery projects, your oven is more than enough. Reserve the more advanced methods for when you have outgrown oven baking and want to explore the full world of ceramic arts.
Finishing And Sealing Your Oven-Baked Pottery
Once your pottery is baked and cooled, you can enhance it with finishing techniques. For polymer clay, a coat of acrylic sealant adds shine and durability. For natural clay, a food-safe glaze or sealant protects the surface and gives it a polished look.
Sanding rough edges with fine-grit sandpaper (400 to 600 grit) smooths the surface before finishing. This small step makes a big difference in the final appearance of your oven-baked ceramics.
Some crafters also paint their baked pieces with acrylic paints. Just make sure the paint is fully dry before applying any sealant. This layered approach gives your pottery a professional look without needing a kiln.
Is It Safe To Bake Pottery In A Kitchen Oven
Safety is a valid concern when using your kitchen oven for pottery. The short answer is yes, it is safe as long as you follow basic precautions. Polymer clay is non-toxic when baked at the recommended temperature. It does not release harmful fumes at normal curing temperatures.
However, it is best practice to avoid baking polymer clay and food in the same oven at the same time. If you must use a shared oven, cover your food securely and ventilate the kitchen well. Many hobbyists keep a separate toaster oven or small oven dedicated to clay work. This eliminates any concern about chemical residue on food surfaces.
For natural clays, the safety concerns are minimal. You are essentially baking dirt and water. Just make sure your workspace is clean and that you wash your hands after handling raw clay. The dust from dry clay can irritate your lungs, so wear a mask when sanding dried pieces.
Frequently Asked Questions
Can You Bake Regular Pottery Clay In A Home Oven?
Regular pottery clay cannot be fully fired in a home oven, but low-fire and earthenware clays can be partially cured at home oven temperatures. The results will not match kiln-fired pottery in strength or waterproofing, but they work well for decorative and craft projects. Always air-dry the piece first and use a slow, gradual heating process.
What Temperature Do You Bake Polymer Clay In An Oven At?
Most polymer clays bake between 230°F and 275°F. Always check the manufacturer’s instructions for the specific brand you are using. Sculpey Original and Premo typically require 275°F, while Fimo works best at 230°F. Use an oven thermometer to verify the temperature, as home ovens often run inaccurate.
How Long Should You Bake Pottery In An Oven?
For polymer clay, the general rule is 15 minutes per quarter inch of thickness. Thicker pieces need longer baking times. For natural clays, the process takes longer because you need to gradually increase and hold the temperature. A piece one inch thick might need 2 to 3 hours total including the gradual heating and cooling phases.
Can You Use A Toaster Oven For Baking Pottery?
Yes, a toaster oven works well for small pottery projects. In fact, many polymer clay artists prefer toaster ovens because they heat up faster, maintain steady temperatures, and avoid the temperature fluctuations of a full-size oven. Just make sure the toaster oven reaches and holds the target temperature accurately.
Why Did My Oven-Baked Pottery Crack?
Cracking usually happens for one of three reasons: the clay was not fully dried before baking, the temperature increased too quickly, or the piece was overbaked. Natural clays are especially prone to cracking if moisture escapes too fast. Always air-dry thoroughly and increase oven temperature gradually to prevent cracks.
Is Oven-Baked Pottery As Durable As Kiln-Fired Pottery?
No, oven-baked pottery is not as durable as kiln-fired pottery. A kiln reaches temperatures over 1000°F, which fully vitrifies the clay and makes it strong and waterproof. Oven-baked pieces are best suited for decorative items, jewelry, and light-use crafts. They can still be beautiful and functional, but they require more careful handling.
Final Thoughts On Baking Pottery In An Oven
Baking pottery in an oven at home is a rewarding and accessible creative outlet. Whether you choose polymer clay for its ease and versatility or experiment with natural low-fire clays for a more traditional experience, your kitchen oven can produce wonderful results. The key is patience, precision, and following the right process for your chosen clay type.
Start small with simple shapes and practice your technique before tackling larger or more detailed projects. Invest in an oven thermometer, read the clay manufacturer’s instructions carefully, and always allow proper drying and cooling time. These small habits make a huge difference in the quality of your finished pieces.
The world of home pottery baking is open to everyone. You do not need a studio, a kiln, or years of experience. With a basic oven, the right clay, and the knowledge from this guide, you are ready to create beautiful oven-baked ceramics right from your kitchen. So go ahead, pick up some clay, and start your first DIY pottery project today.