How To Make Tri Tip Tender In The Oven Step By Step
Making tri tip tender in the oven is easier than you think. With the right temperature, seasoning, and patience, you can turn a tough cut into a juicy masterpiece. This guide walks you through every step so you get perfect oven-baked tri tip at home.
There is nothing quite like a perfectly cooked tri tip roast coming out of the oven. The outside is golden and crusty, and when you cut into it, the inside is pink, juicy, and falling apart with tenderness. If you have ever struggled with a dry, tough tri tip, you are not alone. This cut of beef can be tricky, but the right method makes all the difference.
In this guide, we will show you exactly how to make tri tip tender in the oven step by step. Whether you are a beginner or a seasoned home cook, these tips will help you achieve restaurant-quality results. You will learn the best temperature, the ideal cooking time, and the secrets that keep every bite moist and full of flavor.
Tri tip comes from the bottom sirloin area of the cow. It is a lean cut with a thick triangular shape. Because it is lean, it can dry out fast if you are not careful. But when you treat it right, it becomes one of the most delicious and affordable roasts you can make. Let us dive into everything you need to know.
Key Takeaways
- Low and slow cooking: Baking tri tip at a moderate temperature keeps it tender and juicy.
- Always use a meat thermometer: Pulling the roast at the right internal temp prevents overcooking.
- Rest the meat before slicing: Letting tri tip rest for 10-15 minutes locks in the juices.
- Sear first for a flavorful crust: A quick sear on the stovetop adds amazing flavor before oven roasting.
- Slice against the grain: This single step makes a huge difference in tenderness.
- Marinate or dry brine overnight: Either method deepens flavor and improves texture significantly.
- Use foil to trap moisture: Wrapping tri tip in foil during cooking keeps it from drying out.
📑 Table of Contents
- Understanding Your Tri Tip Roast
- Preparing the Tri Tip for Oven Cooking
- The Best Oven Temperature for Tender Tri Tip
- Step-by-Step Oven Cooking Process
- Common Mistakes That Make Tri Tip Tough
- Expert Tips for the Perfect Tri Tip
- Serving Suggestions and Pairings
- Storing and Reheating Leftover Tri Tip
- Final Thoughts on Making Tri Tip Tender
Understanding Your Tri Tip Roast
Before you turn on the oven, it helps to understand what you are working with. Tri tip is a unique cut, and knowing its characteristics will guide every decision you make in the kitchen.
What Is Tri Tip?
Tri tip is a steak cut from the bottom sirloin subprimal. It weighs about two to four pounds and has a distinctive triangular shape. This cut is popular in California for Santa Maria-style barbecue, but it works beautifully in the oven too.
The meat is lean with a moderate amount of marbling. Marbling refers to the thin streaks of fat running through the muscle. This fat melts during cooking and keeps the meat juicy. Because tri tip is not as heavily marbled as a ribeye, you need to be more careful about overcooking it.
Why Tri Tip Can Be Tough
Tri tip contains connective tissue and muscle fibers that run in multiple directions. If you cook it too fast or too hot, those fibers seize up and the meat turns tough. The key to tenderness is gentle, even heat over a longer period of time.
This is where the oven-baked tri tip method shines. The oven surrounds the meat with consistent, moderate heat. Unlike a grill where one side gets more direct flame, the oven cooks the roast evenly from all sides. This slow, gentle approach breaks down tough fibers without drying out the meat.
Preparing the Tri Tip for Oven Cooking
Preparation is where the magic starts. Taking a few extra minutes before the roast goes in the oven sets you up for success.
Trimming and Tying the Roast
Start by examining your tri tip on the cutting board. You will likely see a thick layer of fat on one side. Leave about a quarter-inch of fat in place. This fat melts during cooking and bastes the meat from the inside. Trim away any large, hard chunks of fat or silver skin.
Next, tie the roast with kitchen twine. Tri tip has different thicknesses, and the thinner parts cook faster than the thick center. Tying it into a uniform shape helps the roast cook evenly. Use three or four pieces of twine spaced evenly along the length of the roast.
Seasoning Options for Maximum Flavor
Seasoning is your chance to build layers of flavor. You have two great options: a dry rub or a wet marinade.
Dry Rub Method: Combine coarse salt, black pepper, garlic powder, smoked paprika, and onion powder. Rub this mixture all over the tri tip, pressing it into the surface. For best results, apply the rub at least one hour before cooking, or even the night before.
Marinade Method: Mix olive oil, soy sauce, Worcestershire sauce, minced garlic, and a splash of red wine vinegar. Place the tri tip in a zip-lock bag with the marinade and refrigerate for four to twelve hours. The acid in the vinegar helps break down tough fibers, making the meat more tender.
No matter which method you choose, let the seasoned tri tip sit at room temperature for about 30 minutes before it goes in the oven. This prevents a cold center and promotes even cooking throughout the beef roast.
The Best Oven Temperature for Tender Tri Tip
Temperature control is the single most important factor in making tri tip tender. Too hot and the outside burns before the inside cooks. Too low and the roast takes forever without developing flavor.
Why Low and Slow Works Best
The sweet spot for oven-baked tri tip is between 250°F and 325°F. This range allows the collagen in the meat to break down slowly. Collagen is the tough protein that makes lean cuts chewy. When you cook it low and slow, collagen converts into gelatin, which gives the meat a silky, tender texture.
At higher temperatures, the muscle fibers contract quickly and squeeze out moisture. This is why a roast cooked at 450°F often ends up dry, even if the internal temp looks right. The low-and-slow approach gives you a pink juicy center with a beautifully caramelized exterior.
Recommended Temperature and Time Guide
Here is a general guide for cooking tri tip in the oven:
- 250°F: About 30-35 minutes per pound. Best for maximum tenderness.
- 275°F: About 25-30 minutes per pound. A good balance of tenderness and flavor.
- 300°F: About 20-25 minutes per pound. Slightly faster with a nice crust.
- 325°F: About 18-22 minutes per pound. Good if you are short on time.
For most home cooks, 275°F is the ideal temperature. It is hot enough to develop flavor but gentle enough to keep the meat moist. Plan for about 2.5 to 3 hours for a typical three-pound tri tip roast.
Step-by-Step Oven Cooking Process
Now that you understand the basics, let us walk through the actual cooking process. Follow these steps and you will have a tender, flavorful tri tip every single time.
Step One: Preheat and Prep
Preheat your oven to 275°F. While the oven is warming up, place your seasoned tri tip on a wire rack set inside a rimmed baking sheet. The wire rack allows hot air to circulate around the roast, which promotes even cooking. It also keeps the bottom from sitting in moisture and getting soggy.
Step Two: Sear for a Flavorful Crust
Before the tri tip goes in the oven, give it a quick sear on the stovetop. Heat a cast-iron skillet over high heat and add a high-smoke-point oil like avocado or grapeseed oil. Sear each side for about 60 to 90 seconds until you get a deep brown crust.
This step is optional but highly recommended. The flavorful crust from searing adds a depth of flavor that you cannot get from oven cooking alone. The Maillard reaction, which is the chemical reaction between amino acids and sugars at high heat, creates hundreds of complex flavor compounds.
Step Three: Oven Roast with Foil
After searing, transfer the tri tip back to the wire rack. Wrap the roast loosely in aluminum foil. The foil traps moisture and creates a gentle steaming effect that keeps the meat from drying out.
Place the rack in the center of the preheated oven. Set a timer and resist the urge to open the oven door frequently. Every time you open the door, the temperature drops and your cooking time increases.
Step Four: Monitor Internal Temperature
This is the most critical step. Insert a meat thermometer into the thickest part of the roast, avoiding any bone or fat pockets. You want to pull the tri tip out of the oven when it reaches these internal temperatures:
- 120°F: Rare
- 130°F: Medium Rare (recommended for best tenderness)
- 140°F: Medium
- 150°F and above: Well Done (not recommended, will be dry)
For a tender, juicy tri tip, aim for 130°F to 135°F. Remember that the temperature will rise about 5 to 10 degrees while the meat rests. This carryover cooking is important to account for.
Step Five: Rest Before Slicing
Once the tri tip reaches your target temperature, take it out of the oven. Remove the foil and let the roast rest on the cutting board for at least 10 to 15 minutes. This resting period allows the juices to redistribute throughout the meat.
If you skip this step and slice immediately, all those juices will run out onto the cutting board instead of staying in the meat. The result is a drier roast. Patience here pays off big time.
Step Six: Slice Against the Grain
Tri tip has muscle fibers that run in different directions across the roast. Before slicing, look closely at the meat and identify which direction the fibers run. Cut perpendicular to those fibers, which is called slicing against the grain.
Use a sharp carving knife and cut slices about a quarter-inch thick. This technique shortens the muscle fibers and makes each bite much easier to chew. It is the simplest and most effective way to ensure tenderness in every single slice.
Common Mistakes That Make Tri Tip Tough
Even with the best recipe, certain mistakes can ruin your tri tip. Here are the most common pitfalls and how to avoid them.
Cooking at Too High a Temperature
Some recipes call for starting tri tip at 400°F or higher. While this can work for thicker steaks, it is not ideal for a whole roast. High heat causes the outside to overcook before the inside reaches the target temperature. Stick to the 250°F to 325°F range for the best results.
Skipping the Rest Period
We mentioned this in the steps above, but it deserves its own warning. Cutting into a hot tri tip right out of the oven is tempting, but it is the number one reason home cooks end up with dry meat. Set a timer, make a side dish, and wait. Your patience will be rewarded.
Not Using a Meat Thermometer
Relying on time alone is a recipe for inconsistency. Every oven runs hot or cold, and every tri tip is a different size. A digital instant-read thermometer takes the guesswork out of cooking. It is the single best tool you can invest in for oven cooking temperature accuracy.
Over-Marinating or Using Too Much Acid
Marinades with a lot of vinegar or citrus juice can actually break down the meat too much if left too long. Four to twelve hours is the sweet spot. Beyond 24 hours, the texture can become mushy and unpleasant.
Slicing With the Grain
This is an easy mistake to make, especially if you are in a hurry. Take the extra 30 seconds to identify the grain direction. Slicing with the grain leaves long, chewy fibers in each bite. Slicing against the grain gives you tender, melt-in-your-mouth results.
Expert Tips for the Perfect Tri Tip
Here are some bonus tips from experienced cooks and chefs that will take your tri tip game to the next level.
Try a Reverse Sear Method
The reverse sear method involves cooking the tri tip low in the oven first, then finishing it with a high-heat sear on the stovetop or under the broiler. This gives you a perfectly pink interior with a deeply caramelized crust. After the oven phase, crank your stovetop burner to high and sear each side for 45 to 60 seconds.
Add Aromatics for Extra Flavor
Place a few sprigs of fresh rosemary, thyme, or smashed garlic cloves on the wire rack beneath the tri tip. As the roast cooks, the aromatic steam infuses the meat with subtle, wonderful flavors. This is an easy trick that elevates a simple oven-baked beef roast into something extraordinary.
Make a Pan Sauce
After the tri tip rests, do not throw away the pan drippings. Pour off excess fat, leaving the browned bits in the baking sheet. Add beef broth, a splash of red wine, and a knob of butter. Simmer on the stovetop for a few minutes, strain, and you have a rich, savory sauce to drizzle over your sliced tri tip.
Experiment with Different Woods for Smoking
If you want to add a smoky flavor, try adding a handful of wood chips to a foil pouch in the oven. Hickory, mesquite, and cherry wood all pair beautifully with tri tip. Place the pouch on the oven floor during the first hour of cooking, then remove it for the remaining time.
Serving Suggestions and Pairings
A great tri tip roast deserves great sides. Here are some classic pairings that complement the rich, beefy flavor:
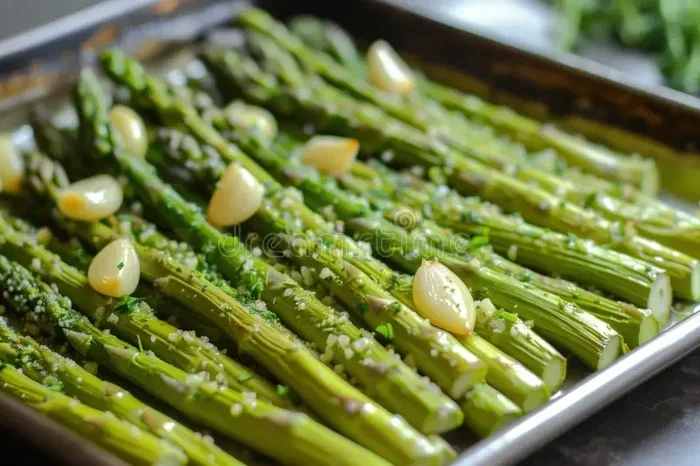
- Grilled vegetables: Asparagus, bell peppers, and zucchini grilled alongside the tri tip.
- Crispy roasted potatoes: Baby potatoes roasted with olive oil, garlic, and rosemary.
- Simple green salad: A bright arugula salad with lemon vinaigrette cuts through the richness.
- Grilled corn on the cob: A nod to Santa Maria-style BBQ tradition.
- Garlic bread or crusty rolls: Perfect for soaking up the pan juices.
For drinks, a bold red wine like Cabernet Sauvignon or Zinfandel pairs wonderfully. If you prefer beer, a crisp lager or amber ale complements the smoky, savory flavors beautifully.
Storing and Reheating Leftover Tri Tip
Tri tip makes excellent leftovers, and properly stored, it stays tender for days.
Let the leftover roast cool completely, then wrap it tightly in plastic wrap or aluminum foil. Store it in the refrigerator for up to four days. To reheat, place slices in a baking dish, add a splash of beef broth, and cover with foil. Heat at 250°F for about 15 to 20 minutes. This gentle reheating method prevents the meat from drying out.
You can also freeze cooked tri tip for up to three months. Wrap individual slices in freezer-safe bags and thaw overnight in the refrigerator before reheating.
Final Thoughts on Making Tri Tip Tender
How to make tri tip tender in the oven really comes down to three things: patience, temperature control, and proper slicing. Keep the oven temperature moderate, use a meat thermometer to avoid overcooking, and always let the roast rest before cutting. These simple principles transform a humble cut of beef into a showstopper centerpiece for any meal.
The beauty of oven-baked tri tip is that it is forgiving. Even if you are not a perfect cook, following this guide will get you tender, juicy results. Once you nail the method, you will never go back to ordering expensive cuts at restaurants. A well-made tri tip roast is satisfying, delicious, and incredibly affordable.
So fire up your oven, grab a tri tip from your local butcher or grocery store, and give this method a try. With a little practice, you will be serving up tender beef roast that rivals anything from a steakhouse. Happy cooking!
Frequently Asked Questions
What is the best internal temperature for tri tip?
The best internal temperature for a tender tri tip is 130°F to 135°F for medium rare. This range keeps the meat juicy and pink in the center. Remember to pull the roast out about 5 degrees early because the temperature will rise during resting.
How long does it take to cook tri tip in the oven?
At 275°F, plan for about 25 to 30 minutes per pound. A typical three-pound tri tip will take roughly 1.5 to 2 hours. Always rely on internal temperature rather than time alone for the most accurate results.
Should I wrap tri tip in foil while cooking?
Yes, wrapping tri tip in foil helps trap moisture and promotes even cooking. The foil creates a gentle steaming effect that keeps the lean meat from drying out. You can remove the foil in the last 20 minutes if you want a crispier exterior.
Can I cook tri tip from frozen?
It is best to thaw tri tip in the refrigerator overnight before cooking. Cooking from frozen leads to uneven cooking, with the outside overcooking while the center is still frozen. If you must cook from frozen, increase the cooking time by about 50 percent and use a meat thermometer carefully.
What is the difference between tri tip and brisket?
Tri tip comes from the bottom sirloin, while brisket comes from the breast or lower chest area. Tri tip is smaller, leaner, and cooks much faster than brisket. Brisket has more connective tissue and requires longer, slower cooking, often at lower temperatures over many hours.
How do I know if my tri tip is done?
The only reliable way to know if tri tip is done is by using a meat thermometer. When the internal temperature reaches 130°F to 135°F for medium rare, the roast is ready. The meat should feel firm but springy when you press it with your finger.