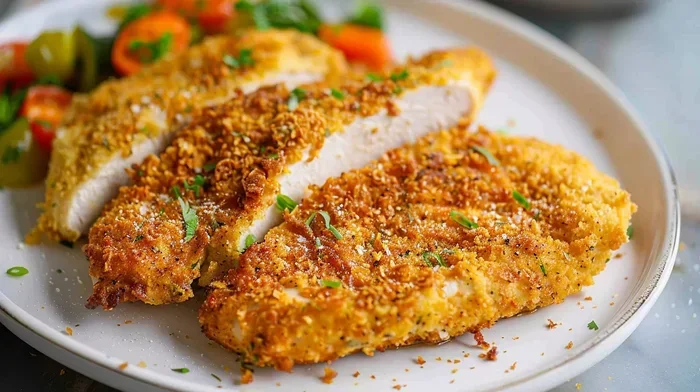
How To Bread Chicken For Oven And Make It Extra Crispy
Learning how to bread chicken for oven is easier than you think, and the results are worth every step. This guide walks you through the complete process of creating golden, crunchy baked chicken that tastes just like fried chicken but with far less oil. Whether you are a beginner or a seasoned cook, you will find simple techniques to make oven-baked crispy chicken that your whole family will love.
There is something deeply satisfying about pulling a tray of golden, crunchy chicken out of the oven. The smell fills the kitchen, the crust crackles just right, and the meat stays perfectly juicy inside. If you have ever wondered how to bread chicken for oven and get that restaurant-quality crunch at home, you are in the right place.
This guide covers everything from the basic ingredients to the pro tricks that make the biggest difference. You do not need any fancy equipment or years of cooking experience. With a few simple steps and some patience, you can make crispy oven-baked chicken that rivals anything from a deep fryer. Let us get started.
Key Takeaways
- Simple 3-Step Breading Process: Flour, egg wash, and breadcrumbs create the perfect crispy coating every time.
- Panko Makes It Extra Crispy: Japanese-style panko breadcrumbs give your chicken a lighter, crunchier texture than regular breadcrumbs.
- Buttermilk Soak Is Key: Soaking chicken in buttermilk keeps it juicy and helps the coating stick better.
- Oven Temperature Matters: Baking at 425°F ensures a golden brown finish without drying out the meat.
- Double Dredging Adds Crunch: Going through the breading process twice creates a thicker, more satisfying crust.
- Wire Rack Beats Flat Pan: Using a wire rack over a baking sheet allows air to circulate and keeps the bottom crispy.
- No Deep Frying Needed: You get all the crunch of fried chicken with a healthier oven-baked method.
📑 Table of Contents
- Why Oven-Baked Breading Beats Deep Frying
- What You Need to Bread Chicken For Oven
- Step-by-Step How To Bread Chicken For Oven
- Tips to Make Your Breading Extra Crispy
- Common Mistakes to Avoid When Breading Chicken
- Serving Suggestions and Side Dishes
- How to Store and Reheat Leftover Breaded Chicken
- Frequently Asked Questions
- Final Thoughts on How To Bread Chicken For Oven
Why Oven-Baked Breading Beats Deep Frying
More and more people are choosing to bake their chicken instead of frying it. And there are some really good reasons for that. Oven-baked chicken is lighter, healthier, and just as delicious when you do it right.
Health Benefits of Baking Instead of Frying
Deep frying soaks chicken in oil. That adds a lot of extra calories and fat. Baking uses little to no oil, which means you get all the flavor without the guilt. If you are watching what you eat or trying to feed your family something a bit lighter, oven-baked crispy chicken breast is a great choice.
You also avoid the risks that come with hot oil. No splatters, no burns, and no messy cleanup. Baking is simply safer and easier for most home cooks.
Flavor and Texture You Can Trust
Some people worry that baked chicken will not be as crispy as fried chicken. But that is a myth. When you use the right chicken breading techniques and the right oven temperature, baked chicken can be just as crunchy. In fact, many people say oven-baked oven fried chicken has a more even, consistent crust compared to deep frying.
The oven also cooks the chicken more evenly. Every piece gets the same amount of heat, so you do not end up with burnt edges and raw centers. That alone is a big win.
What You Need to Bread Chicken For Oven
Before you start, make sure you have everything ready. Having all your ingredients and tools laid out makes the whole process smooth and fun. This is called setting up a breading station, and it is how professional cooks work too.
Essential Ingredients for Perfect Breading
Here is what you need for a basic crispy chicken coating:
- Chicken pieces: Boneless breasts, thighs, or drumsticks all work great. Chicken cutlets are especially good for even cooking.
- All-purpose flour: This is your first layer. It helps the egg wash stick to the chicken.
- Eggs: Beaten eggs act as the glue between the flour and breadcrumbs.
- Breadcrumbs: Regular breadcrumbs work fine, but panko breadcrumbs give you that extra crunch.
- Buttermilk: Soaking the chicken in buttermilk keeps it tender and adds a subtle tangy flavor.
- Salt and pepper: Do not skip these. They bring out the flavor in every layer.
- Garlic powder and paprika: These add depth and a little warmth to your seasoning mix.
Equipment You Will Need
You do not need much equipment to make great baked chicken recipe results. Here is what helps:
- Three shallow dishes or bowls for your breading station
- A wire cooling rack placed over a baking sheet
- Parchment paper or a silicone baking mat
- Tongs for handling the chicken without mess
- A meat thermometer to check for doneness
Step-by-Step How To Bread Chicken For Oven
Now comes the fun part. The actual breading chicken process is simple, but doing it in the right order makes all the difference. Follow these steps closely and you will get amazing results every single time.
Step 1: Prep the Chicken
Start by patting your chicken dry with paper towels. Moisture is the enemy of a good crust. If the chicken is too wet, the flour will not stick properly, and you will end up with a soggy coating.
Next, season the chicken with salt and pepper on both sides. If you have time, let it sit in the buttermilk soak for at least 30 minutes. An hour is even better. The buttermilk tenderizes the meat and adds flavor deep inside.
Step 2: Set Up Your Breading Station
Arrange three shallow dishes in a row. Here is what goes in each one:
- Dish 1: Flour mixed with salt, pepper, garlic powder, and paprika.
- Dish 2: Beaten eggs (you can add a splash of milk to thin them out).
- Dish 3: Breadcrumbs, preferably panko breadcrumbs for extra crunch.
This setup makes the process fast and clean. You just move the chicken from one dish to the next, and you are done.
Step 3: The Dredging Process
Here is how to dredge each piece properly:
- Press the chicken into the flour mixture on both sides. Shake off any excess.
- Dip it into the egg wash, making sure the entire surface is coated.
- Press it firmly into the breadcrumbs, covering every inch.
- Place the coated piece on the wire rack.
Take your time with this step. Rushing leads to bare spots and a coating that falls off in the oven. A firm press ensures the breadcrumbs stay put.
Step 4: The Double Dredging Trick
Want to know the secret to extra crispy chicken? Go through the breading process twice. After the first round, dip the chicken back into the egg wash and then into the breadcrumbs again. This creates a thicker coating that stays crunchy even after baking.
This double dredging method is what separates good oven-baked chicken from great oven-baked chicken. It is a small extra step that makes a huge difference.
Step 5: Place on the Baking Sheet
Arrange the breaded chicken pieces on the wire rack. Make sure there is space between each piece. Overcrowding traps steam and makes the coating soggy instead of crispy.
Lightly spray or drizzle the tops with olive oil or cooking spray. This helps the breadcrumbs brown and crisp up in the oven.
Tips to Make Your Breading Extra Crispy
Getting that perfect crunch is all about the details. Here are some tried-and-true tips that will elevate your crispy chicken recipe from good to outstanding.
Use Panko Breadcrumbs for a Lighter Crunch
Regular breadcrumbs can make your coating dense and heavy. Panko breadcrumbs are lighter and flakier, which means they fry up (or bake up) into a crispier texture. They also absorb less oil, which keeps your baked chicken lighter.
You can find panko in most grocery stores near the breadcrumb section. They are worth the small extra cost.
The Buttermilk Soak Makes a Big Difference
Soaking your chicken in buttermilk for baked chicken does two things. First, the acidity tenderizes the meat so it stays juicy. Second, the thick texture of buttermilk helps the flour and breadcrumbs cling to the chicken better.
If you do not have buttermilk, you can make a quick substitute. Add one tablespoon of lemon juice or white vinegar to a cup of regular milk. Let it sit for five minutes, and you are good to go.
Temperature and Timing Are Everything
Preheat your oven to 425°F. This high heat is what creates the crispy crust. If the oven is too cool, the chicken steams instead of crisping up.
Bake the chicken for about 20 to 25 minutes, depending on the size of the pieces. Flip them halfway through for even browning. Use a meat thermometer to check that the internal temperature reaches 165°F. That is the safe temperature for cooked chicken.
Let the Coating Set Before Baking
This is a tip many people overlook. After breading the chicken, let it rest on the wire rack for 10 to 15 minutes before putting it in the oven. This allows the coating to set and adhere to the chicken. The result is a coating that does not slide off or get soggy during baking.
Common Mistakes to Avoid When Breading Chicken
Even with the best recipe, small mistakes can ruin your results. Here are the most common pitfalls and how to avoid them.
Skipping the Dry Pat
Wet chicken does not bread well. Always pat your chicken dry before you start the dredging process. This single step can be the difference between a perfect crust and a coating that peels off in the oven.
Overcrowding the Pan
It is tempting to fit as many pieces as possible on the baking sheet. But when pieces touch or overlap, steam gets trapped. That steam softens the coating and gives you soggy spots instead of crispy ones. Give each piece room to breathe.
Not Letting the Breading Set
As mentioned above, skipping the rest time before baking is a common mistake. The coating needs a few minutes to bond with the chicken. Patience here pays off big time.
Using the Wrong Oven Temperature
Baking at too low a temperature will give you pale, soft chicken. Too high, and the outside burns before the inside cooks through. Stick to 425°F for the best balance of crispy outside and juicy inside.
Forgetting to Flip the Chicken
Flipping the chicken halfway through baking ensures both sides get golden and crispy. If you do not flip, the bottom stays pale and soft while the top gets too dark.
Serving Suggestions and Side Dishes
Now that your golden brown chicken is ready, it is time to think about what to serve with it. The right sides can turn a simple baked chicken meal into something memorable.
Roasted vegetables like asparagus, broccoli, or carrots pair beautifully with crispy chicken. A fresh garden salad with a light vinaigrette adds brightness and balance. For something more filling, try mashed potatoes, coleslaw, or corn on the cob.
If you want to keep the theme going, a dipping sauce can take your crispy chicken coating to the next level. Honey mustard, ranch, or a spicy sriracha mayo are all fantastic options. Serve them in small bowls on the side and let everyone customize their plate.
Oven-baked chicken also makes excellent meal prep. Cook a big batch on Sunday, and you have ready-to-eat meals for the week. The chicken stays crispy in the fridge for a day or two, and you can reheat it in the oven to bring back the crunch.
How to Store and Reheat Leftover Breaded Chicken
Proper storage keeps your baked crispy chicken tasting almost as good as the day you made it.
Let the chicken cool completely before storing. Place it in an airtight container and refrigerate for up to 3 days. Do not stack the pieces on top of each other, as this can crush the crispy coating.
To reheat, preheat your oven to 375°F and place the chicken on a wire rack. Bake for 10 to 15 minutes until heated through. The wire rack keeps the bottom from getting soggy. Avoid using the microwave if you can, as it will make the coating soft and chewy.
Frequently Asked Questions
Can I use regular breadcrumbs instead of panko?
Yes, you absolutely can. Regular breadcrumbs will still give you a good coating. However, panko breadcrumbs create a lighter, crunchier texture that many people prefer. If you only have regular breadcrumbs, your chicken will still turn out delicious.
How long should I soak chicken in buttermilk?
At least 30 minutes gives good results, but an hour or overnight in the refrigerator works even better. The longer the soak, the more tender and flavorful the chicken becomes. Just make sure to keep it refrigerated during the soak.
Can I make the breaded chicken ahead of time?
You can bread the chicken up to a day ahead. Place the breaded pieces on a wire rack, cover them loosely with plastic wrap, and refrigerate. When you are ready to bake, let them sit at room temperature for about 15 minutes before putting them in the oven.
What temperature should I bake breaded chicken at?
Bake breaded chicken at 425°F for the best results. This high temperature crisps the coating quickly while keeping the inside moist. Cooking times vary depending on the size of the pieces, but most chicken bakes in 20 to 25 minutes.
Why is my breading falling off the chicken?
The most common reason is moisture. If the chicken surface is too wet, the flour and breadcrumbs will not adhere properly. Make sure to pat the chicken dry, let the coating set before baking, and avoid overcrowding the pan. Also, make sure your egg wash is not too thin or too thick.
Can I freeze breaded chicken before baking?
Yes, you can freeze breaded chicken before baking. Place the breaded pieces on a baking sheet lined with parchment paper and freeze them until solid. Then transfer them to a freezer bag. When you are ready to cook, bake them directly from frozen at 425°F and add about 5 to 10 extra minutes to the cooking time.
Final Thoughts on How To Bread Chicken For Oven
Making crispy chicken for oven at home is one of those skills that pays off every single time. Once you get the hang of the basic breading chicken process, you can experiment with different seasonings, coatings, and sauces to make it your own.
The beauty of this method is how simple it is. You need just a few ingredients, a little bit of patience, and a hot oven. No deep fryer, no special equipment, no complicated techniques. Just good, honest food that tastes incredible.
Start with the basic recipe and the tips in this guide. Try the double dredging method and use panko breadcrumbs for that extra crunch. Once you see and taste the difference, you will never go back to plain baked chicken again.
So next time you are craving something crispy and satisfying, remember that the answer is right in your own kitchen. How to bread chicken for oven is a skill anyone can master, and the results will impress everyone at the table. Get in the kitchen, give it a try, and enjoy every golden, crunchy bite.