How Long Is A Self Cleaning Oven Cycle And What To Expect
A self cleaning oven cycle typically lasts between 2 to 4 hours depending on your oven model and how dirty it is. During this time, the oven heats up to extreme temperatures, usually around 900°F, to burn off grease and food residue. You should expect the oven to lock automatically, produce some smoke and odor, and require a cool-down period before the door unlocks again.
Have you ever stared at your oven, wondering how long that self cleaning oven cycle actually takes? You are not alone. Many homeowners press that button, hear a click, and then wonder what they have gotten themselves into. The truth is, understanding the cleaning cycle length and what happens during it can save you time, stress, and even prevent damage to your appliance.
Self cleaning ovens are a fantastic convenience. They use high heat to burn off grease, food splatters, and baked-on residue without any scrubbing. But the process is not instant. It takes time, patience, and a little know-how. In this guide, we will walk you through everything you need to know about how long a self cleaning oven cycle lasts, what to expect at each stage, and how to get the best results every single time.
Key Takeaways
- Standard Cycle Duration: Most self cleaning oven cycles run between 2 to 4 hours, with some models offering shorter options.
- Extreme Heat Is Key: The oven reaches temperatures around 900°F to incinerate grease and food buildup effectively.
- Safety Features Activate: The oven door locks automatically during the cycle to prevent burns and accidents.
- Smoke and Odor Are Normal: Some smoke and smell are expected, but proper ventilation helps manage them.
- Cool-Down Period Matters: The oven needs 30 minutes to several hours to cool down before the door unlocks.
- Preparation Reduces Mess: Removing large debris and lining the oven floor with foil before starting helps minimize smoke.
- Maintenance Extends Performance: Running the cycle every few months keeps your oven working efficiently and odor-free.
📑 Table of Contents
- How Long Does A Self Cleaning Oven Cycle Take?
- What To Expect Before Starting the Cycle
- The Self Cleaning Oven Cycle: Step by Step
- Common Mistakes People Make With Self Cleaning
- How To Get the Best Results From Your Self Cleaning Cycle
- Safety Tips for Using the Self Cleaning Feature
- How Often Should You Use the Self Cleaning Feature?
- What To Do If Something Goes Wrong
- Final Thoughts on Self Cleaning Oven Cycles
How Long Does A Self Cleaning Oven Cycle Take?
The short answer is that most self cleaning oven cycles last between 2 and 4 hours. However, the exact cleaning duration depends on several factors. Let us break this down so you know exactly what to expect.
Standard Cycle Time
Most modern ovens with a pyrolytic cleaning feature run a full cycle in about 2.5 to 3 hours. This is the standard setting you will find on most brands like Whirlpool, GE, Samsung, and LG. During this time, the oven ramps up to its peak temperature and holds it long enough to carbonize all the grime inside.
Some ovens offer a shorter cycle option. These quick clean settings can take as little as 1 to 1.5 hours. However, they work best on lightly soiled ovens. If your oven has heavy buildup, the shorter cycle may not fully remove all the residue.
Factors That Affect Cleaning Time
Several things influence how long your oven cleaning cycle will run:
- Level of Dirt: A heavily soiled oven needs more time at high heat to fully burn off residue.
- Oven Model: Different brands and models have slightly different cycle programs and temperature settings.
- Age of the Oven: Older ovens may take longer because their insulation is less efficient.
- Amount of Food Residue: More baked-on food means the cycle needs to work harder and longer.
- Room Temperature: Cold kitchens may slightly extend the heating phase of the cleaning cycle length.
What Happens During the Cycle
The self-cleaning feature works through a process called pyrolysis. Here is a simple breakdown of what happens:
- The oven heats up rapidly to around 900°F.
- It holds that temperature for 1 to 2 hours.
- The extreme heat carbonizes all organic matter inside the oven.
- The oven cools down gradually.
- You wipe away the ash residue with a damp cloth.
Each of these phases takes time, which is why the total cleaning time adds up to several hours. But the result is worth it. You end up with a spotless oven interior without using a single chemical cleaner.
What To Expect Before Starting the Cycle
Before you press that start button, there are a few important things you need to do. Proper preparation makes a huge difference in how smoothly the self cleaning oven cycle goes.
Remove Large Food Debris
Take out any large chunks of food, oven racks, and metal pans. The extreme heat can damage removable parts, and large debris can create excessive smoke. A quick wipe of the oven floor with a damp cloth to remove loose crumbs also helps.
Ventilate Your Kitchen
Open windows and turn on your range hood before starting. The oven cleaning process produces smoke and odors as it burns off grease. Good airflow keeps your kitchen comfortable and helps the smoke dissipate faster.
Check the Oven Door Lock
Most ovens with a self-cleaning feature have an automatic door lock. This lock engages once the cycle starts and stays engaged until the oven cools to a safe temperature. Make sure nothing is blocking the lock mechanism.
Quick Tips Before Starting
- Remove pets from the kitchen. The fumes can be irritating to animals.
- Turn off your smoke detectors if they are sensitive, but keep them on if possible for safety.
- Place a baking sheet on the oven floor below the racks to catch any dripping residue.
- Never leave the house during a self cleaning cycle. Always stay nearby.
The Self Cleaning Oven Cycle: Step by Step
Understanding each phase of the oven cleaning cycle helps you feel more confident and prepared. Here is what happens from start to finish.
Phase 1: Heating Up
The first 10 to 15 minutes involve the oven rapidly heating up. You will hear the fans running and may notice the interior lights turning on. The temperature climbs from room temperature to around 900°F. This phase is quick and relatively quiet.
Phase 2: Peak Temperature Hold
This is the longest phase and can last 1 to 2 hours. The oven maintains its extreme temperature to break down all the grease and food residue. You may see smoke and smell a strong odor during this phase. This is completely normal and expected.
The thermal protectors in your oven are designed to handle these temperatures safely. They prevent overheating and protect the oven’s electronics. You might also hear some popping or crackling sounds as food residue burns away.
Phase 3: Cooling Down
Once the cleaning phase is complete, the oven begins to cool. This is the most time-consuming part. Depending on how hot the oven got and the ambient temperature in your kitchen, cooling can take anywhere from 30 minutes to 3 hours.
The oven door remains locked during this entire cool-down period. This is a critical safety feature. The interior surfaces are extremely hot and can cause severe burns. Wait until the door lock releases on its own before opening the oven.
Phase 4: Wiping Away Ash
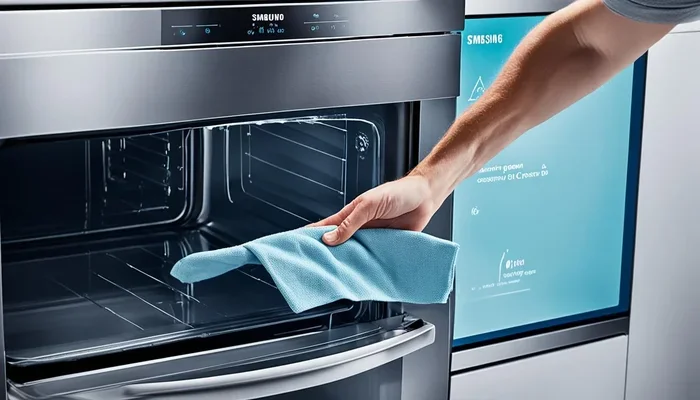
After the door unlocks, open it and you will see a grayish ash residue covering the oven floor and walls. This is what is left of all the burned-off grease and food. Use a damp cloth or sponge to wipe it away easily. No scrubbing is needed.
If you notice stubborn spots, a paste of baking soda and water can help. Apply it, let it sit for a few minutes, and wipe clean. This final step usually takes 10 to 15 minutes.
Common Mistakes People Make With Self Cleaning
Even though self cleaning ovens are designed to be convenient, many people make mistakes that can cause problems. Here are the most common ones to avoid.
Starting the Cycle With a Messy Oven
This might sound obvious, but many people skip the prep work. Large food particles and excessive grease create more smoke than necessary. They can also trigger your smoke detectors and leave behind a stronger odor. Always do a quick pre-clean before starting the auto-clean setting.
Leaving the Oven Unattended for Too Long
While the oven is designed to run the cycle safely, it is still a good idea to stay home. Check on it periodically. If you notice excessive smoke or a burning smell that seems unusual, you can stop the cycle early.
Forgetting About the Oven Racks
Oven racks should always be removed before a self cleaning cycle. The extreme heat can warp or discolor them. Hand wash them separately with warm soapy water.
Using the Self Clean Feature Too Often
Running the cleaning cycle too frequently can wear out the oven’s components over time. The door lock mechanism, glass, and insulation are all subjected to extreme stress. For best results, use the self-cleaning feature every 3 to 6 months or as needed.
Not Letting the Oven Cool Completely
Some people try to open the oven door before it has fully cooled. This is dangerous and can cause burns. Always wait for the door lock to release naturally. Patience is key with any oven maintenance routine.
How To Get the Best Results From Your Self Cleaning Cycle
Want your self cleaning oven to work its magic as effectively as possible? Follow these expert tips for the best results.
Run a Short Test Cycle First
If you have never used the self-cleaning feature on your oven, try a short test run first. This helps you understand how your specific oven behaves. You will see how much smoke it produces and how long the actual cleaning takes.
Use the Steam Clean Option When Available
Many newer ovens come with a steam clean feature. This uses lower temperatures and water to loosen light grime. It is much faster than a full pyrolytic cycle, often taking only 20 to 30 minutes. It is perfect for routine maintenance between full cleaning cycles.
Clean Spills Immediately
The less buildup your oven has, the shorter and more effective the cleaning cycle length will be. Wipe up spills as soon as the oven cools down after cooking. This simple habit reduces the need for heavy-duty self-cleaning sessions.
Keep the Oven Vent Clean
Some ovens have vent openings that can get clogged with grease over time. Check these vents regularly and clean them with a damp cloth. Clear vents allow smoke to escape properly during the oven cleaning cycle and prevent excessive buildup inside the oven.
Line the Oven Floor With Foil
Before starting a self cleaning cycle, you can line the oven floor with a layer of aluminum foil. This catches dripping residue and reduces the amount of smoke produced. Just make sure the foil does not touch the heating elements.
Compare: Steam Clean vs Pyrolytic Clean
| Feature | Steam Clean | Pyrolytic Clean |
|---|---|---|
| Cycle Duration | 20-30 minutes | 2-4 hours |
| Temperature | Around 250°F | Around 900°F |
| Best For | Light maintenance | Heavy grease and buildup |
| Oven Door Lock | Usually not required | Automatic lock |
| Odor Level | Minimal | Moderate to strong |
| Energy Use | Low | High |
| Residue After | Wet, easy to wipe | Dry ash, easy to wipe |
Both methods have their place in oven maintenance. Use steam clean for quick touch-ups and pyrolytic clean for deep cleaning every few months.
Safety Tips for Using the Self Cleaning Feature
Safety should always come first when using the self cleaning oven cycle. The extreme temperatures involved demand respect and caution. Here are some important safety tips to keep in mind.
- Never leave children or pets unattended near the oven during a cleaning cycle.
- Keep flammable items away from the oven, including towels, paper, and plastic items.
- Check that the oven is empty before starting. No utensils, foil, or removable parts should be inside.
- Use your range hood to help vent smoke and fumes outside the kitchen.
- Do not force the oven door open during or immediately after the cycle. Wait for the lock to release.
- Wear oven mitts when wiping down the interior after the cycle, just to be safe.
Following these simple precautions ensures that your oven cleaning process is both effective and safe. Most modern ovens are built with multiple safety features, but common sense goes a long way.
How Often Should You Use the Self Cleaning Feature?
The frequency of using your self cleaning oven cycle depends on how often you cook. Here is a general guideline:
- Daily Cooks: Run a full pyrolytic cycle every 2 to 3 months.
- Occasional Cooks: Every 4 to 6 months is usually sufficient.
- Steam Clean Users: Use the steam feature monthly for light maintenance.
Regular maintenance keeps your oven performing at its best. It also prevents heavy buildup that can make the cleaning duration longer and more difficult. A little upkeep goes a long way in extending the life of your oven.
What To Do If Something Goes Wrong
While self cleaning ovens are designed to be reliable, sometimes issues arise. Here is what to do in common situations.
The Oven Won’t Start the Self Clean Cycle
Check that the oven is properly plugged in and that the door is fully closed. Some ovens will not start the cleaning cycle if the door lock mechanism is faulty. Refer to your owner’s manual for troubleshooting steps.
Excessive Smoke During the Cycle
A small amount of smoke is normal. But if the smoke is excessive, it usually means there is too much food residue inside. Open a window and run your range hood. If the smoke continues, you can stop the cycle early, let the oven cool, and wipe out the worst of the mess before restarting.
The Door Won’t Unlock After Cooling
Sometimes the door lock takes longer than expected to release. Give it extra time. If it still does not unlock after several hours, consult your oven’s manual or contact customer support. Forcing the door open can damage the lock mechanism.
Unusual Odors After Cleaning
A slight odor after a self cleaning cycle is normal and should dissipate within a few hours. If the smell persists, wipe down the interior with a solution of water and white vinegar. This neutralizes any remaining odors effectively.
Final Thoughts on Self Cleaning Oven Cycles
The self cleaning oven cycle is one of the most useful features in modern kitchens. It saves you from the hassle of scrubbing and scraping baked-on grease. While the cycle takes a few hours, the result is a sparkling clean oven with minimal effort on your part.
Remember that preparation is key. A quick pre-clean before starting reduces smoke and shortens the overall cleaning time. Always stay nearby during the cycle, keep your kitchen ventilated, and let the oven cool completely before opening the door.
With regular use of the self-cleaning feature and a little basic maintenance, your oven will stay in great shape for years to come. The time you invest in running a self cleaning oven cycle pays off in a cleaner, more efficient appliance that performs better every time you cook.
So the next time your oven needs attention, do not dread it. Know exactly how long the process takes, what to expect, and how to get the best results. Your oven will thank you for it.
Frequently Asked Questions
Can I stop a self cleaning oven cycle early?
Yes, you can stop the cycle at any time by pressing the cancel or off button. However, the oven will be extremely hot, so wait for it to cool down before opening the door. It is best to only stop early if there is a safety concern or excessive smoke.
Is the smoke during a self cleaning cycle dangerous?
No, the smoke is not dangerous. It is simply the result of food residue and grease being burned off at high temperatures. However, you should ventilate your kitchen well and keep smoke detectors functional. If the smoke seems unusually heavy, stop the cycle and wipe out excess debris before restarting.
Can I use oven cleaner during a self cleaning cycle?
No, you should never use chemical oven cleaners in a self cleaning oven. The extreme heat of the pyrolytic cleaning process is designed to replace chemical cleaners. Using additional chemicals can produce harmful fumes and damage the oven interior.
How long does the oven door stay locked after a self cleaning cycle?
The door typically stays locked for 30 minutes to 3 hours after the cycle ends, depending on the oven model and the temperature reached. The lock releases automatically once the interior cools to a safe temperature. Never try to force the door open.
Does the self cleaning cycle use a lot of electricity?
Yes, the self cleaning oven cycle uses more electricity than a regular cooking cycle because it heats to extremely high temperatures for several hours. However, since the cycle only runs a few times a year, the overall impact on your electricity bill is minimal.
Should I remove the oven racks before running a self cleaning cycle?
Yes, absolutely. Remove all oven racks, baking pans, and trays before starting the cleaning cycle. The extreme heat can warp, discolor, or damage removable parts. Wash them separately by hand with warm soapy water.
=== CONCLUSION ===
A self cleaning oven cycle is a powerful tool that makes oven maintenance simple and effective. Now you know that the cleaning cycle length typically ranges from 2 to 4 hours, with additional time needed for cooling. You understand what happens at each stage, from the initial heat-up to the final wipe-down of ash residue.
By following the preparation tips, avoiding common mistakes, and using the self-cleaning feature at the right frequency, you can keep your oven in excellent condition. The time you spend understanding your oven cleaning process pays off with a cleaner appliance, better cooking performance, and less hassle in the long run.
Take what you have learned here and put it into practice. Your oven will reward you with better results and a longer lifespan. Happy cleaning!