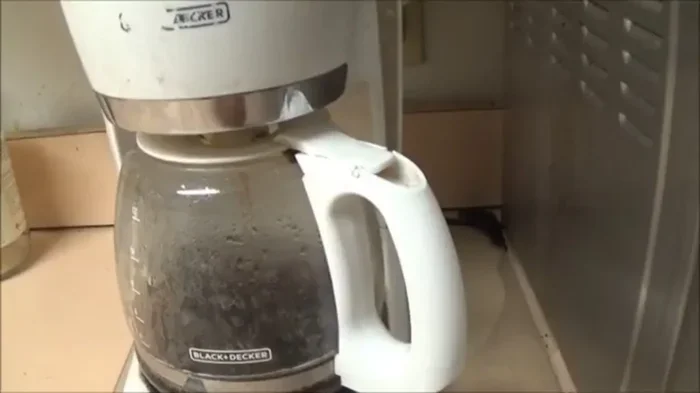
How To Prevent Mold In Coffee Maker And Keep It Clean
Mold in coffee makers is a common problem that affects taste and health. This guide covers everything you need to know about how to prevent mold in coffee maker through simple daily habits and deep cleaning routines. You will learn the best cleaning solutions, warning signs, and maintenance tips to keep your machine fresh and safe.
Mold loves warm, damp, and dark places. Your coffee maker checks every single box. If you have ever noticed a weird smell or seen dark spots inside your machine, you are not alone. Mold in coffee makers is a real problem that many people face every single day. The good news is that preventing it is much easier than you think.
In this guide, we will walk you through everything you need to know about how to prevent mold in coffee maker. You will learn simple daily habits that stop mold before it starts. We will also cover deep cleaning methods that remove any mold that has already formed. By the end, you will feel confident keeping your coffee maker fresh, clean, and safe for every brew.
Taking a few extra minutes each day can save you from coffee maker mold problems down the road. Think of it this way: just as understanding how to brown flour in the oven helps you control heat and timing, knowing how moisture behaves inside your coffee maker helps you prevent mold before it takes hold.
Your coffee maker is one of the most used appliances in any kitchen. It handles hot water, coffee grounds, and moisture on a daily basis. Over time, this creates the perfect breeding ground for mold and bacteria. Many people do not realize that mold can grow inside the water reservoir, on the brew basket, and even in the coffee grounds themselves. The coffee maker mold problem is not just about taste. It can also affect your health in serious ways.
Breathing in mold spores or drinking coffee made with a moldy machine can cause allergies, respiratory issues, and stomach problems. This is why coffee maker cleaning should be a regular part of your kitchen routine. Understanding what causes mold is the first step toward prevention. Once you know the conditions that allow mold to thrive, you can take action to remove those conditions. The rest of this article will show you exactly how to do that.
Key Takeaways
- Daily rinsing and drying prevents moisture buildup that causes mold growth.
- Vinegar and baking soda are the most effective natural cleaning agents for coffee makers.
- Replace water after every brew to avoid stagnant water that breeds bacteria and mold.
- Clean removable parts weekly including the brew basket and filter holder to prevent brew basket mold.
- Store your coffee maker with the lid open to allow proper air circulation and prevent coffee maker odor.
- Descale your machine monthly to remove mineral buildup where mold can hide and thrive.
📑 Table of Contents
Why Mold Grows In Coffee Makers
The Perfect Environment For Mold Growth
Mold needs three things to grow: moisture, warmth, and organic material. Your coffee maker provides all three every single time you brew a pot. The warm water creates a damp environment inside the machine. Coffee grounds provide organic material for mold to feed on. And the dark interior of the coffee maker traps moisture instead of letting it evaporate. When you leave water sitting in the reservoir for hours or days, you create a stagnant pool where mold spores can settle and multiply.
This is one of the most common reasons prevent mold growth fails when people do not empty their machines after use. The temperature inside a coffee maker also plays a role. After brewing, the machine stays warm for a while. This warm, moist environment is exactly what mold loves. Without proper drying and ventilation, mold can begin to grow within 24 to 48 hours. The key to coffee maker maintenance is breaking this cycle by removing moisture and organic material regularly.
Hard water minerals also play a role in mold growth. Mineral deposits build up inside the machine over time and create rough surfaces where mold spores can attach and grow. This is why descale coffee maker routines are so important. Descaling removes these mineral deposits and smooths the interior surfaces, making it harder for mold to take hold.
Common Areas Where Mold Appears
Mold does not just appear in one spot. It can grow in several places inside and around your coffee maker. Knowing where to look helps you focus your cleaning efforts on the right spots:
- Water reservoir – This is where stagnant water sits the longest. Mold and water reservoir mold often start here because the water does not move or get refreshed regularly.
- Brew basket and filter holder – Coffee oils and residue build up in these areas, providing food for mold. Brew basket mold is one of the most common issues coffee owners face.
- Coffee carafe or pot – The dark, moist interior of a glass or plastic carafe is a common mold hotspot that is often overlooked during regular cleaning.
- Rubber seals and gaskets – These areas stay wet and are hard to dry completely after cleaning, making them prime spots for mold and bacteria to develop.
- Drip tray and drainage area – Water collects here and often goes unnoticed during regular cleaning, creating a hidden mold breeding ground.
Focusing your coffee maker care tips on these specific areas can make a big difference. A quick inspection of these spots after each use helps you catch mold early before it spreads to other parts of the machine.
Signs Your Coffee Maker Has Mold
Visual Indicators You Should Not Ignore
Sometimes mold is easy to see. Dark black, green, or white spots inside the water reservoir or on the brew basket are clear signs of mold in coffee maker problems. These spots may look like fuzzy patches or small dots clustered together. If you notice any of these, it is time to take action immediately.
However, mold is not always visible. It can hide inside the tubing and internal mechanisms where you cannot easily see. This is why regular deep cleaning is so important. Even if you do not see mold, it could still be present inside the machine. The invisible mold is often the most dangerous because you do not know it is there until symptoms appear.
Strange Smells And Off-Tastes
One of the earliest signs of coffee maker mold symptoms is a musty or earthy smell coming from the machine. If your coffee starts tasting different, sour, or off, mold could be the cause. A persistent coffee maker smell that is unpleasant or unusual should never be ignored. Some people also notice a bitter taste in their coffee even after using fresh beans and clean filters.
This change in taste can be a warning sign that mold or bacteria has started to grow inside the machine. If your coffee tastes different from normal and you have not changed your beans or water source, check the machine for mold. Trust your senses. If something smells or tastes wrong, it probably is wrong, and your coffee maker hygiene needs attention.
If you notice any of these signs, it is important to act quickly. The longer mold sits, the harder it becomes to remove and the more it can spread to other parts of the machine. Early detection makes the cleaning process much easier and faster.
How To Prevent Mold In Coffee Maker: Daily Habits
Rinse And Empty After Every Brew
The simplest and most effective way to prevent mold growth is to rinse your coffee maker after every single use. Do not leave wet coffee grounds sitting in the brew basket. Empty the coffee maker parts and rinse them with warm water. This removes the organic material that mold feeds on and is one of the most important coffee maker care tips you can follow.
Empty the water reservoir after each use as well. Do not let old water sit in the machine overnight. Fresh water should always be used for the next morning’s brew. This one habit alone can dramatically reduce the chance of mold forming. It takes less than thirty seconds and makes a huge difference in coffee maker maintenance.
Leave The Lid Open After Brewing
After you finish brewing, leave the lid of the coffee maker open. This allows air to circulate inside the machine and helps moisture evaporate faster. Mold thrives in damp, closed environments, so letting your machine dry out between uses is a powerful way to prevent bacteria coffee maker issues from developing.
This also applies to the carafe. Do not leave the lid on the pot after pouring your coffee. Set it open on the counter or drying rack to let the inside dry completely. This small habit prevents moisture from being trapped inside and creates an environment where mold cannot thrive. It is one of the easiest coffee maker care tips to build into your routine.
Use Fresh Water Every Single Time
Never reuse water from a previous brew. Stagnant water that has been sitting in the reservoir is a prime breeding ground for bacteria and mold. Always fill the reservoir with fresh, cold water before each use. Fresh water not only tastes better but also keeps your machine cleaner and safer.
This is a simple step that many people overlook. Think of it as part of your daily coffee maker routine that takes only a few seconds. The taste of your coffee will also improve because fresh water extracts flavors better than old standing water. This is a win-win for both flavor and coffee maker hygiene.
Wipe Down The Exterior Regularly
Do not forget about the outside of your machine. Wipe down the exterior, the control panel, and the area around the base with a damp cloth. Coffee spills, dust, and moisture can accumulate on the surface and lead to coffee maker odor and mold growth around the machine. A quick wipe-down once a day keeps the exterior clean and also helps you spot any leaks or moisture buildup early.
Pay special attention to the area around the water reservoir opening and the drip tray. These spots collect moisture and coffee spills throughout the day. Keeping them dry and clean is an essential part of coffee maker maintenance that many people skip.
Deep Cleaning Your Coffee Maker To Remove Mold
The Vinegar Cleaning Method
White vinegar is one of the most effective and affordable ways to clean coffee maker and remove mold. Vinegar is a natural acid that kills mold spores and breaks down mineral buildup inside the machine. It is safe for most coffee maker models and does not leave behind harmful residues. This makes it a top choice for mold removal coffee maker needs at home.
Here is how to do it step by step:
- Fill the water reservoir with equal parts white vinegar and water.
- Run a full brew cycle without coffee grounds.
- Let the vinegar solution sit in the machine for 30 minutes after the cycle finishes.
- Run two to three more cycles with fresh water to rinse out the vinegar smell completely.
- Wash all removable parts with warm soapy water and dry them thoroughly.
This method should be done at least once a month for best results. If you already have visible mold, you may need to repeat the process twice to fully remove it. The vinegar smell will dissipate completely after the rinse cycles, leaving your machine fresh and clean.
Baking Soda Deep Clean
Baking soda is another excellent natural cleaner for coffee maker deep clean sessions. It is a gentle abrasive that removes mold and neutralizes odors without damaging the machine. Baking soda is especially good at tackling stubborn mold and coffee maker odor that vinegar alone may not fully eliminate.
To use baking soda, mix two tablespoons into the water reservoir with warm water. Let it sit for 15 to 20 minutes. Then run a brew cycle and follow up with two rinse cycles using fresh water. You can also make a paste of baking soda and water to scrub stubborn mold spots on the brew basket and carafe. Use a soft brush or sponge to avoid scratching the surfaces. This gentle approach protects your machine while still delivering powerful mold removal coffee maker results.
How Often Should You Deep Clean
A monthly deep clean is the minimum recommended frequency for most coffee makers. However, if you use your machine daily or live in a humid climate, you may need to clean it more often. Pay attention to any changes in taste or smell, as these are signs that a deep clean is needed. Descale coffee maker routines should also be part of your monthly schedule to remove mineral deposits.
After deep cleaning, make sure all parts are completely dry before reassembling. Just like knowing how to put an oven rack back in after cleaning it, properly reassembling your coffee maker parts ensures everything works correctly and stays dry. Thorough drying is essential. Whether you are learning how to dry eggshells in the oven or drying coffee maker components after a deep clean, the principle is the same. Moisture left behind is the number one cause of mold regrowth.
Best Cleaning Solutions For Mold Prevention
Natural Cleaning Options
You do not need harsh chemicals to keep your coffee maker mold-free. Several natural solutions work wonderfully and are safe for everyday use:
- White vinegar – Kills mold and removes mineral deposits. Safe for most coffee maker models and very affordable.
- Baking soda – Neutralizes odors and gently scrubs away mold residue without scratching surfaces.
- Lemon juice – A natural acid that cuts through mold and leaves a fresh, pleasant scent behind.
- Hydrogen peroxide – A mild disinfectant that kills mold spores on contact and breaks down into water and oxygen.
These natural options are safe, affordable, and effective. They are also better for the environment than chemical-based cleaners. Using a combination of vinegar and baking soda in alternating cleaning sessions gives you the best results for coffee maker deep clean routines.
Commercial Coffee Maker Cleaners
If you prefer store-bought solutions, many commercial coffee maker cleaners are designed specifically to remove mold and mineral buildup. Look for products that are labeled as mold and mildew removers. Some popular options include descaling solutions and coffee maker cleaning tablets that dissolve in the water reservoir.
Always follow the manufacturer instructions when using commercial cleaners. Some products are stronger than others and may require longer soaking or rinse times. While commercial cleaners can be convenient, natural options like vinegar and baking soda are often just as effective and much cheaper. Choose what works best for your budget and coffee maker maintenance schedule.
What To Avoid When Cleaning
Not all cleaning methods are safe for coffee makers. Here are some things to avoid to protect your machine and your health:
- Bleach – It can leave behind harsh chemical residues that end up in your next cup of coffee and can damage internal components over time.
- Abrasive scrubbers – Steel wool or harsh scrub pads can scratch the interior surfaces and create grooves where mold can hide and grow.
- Dishwasher detergent – Not designed for coffee makers and can leave a soapy residue that affects the taste of your coffee.
- Excessive water during cleaning – Too much water left inside the machine can actually promote mold growth instead of preventing it.
Sticking to gentle, natural cleaners keeps your machine safe and effective. This is an important part of coffee maker hygiene that many people overlook. When in doubt, stick to vinegar, baking soda, and warm water for safe and effective cleaning.
How To Maintain A Mold-Free Coffee Maker Long-Term
Replace Filters Regularly
Coffee filters trap grounds and oils, but they can also harbor mold if not replaced regularly. Paper filters should be replaced after every use. Reusable metal or mesh filters should be washed thoroughly after each use and replaced every three to six months. Old, worn-out filters can trap moisture and coffee residue, creating ideal conditions for mold to grow.
Keeping your filters fresh is a simple but important part of coffee maker maintenance. If you use a permanent filter, inspect it regularly for signs of wear or discoloration. A clean filter not only prevents mold but also improves the taste of your coffee by trapping unwanted oils and particles.
Proper Storage Tips
Where and how you store your coffee maker matters. Keep the machine in a cool, dry place away from excess moisture. Do not store it in a cabinet that is damp or poorly ventilated. When not in use for extended periods, clean the machine thoroughly and store it with the lid and carafe open. This allows air to circulate and prevents moisture from getting trapped inside.
Proper coffee maker storage can extend the life of your machine and prevent mold issues from developing during periods of inactivity. Also, make sure the area around the coffee maker is clean and dry. Wipe up any spills immediately and keep the countertop free of coffee grounds and moisture. Good storage habits are a key part of your daily coffee maker routine that pays off in the long run.
When To Replace Your Coffee Maker
Even with the best care, coffee makers do not last forever. If you notice persistent mold that does not go away after deep cleaning, it may be time for a replacement. Old machines with cracks, worn seals, or damaged internal parts are harder to keep clean and more prone to mold problems that keep coming back no matter how much you clean.
As a general rule, most coffee makers should be replaced every five to ten years depending on usage and maintenance. If your machine is older and showing signs of wear, investing in a new one can be a smart move for your health and your morning coffee routine. A new machine gives you a fresh start and ensures that your coffee maker hygiene efforts actually pay off.
Conclusion
Preventing mold in your coffee maker does not have to be complicated or time-consuming. A few simple daily habits like rinsing after each use, leaving the lid open, and using fresh water can make a huge difference. Regular deep cleaning with vinegar or baking soda removes any mold that has started to form and keeps your machine running at its best.
Remember that how to prevent mold in coffee maker is really about consistency. Small actions done every day add up to a clean, fresh, and safe coffee maker. Pay attention to the warning signs, clean regularly, and do not let moisture sit inside your machine. Your morning coffee deserves a clean start.
By following the tips in this guide, you can enjoy every cup with confidence, knowing your machine is free from mold and ready to brew. Take control of your coffee maker maintenance today and taste the difference that a clean machine makes. Your health and your coffee will thank you.
Frequently Asked Questions
Can mold in a coffee maker make you sick?
Yes, mold in a coffee maker can cause health problems including allergies, respiratory issues, and stomach discomfort. Mold spores can be inhaled while brewing or ingested through contaminated coffee. If you suspect mold, clean the machine thoroughly before using it again.
How often should I clean my coffee maker to prevent mold?
You should rinse your coffee maker after every use and perform a deep clean with vinegar or baking soda at least once a month. In humid climates or with daily use, more frequent cleaning may be necessary to prevent mold growth.
Is vinegar safe to use in all coffee makers?
White vinegar is safe for most coffee maker models and is one of the best natural cleaners for removing mold and mineral buildup. However, if your machine has a proprietary cleaning system or delicate internal parts, check the manufacturer guidelines before using vinegar.
What causes black spots in my coffee maker?
Black spots inside a coffee maker are usually caused by mold growth or mineral deposits from hard water. Both issues are common and can be resolved through regular cleaning with vinegar or baking soda and by using filtered water in your machine.
Can I use bleach to clean mold from my coffee maker?
No, bleach is not recommended for coffee makers. It can leave behind harsh chemical residues that end up in your coffee and may damage internal components. Stick to natural cleaners like vinegar and baking soda for safe and effective mold removal.
How do I know if my coffee maker has mold?
Signs of mold include a musty smell, dark spots inside the machine, and an off or bitter taste in your coffee. If you notice any of these symptoms, inspect the water reservoir, brew basket, and carafe for visible mold growth and clean the machine thoroughly.