How To Make Oven Baked Clay at Home with These Simple Steps
Learning how to make oven baked clay at home is easier than you think. This guide walks you through everything from basic supplies to perfect baking techniques. You will discover simple recipes, pro tips, and fun project ideas that anyone can try. Whether you are a complete beginner or a seasoned crafter, these steps will help you create stunning pieces. Get ready to start your clay crafting journey with confidence and creativity.
Have you ever wanted to create your own custom crafts at home? Learning how to make oven baked clay opens up a world of creative possibilities. You do not need a fancy studio or expensive tools. A simple oven, a few basic supplies, and a little patience are all you need. This guide will show you exactly how to get started, from mixing your own clay to baking it to perfection. By the end, you will feel confident enough to start your very first project.
Clay crafting has exploded in popularity over the last few years. People love the hands-on experience and the satisfaction of holding something they made with their own hands. Oven baked clay is one of the most beginner-friendly forms of this hobby. It dries hard when heated, which means your creations last a long time. You can make jewelry, decorations, keychains, and so much more. The best part is that you can do it all from the comfort of your kitchen.
Key Takeaways
- Easy to Start: Making oven baked clay at home requires just a few basic supplies and a standard home oven.
- Budget Friendly: You can create beautiful crafts without expensive equipment or advanced skills.
- Versatile Projects: Use your baked clay to make jewelry, ornaments, figurines, and decorative items.
- Proper Baking Matters: Getting the temperature and time right ensures durable, crack-free results every time.
- Beginner Friendly: Simple step-by-step instructions make this craft accessible to all ages and skill levels.
- Safe and Non-Toxic: Most oven baked clay brands are safe when used and baked as directed.
📑 Table of Contents
What Is Oven Baked Clay?
Understanding the Basics
Oven baked clay is a type of modeling material that hardens when exposed to heat. Unlike air dry clay, which sets at room temperature, this clay needs an oven to cure properly. The most common type is polymer clay, which is made from PVC particles and plasticizers. When you heat it to the right temperature, the particles bond together and form a solid, durable piece.
One of the biggest advantages of oven baked clay is that it stays soft and workable until you bake it. This gives you plenty of time to shape, sculpt, and refine your creations. You do not have to rush. If you make a mistake, you can simply knead the clay back together and start again. This flexibility makes it perfect for beginners who are still building their skills.
Clay crafting with oven baked materials offers a huge range of colors and finishes. You can mix colors to create custom shades, add textures, and even blend different brands together. Some crafters use clay conditioning techniques to warm up the clay and make it more pliable. This simple step can make a big difference in how your final piece turns out.
What You Need to Get Started
Essential Supplies for Clay Crafting
Before you dive into how to make oven baked clay projects, you need the right supplies. The good news is that you do not need a lot of fancy equipment. Here is a simple list of everything you will need to get started:
- Polymer clay in your choice of colors (a basic pack of 4-5 colors is great for beginners)
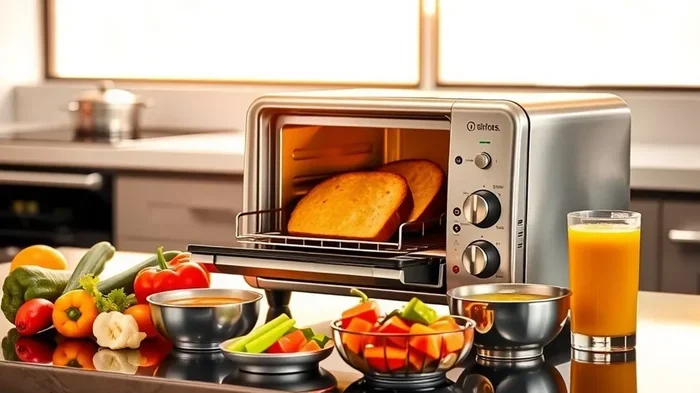
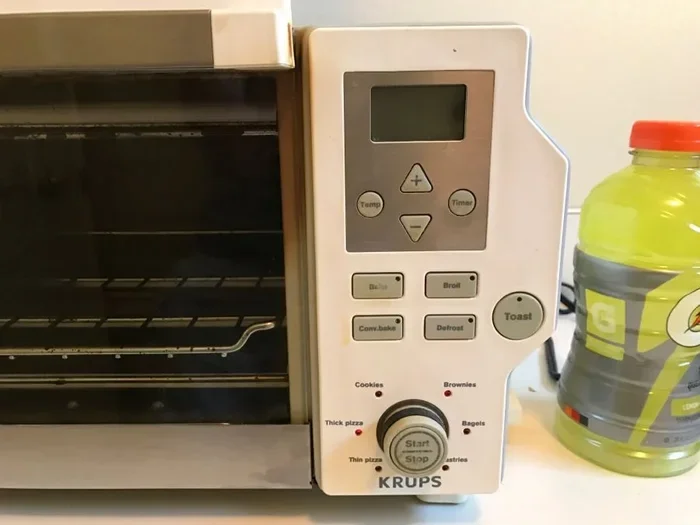
- A home oven or toaster oven that can maintain a steady temperature
- An oven thermometer to make sure your oven reads accurately
- A baking sheet lined with parchment paper or aluminum foil
- A rolling pin or clay roller for flattening and shaping
- Clay tools like a blade, needle tool, and ball stylus
- A work surface such as a glass cutting board or ceramic tile
- Sandpaper (fine grit) for smoothing finished pieces
- Sealant or glaze for protecting your finished work
Oven Baked Clay vs Air Dry Clay
Many beginners wonder which type of clay is better. Here is a quick comparison to help you decide:
| Feature | Oven Baked Clay | Air Dry Clay |
|---|---|---|
| Curing Method | Requires oven heat | Dries at room temperature |
| Drying Time | 15-30 minutes in oven | 24-72 hours to air dry |
| Durability | Very hard and durable | Can be fragile when dry |
| Waterproof | Yes, once baked | No, absorbs water |
| Reworkability | Can be re-baked | Cannot be re-wetted easily |
| Best For | Jewelry, ornaments, figurines | Large sculptures, kids projects |
| Cost | Moderate | Low to moderate |
For most home crafters, oven baked clay is the better choice. It produces stronger, more polished results. It also allows for more detailed work because the clay stays soft longer. If you want your pieces to last for years, oven baked clay is the way to go.
How To Make Oven Baked Clay at Home
Step-by-Step Process for Beginners
Now that you have your supplies ready, let us walk through the process of how to make oven baked clay creations at home. Follow these steps carefully for the best results.
Step 1: Prepare Your Workspace
Clear a clean, flat surface for your work. Glass or ceramic surfaces work best because clay does not stick to them. Lay down some parchment paper to catch any crumbs or excess clay. Make sure your hands are clean and dry before you start working with the clay.
Step 2: Condition the Clay
Clay conditioning is the process of warming and kneading the clay to make it soft and pliable. Take your clay out of the package and knead it in your hands for about 2-3 minutes. Push, fold, and twist the clay repeatedly. You will feel it become smoother and more flexible. This step is essential for preventing cracks during baking.
Step 3: Shape Your Creation
Now comes the fun part. Use your hands, tools, and rollers to shape the clay into your desired form. You can roll it flat, sculpt it into figures, or press it into molds. Work slowly and carefully. If you are making homemade clay beads, use a needle tool to poke holes through each piece before baking. This makes stringing them much easier later.
Step 4: Prep for Baking
Place your shaped clay pieces on a parchment-lined baking sheet. Make sure they are spaced apart so they do not touch each other. This prevents them from sticking or merging during baking. If your oven runs hot, use a clay baking tile instead of a metal sheet for more even heat distribution.
Step 5: Bake at the Right Temperature
Preheat your oven to the temperature recommended by your clay brand. Most polymer clay bakes at around 275°F (130°C). Place the baking sheet in the oven and set a timer. Clay baking time depends on the thickness of your pieces. Thin pieces need about 15 minutes, while thicker pieces may need 30 minutes or more. Always follow the manufacturer’s instructions for best results.
Step 6: Cool and Finish
Once baking is complete, turn off the oven and let the clay cool inside. Do not open the oven door right away. Sudden temperature changes can cause cracking. After the clay has cooled completely, you can sand it, paint it, or apply a sealant for a polished finish. Clay finishing techniques like buffing with a soft cloth can give your pieces a beautiful sheen.
Baking Temperature and Time Guide
Getting the oven temperature for clay right is one of the most important parts of the process. Too much heat can burn your clay, while too little heat will leave it soft and crumbly. Here is a general guide:
- Standard polymer clay: Bake at 275°F (130°C) for 15-30 minutes per quarter inch of thickness
- Thin pieces (1/8 inch): 15 minutes at 275°F
- Medium pieces (1/4 inch): 30 minutes at 275°F
- Thick pieces (1/2 inch or more): 30-45 minutes at 275°F, with an optional second bake
- Always preheat: Never place clay in a cold oven
- Use a timer: Overbaking can cause browning and brittleness
Tips and Tricks for Perfect Results
Quick Tips for Better Clay Crafting
Mastering oven baked clay takes a little practice, but these tips will help you get great results from the start.
- Always use an oven thermometer. Most home ovens do not display the exact temperature. A simple thermometer placed inside the oven takes the guesswork out of baking.
- Do not rush the conditioning step. Well-conditioned clay shapes better and cracks less during baking. Spend at least 2-3 minutes kneading each color.
- Keep your work surface cool. Warm hands can soften clay too much, making it sticky and hard to work with. If this happens, pop your clay in the fridge for a few minutes.
- Bake on a lower rack. This helps distribute heat more evenly around your pieces and prevents the bottom from browning.
- Use a dedicated clay oven if possible. A small toaster oven reserved just for clay crafting prevents clay fumes from mixing with food cooking odors.
- Test bake a scrap piece first. If you are trying a new brand or technique, bake a small scrap piece first to check the results before committing to your final project.
- Store clay properly. Keep unused clay in a cool, dark place in airtight bags. Heat and light can degrade the clay over time.
Expert Insights on Clay Curing
Clay curing is the chemical process that happens when heat activates the binding agents in polymer clay. Professional crafters know that proper curing is what gives oven baked clay its strength and durability. Under-cured clay will be brittle and prone to breaking. Over-cured clay can become discolored and smoky.
The key is to follow the recommended temperature and time for your specific brand. If you are working with a thicker piece, consider doing a two-stage bake. Bake for half the recommended time, let it cool, then bake again for the remaining time. This approach ensures even curing throughout the entire piece without risking overbaking the surface.
Another pro tip is to place a piece of aluminum foil over your clay during baking. This reflects heat evenly and prevents the top from browning. Some crafters also use a clay baking dome, which is a small ceramic cover that regulates heat flow around delicate pieces.
Creative Projects You Can Try at Home
Easy Project Ideas for Beginners
Once you know the basics of how to make oven baked clay, the real fun begins. Here are some simple and rewarding projects you can try right away:
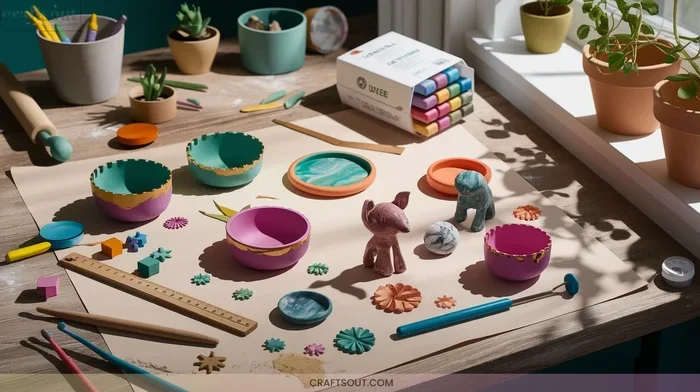
- Homemade Clay Beads: Roll small balls or teardrop shapes, poke holes with a toothpick, bake, and string them into necklaces or bracelets. This is one of the most popular DIY clay projects for beginners.
- Ornament Decorations: Roll out clay flat, cut out shapes with cookie cutters, bake, and hang them on your Christmas tree or give them as gifts. You can paint them with acrylic paints after baking.
- Keychains and Charms: Sculpt small animals, hearts, or initials, attach a metal eye pin before baking, and connect them to keyrings. These make wonderful handmade gifts.
- Miniature Figurines: Use sculpting tools to create tiny people, animals, or fantasy creatures. These are great for desk decorations or dioramas.
- Coasters and Trivets: Roll clay flat, cut into circles or squares, and bake. Once cooled, seal with a food-safe glaze to make them safe for placing hot drinks on.
- Wall Art: Press clay into silicone molds to create decorative wall pieces. Paint them in coordinating colors and mount them on canvas or directly on your wall.
Getting More Advanced with Clay Art Projects
As you gain confidence, you can explore more complex clay art projects. Try mixing colors to create marbled effects, or layer thin sheets of different colored clay for a stained-glass look. Some crafters use clay extruders to create consistent patterns and textures. You can also experiment with adding inclusions like glitter, dried flowers, or metal leaf for unique finishes.
The beauty of clay crafting for beginners is that there is no wrong way to do it. Every mistake teaches you something new. The more you practice, the better your pieces will look. Set aside a little time each week to work on new projects, and you will be amazed at how quickly your skills improve.
Common Mistakes to Avoid
Baking Mistakes That Ruin Your Clay
Even experienced crafters make mistakes sometimes. Here are the most common errors to watch out for when you are baking clay at home:
- Using the wrong temperature. This is the number one mistake. Always check your oven with a thermometer and follow the clay brand’s instructions exactly.
- Overbaking the clay. Leaving clay in the oven too long can cause it to brown, become brittle, or release unpleasant fumes. Set a timer and stay nearby.
- Skipping the conditioning step. Cold, stiff clay is more likely to crack during baking. Take the time to knead it properly before shaping.
- Baking clay directly on metal. Metal can conduct heat unevenly and leave marks on your clay. Always use parchment paper or a ceramic tile.
- Not letting clay cool gradually. Pulling hot clay out of the oven and placing it on a cold surface can cause thermal shock and cracking.
- Using clay that has expired or been stored poorly. Old or heat-damaged clay will not cure properly. Check expiration dates and store clay in a cool place.
By avoiding these simple mistakes, you will save yourself frustration and wasted materials. Oven baked clay projects are meant to be fun and rewarding. A little attention to detail goes a long way toward achieving professional-looking results.
Conclusion
How to make oven baked clay at home is a rewarding and enjoyable craft that anyone can learn. With just a few basic supplies, a standard oven, and a little patience, you can create beautiful, durable pieces that you will be proud to display or give as gifts. From conditioning your clay to shaping, baking, and finishing, each step is simple and satisfying.
Remember that practice makes perfect. Your first few projects may not be flawless, and that is completely okay. Every piece you make teaches you something new about clay sculpting and clay finishing techniques. As you grow more comfortable, you will develop your own style and techniques that set your work apart.
Start with simple projects like beads or ornaments, and gradually work your way up to more complex creations. The clay crafting community is full of inspiration and support, so do not be afraid to share your work and learn from others. Most importantly, have fun with it. Oven baked clay is a wonderful creative outlet that brings joy and a sense of accomplishment. So gather your supplies, preheat your oven, and start creating today.
Frequently Asked Questions
Can I use any oven to bake polymer clay?
Yes, you can use a standard home oven or a toaster oven to bake polymer clay. The key is to make sure your oven maintains a steady temperature. Use an oven thermometer to verify the accuracy, and avoid opening the door frequently during baking. A dedicated toaster oven for clay crafting is a great option if you want to keep clay fumes separate from food cooking.
How long does oven baked clay last?
Properly baked and sealed oven baked clay can last for many years. It does not crack, crumble, or dissolve like air dry clay might over time. To maximize longevity, store your finished pieces away from direct sunlight and extreme temperatures. Applying a sealant or glaze after baking also helps protect the surface from scratches and wear.
Can I bake clay on aluminum foil?
Yes, aluminum foil is a safe and popular option for baking clay. It conducts heat evenly and makes cleanup easy. However, shiny foil can leave a glossy mark on the bottom of your clay. If you want a perfectly smooth finish, use parchment paper or a ceramic baking tile instead. Both options work great and are easy to find in any kitchen.
Is oven baked clay safe for food items?
Most polymer clays are non-toxic when baked, but they are not officially food-safe. If you plan to make coasters, trivets, or other items that will contact food, make sure to apply a food-safe sealant or glaze after baking. This creates a protective barrier and ensures your pieces are safe for everyday kitchen use. Always check the manufacturer’s guidelines for specific recommendations.
What is the difference between polymer clay and regular modeling clay?
Polymer clay is a PVC-based material that hardens when baked in an oven. Regular modeling clay, often called children’s clay or play clay, is water-based and air dries or stays soft. Polymer clay is much more durable, waterproof, and suitable for long-lasting crafts. It also offers a wider range of colors and finishes compared to regular modeling clay.
Can I paint oven baked clay after baking?
Absolutely! Painting baked clay is one of the best ways to add color and detail to your creations. Use acrylic paints for the best results, as they adhere well to cured polymer clay. You can paint before baking for a more muted look, or after baking for vibrant, crisp colors. Always let the paint dry completely, and consider applying a sealant or varnish to protect the painted surface.