How To Clean Coffee Pod Machine And Keep It Tasting Fresh
Learning how to clean a coffee pod machine is essential for great-tasting coffee and machine longevity. Regular cleaning removes built-up oils, mineral deposits, and coffee grounds that affect flavor. This guide covers everything from daily maintenance to deep descaling, so your machine stays in top shape.
There is nothing quite like waking up to a fresh cup of coffee made by your pod machine. But here is the thing most people overlook. That great taste depends heavily on how clean your machine actually is. Over time, coffee oils, mineral deposits, and old grounds build up inside. This affects flavor, clogs parts, and can even shorten the life of your machine.
Learning how to clean a coffee pod machine is simple once you know the steps. It does not require expensive products or a lot of time. With just a few basic supplies and a regular routine, you can keep your machine running smoothly. Every cup will taste as fresh as the first one you ever made.
This guide walks you through everything. From daily quick cleans to full descaling sessions, we have you covered. You will learn what supplies to use, what mistakes to avoid, and how to keep your machine in top shape for years to come. Let us get started.
Key Takeaways
- Clean your pod machine weekly to prevent oil buildup and maintain fresh coffee flavor.
- Descale every 1-3 months using vinegar or a commercial descaling solution to remove mineral deposits.
- Clean the pod holder, needles, and drip tray after every few uses for best results.
- Never use abrasive cleaners or harsh chemicals inside your coffee pod machine.
- Run a water-only cycle after descaling to flush out any cleaning residue completely.
- Fresh beans and clean machines work together to deliver the best cup of coffee every time.
📑 Table of Contents
- Why Regular Cleaning Matters For Your Coffee Pod Machine
- What You Will Need To Clean A Coffee Pod Machine
- Step-By-Step Guide To Cleaning Your Coffee Pod Machine
- How To Deep Clean A Coffee Pod Machine For Best Results
- Common Mistakes To Avoid When Cleaning Your Machine
- Tips For Keeping Your Coffee Pod Machine Fresh Between Cleanings
- Benefits Of A Clean Coffee Pod Machine
- Final Thoughts On Keeping Your Pod Machine Clean
Why Regular Cleaning Matters For Your Coffee Pod Machine
Many people treat their coffee pod machine like a set-and-forget appliance. You pop in a pod, press a button, and enjoy your coffee. But behind the scenes, things are happening that can hurt both your machine and your morning cup.
The Impact Of Residue On Coffee Flavor
Every time you brew a cup, tiny coffee oils and microscopic grounds stay behind. These build up inside the water lines, the pod holder, and the brewing needles. Over days and weeks, this residue starts to turn rancid. The result is a bitter or stale taste that no amount of good coffee pods can fix.
Mineral deposits from water are another big problem. Hard water contains calcium and magnesium. These minerals coat the inside of your machine over time. They restrict water flow and change the temperature of your brew. Both of these factors directly impact the taste of your coffee.
How Often Should You Clean Your Machine
The answer depends on how often you use your machine. For daily users, a quick clean every week is ideal. A deeper descaling should happen every one to three months. If you notice slower brewing or a funny taste, it is time to clean sooner.
Light users can stretch cleaning intervals a bit. But even if you only brew a cup a few times a week, do not skip maintenance entirely. Stagnant water and old residue do not wait for you to use the machine more.
What You Will Need To Clean A Coffee Pod Machine
Before you start, gather your supplies. The good news is that you probably already have most of these items in your kitchen. You do not need anything fancy or expensive.
Essential Cleaning Supplies
- White vinegar or a commercial descaling solution
- Warm water for rinsing and filling the reservoir
- Mild dish soap for wiping down exterior parts
- A soft cloth or sponge for cleaning surfaces
- A small brush like an old toothbrush for hard-to-reach spots
- A clean, dry towel for drying parts
Household Alternatives That Work Well
Vinegar is the most popular natural descaler. It breaks down mineral deposits effectively and safely. If the smell of vinegar bothers you, do not worry. It rinses out completely after a few cycles. Lemon juice also works as a natural alternative for light descaling needs.
For the pod holder and needles, warm soapy water does the job perfectly. Avoid using steel wool or harsh scrubbers. These can scratch surfaces and leave behind tiny particles that end up in your next cup of coffee.
Step-By-Step Guide To Cleaning Your Coffee Pod Machine
Now let us get into the actual cleaning process. Follow these steps in order for the best results. Each part of the machine needs different attention, so we break it all down for you.
Cleaning The Exterior And Drip Tray
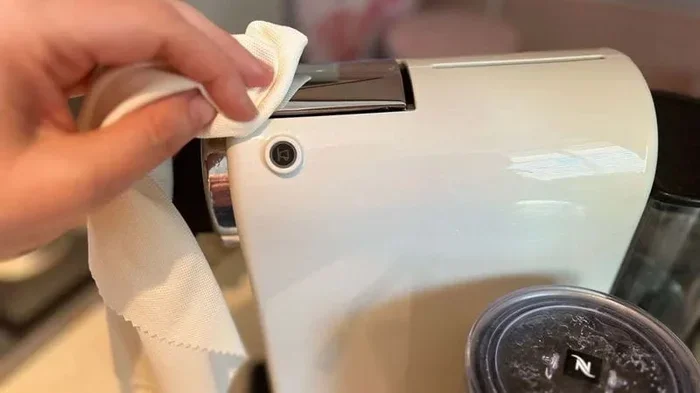
Start with the outside of your machine. Unplug it first. Always safety comes first when cleaning any kitchen appliance. Wipe down the exterior with a damp cloth and a little mild dish soap. Pay extra attention to the area around the pod slot where oils tend to accumulate.
Remove the drip tray and wash it with warm soapy water. If there are old coffee stains, let it soak for a few minutes before scrubbing gently. Dry everything thoroughly before putting it back together.
Descaling The Internal System
Descaling is the most important part of how to clean a coffee pod machine. This process removes mineral buildup from the water lines and heating element.
Fill the water reservoir with a mixture of half white vinegar and half water. If your machine has a descaling mode, use it. If not, simply run the vinegar mixture through the machine without a pod. Let it brew halfway, then pause for 30 minutes. This gives the solution time to dissolve mineral deposits. Then let it finish the cycle.
After the vinegar cycle, rinse the reservoir thoroughly. Fill it with clean water only. Run two to three full water-only cycles to flush out any remaining vinegar taste and smell. This step is crucial. Skipping it can leave your coffee tasting off.
Cleaning The Pod Holder And Needles
Remove the pod holder from the machine. Check for any stuck coffee grounds or old pods. Rinse it under warm water and use your small brush to clear out any residue from the puncturing needles. These needles can get clogged easily, and clogs cause weak or uneven brewing.
For a deeper clean, soak the pod holder in warm soapy water for 10 to 15 minutes. Then scrub gently and rinse. Make sure everything is completely dry before reassembling. Moisture left inside can lead to mold or bacteria growth.
How To Deep Clean A Coffee Pod Machine For Best Results
A regular clean keeps things running. But every few months, your machine deserves a deeper treatment. Think of it like a spa day for your coffee maker. Here is how to do it right.
Running A Vinegar Cleaning Cycle
The vinegar cleaning cycle is your best friend for deep maintenance. Here is the full process step by step:
- Empty the water reservoir completely
- Mix equal parts white vinegar and fresh water
- Fill the reservoir with the vinegar solution
- Place a large mug on the drip tray
- Run the machine through a full brew cycle without a pod
- Repeat until the reservoir is empty
- Let the machine sit for 30 minutes with the solution inside
- Run two to three full cycles with clean water only
This process dissolves tough mineral deposits and breaks down built-up coffee oils. Your machine will feel like new afterward.
Using Commercial Descaling Solutions
If you prefer not to use vinegar, commercial descaling solutions work great. Brands like Dezcal and Urnex make products specifically designed for pod machines. These solutions are formulated to be gentle yet effective. They often come with clear instructions on the bottle.
The advantage of commercial solutions is that they do not leave a vinegar smell. They also tend to work faster on heavy mineral buildup. The downside is cost. Vinegar is much cheaper and works just as well for most machines.
Common Mistakes To Avoid When Cleaning Your Machine
Even with good intentions, people make mistakes when cleaning their coffee pod machines. Here are the most common ones and how to avoid them.
Using The Wrong Cleaning Products
This is the biggest mistake people make. Never use bleach, abrasive cleaners, or strong chemical solvents inside your machine. These can damage internal components and leave harmful residues. Your coffee could end up tasting worse than before.
Stick to mild dish soap for exterior parts. Use only vinegar or approved descaling solutions for the internal system. Your machine was designed to handle these gentle cleaners.
Skipping Regular Maintenance
It is easy to put off cleaning when the machine still works. But maintenance is not just about fixing problems. It is about preventing them. Skipping regular cleans leads to bigger issues down the road. Clogged needles, weak brewing, and bad tastes all come from neglect.
Set a reminder on your phone if you need to. A few minutes of cleaning each week saves you from costly repairs or replacement later.
Not Letting Parts Dry Properly
After washing, make sure all parts are completely dry before reassembling. Moisture trapped inside the machine creates a perfect environment for mold and bacteria. This is especially true for the pod holder and the water reservoir.
Use a clean towel to dry everything. You can also let parts air dry on a rack for a few minutes before putting them back. This small step makes a big difference for hygiene.
Tips For Keeping Your Coffee Pod Machine Fresh Between Cleanings
Cleaning is only half the battle. Daily habits play a huge role in keeping your machine fresh. These small changes take almost no effort but pay off big time.
Daily Habits That Help
- Remove used pods immediately after brewing. Do not let them sit in the pod holder.
- Wipe the pod slot with a dry cloth after each use to catch stray grounds.
- Leave the machine door open after brewing. This lets moisture escape and prevents mold.
- Empty the drip tray regularly, especially if you brew multiple cups a day.
- Use filtered water in your reservoir. It reduces mineral buildup significantly.
Storing Your Machine Properly
If you are going away for a while, take a few extra steps. Empty the water reservoir completely. Leave the pod holder and drip tray out to air dry. When you return, run a quick cleaning cycle before brewing your first cup. This keeps stale water and residue from sitting in the machine while you are gone.
Store your machine in a cool, dry place. Avoid placing it near a stove or in direct sunlight. Heat and humidity can affect the internal components and the quality of your coffee.
Benefits Of A Clean Coffee Pod Machine
Once you establish a cleaning routine, you will notice the difference right away. Here is what a clean machine gives you.
Better tasting coffee. Without residue and mineral buildup, your pods brew at the right temperature. The flavors come through clean and true. You will taste notes you did not even know were there.
Longer machine life. Regular maintenance prevents wear and tear on internal parts. Your machine will last years longer than it would with neglect. This saves you money in the long run.
Faster brewing. Clean water lines and unclogged needles mean your machine works efficiently. You get your coffee faster and with more consistent results every single time.
Better hygiene. A clean machine means no mold, no bacteria, and no stale coffee oils. This is especially important if you share your machine with family or guests.
Final Thoughts On Keeping Your Pod Machine Clean
How to clean a coffee pod machine does not have to be complicated or time-consuming. With a simple weekly routine and a deeper clean every few months, your machine will keep performing at its best. The steps are straightforward. The supplies are affordable. And the payoff is a better cup of coffee every single morning.
Start small if you need to. Even just wiping down the pod holder and running a water flush once a week makes a huge difference. Build from there as the habit sticks. Before long, cleaning your machine will feel like second nature.
Your coffee pod machine works hard for you every day. A little care and attention goes a long way. Treat it well, and it will keep delivering fresh, delicious coffee for years to come.
Frequently Asked Questions
How often should I descale my coffee pod machine?
Most experts recommend descaling every one to three months. If you use your machine daily or live in an area with hard water, aim for every month. Signs that you need to descale include slower brewing, unusual noises, or a change in coffee taste.
Can I use vinegar to clean my coffee pod machine?
Yes, white vinegar is one of the most effective and affordable ways to descale a coffee pod machine. Mix equal parts vinegar and water, run it through the machine, then follow up with two to three clean water cycles to rinse out any remaining vinegar taste.
What is the best way to clean the needles in a pod machine?
Use a small brush, like an old toothbrush, to gently clean the needles. Remove the pod holder first, then carefully brush around the puncturing needles to clear out any stuck coffee grounds. Avoid using anything sharp that could damage the needles.
Is it safe to use lemon juice instead of vinegar?
Yes, lemon juice is a safe and natural alternative for light descaling. It is less acidic than vinegar, so it works well for routine maintenance but may be less effective on heavy mineral buildup. Use the same method as vinegar, mixing it with equal parts water.
Why does my coffee taste bitter even after cleaning?
Bitter coffee can be caused by several factors beyond a dirty machine. Old or stale coffee pods, water that is too hot, or using too fine a grind can all contribute. Make sure your pods are fresh and your machine is fully rinsed after any cleaning cycle.
Can I put the pod holder and drip tray in the dishwasher?
Most pod machine parts are dishwasher safe, but it is always best to check your machine’s manual. Hand washing with warm soapy water is the safest method. It ensures no harsh dishwasher detergents leave a residue that could affect your coffee taste.