What Temperature To Bake Clay In Oven For Perfect Results
Baking clay at the right temperature is the single most important step for creating strong, beautiful crafts. Most polymer clays bake at 275°F (130°C), but the exact heat depends on your brand and project thickness. This guide walks you through what temperature to bake clay in oven settings, timing, and pro tips so you never get underbaked or overbaked results again.
Have you ever wondered what temperature to bake clay in oven settings? Maybe you just finished a beautiful polymer clay project and you are not sure if you are baking it correctly. You are not alone. Thousands of crafters search for this answer every single day. The temperature you choose directly affects how hard, durable, and colorful your finished piece turns out. Too hot and you risk burning. Too cool and your clay stays soft and crumbly. This guide gives you everything you need to know about baking clay in the oven the right way.
Whether you are making clay beads, figurines, jewelry, or home decor, getting the temperature right is non-negotiable. Polymer clay is a forgiving medium, but it has strict baking rules. The good news is that once you learn the basics, it becomes second nature. Let us walk through the exact temperatures, times, and techniques that deliver perfect results every time you turn on your oven.
Key Takeaways
- Standard Baking Temp: Most polymer clays bake at 275°F (130°C), but always check your specific brand’s instructions.
- Thickness Matters: Thicker clay pieces need lower temperatures and longer baking times to cure evenly.
- Avoid Overbaking: Exceeding the recommended temperature can burn, discolor, or release harmful fumes from your clay.
- Use an Oven Thermometer: Home ovens often run hot or cold, so a simple thermometer ensures accuracy every time.
- Parchment Paper Is Essential: It prevents sticking and keeps your clay projects flat and clean during baking.
- Cool Slowly: Let your baked clay cool inside the oven to prevent cracking and warping.
- Brand-Specific Settings: Sculpey, Fimo, and Kato each have slightly different temperature recommendations for best results.
📑 Table of Contents
- Understanding What Temperature To Bake Clay In Oven
- How Long Should You Bake Clay In The Oven
- Step-by-Step Guide To Baking Clay In Your Oven
- Common Mistakes When Baking Clay
- Tips For Perfect Clay Baking Results
- Troubleshooting Common Clay Baking Problems
- Expert Insights On Baking Polymer Clay
- Conclusion
Understanding What Temperature To Bake Clay In Oven
The most common baking temperature for polymer clay is 275°F, which equals about 130°C. This is the standard recommended by nearly all major brands. However, not all clays are created equal. Different brands and types have their own specific needs. Let us break this down clearly.
Brand-Specific Temperature Guide
Each clay brand formulates its material differently. This means the ideal polymer clay baking temperature can vary from one manufacturer to another. Here is a quick look at what the major brands recommend:
- Sculpey Original: Bake at 275°F (130°C). This is the most popular and widely available clay on the market.
- Sculpey III: Also bakes at 275°F (130°C). It is softer and great for detailed sculpting.
- Fimo Professional: Bake at 230°F (110°C). Fimo needs a slightly lower temperature than Sculpey.
- Fimo Soft: Same as Fimo Professional at 230°F (110°C). It cures well at this lower setting.
- Kato Polyclay: Bake at 300°F (150°C). Kato is a denser clay that requires a bit more heat.
- Cernit: Bake at 266°F (130°C). Another European brand with a slightly different curing range.
As you can see, what temperature to bake clay in oven depends heavily on which brand you are using. Never assume one temperature works for every clay type. Always read the package instructions first.
Why Temperature Accuracy Is So Important
Polymer clay cures through a chemical reaction triggered by heat. This process is called polymerization. The molecules in the clay link together when they reach the right temperature. If the heat is too low, the links do not form properly. Your clay will remain soft, crumbly, and easily damaged. If the heat is too high, the clay can burn, bubble, or release acrid fumes.
Here is why precision matters:
- Underbaked clay stays weak and can crumble with light pressure.
- Correctly baked clay becomes hard, durable, and long-lasting.
- Overbaked clay can discolor, warp, or produce toxic fumes that are bad for your health.
This is why investing in an oven thermometer is one of the smartest moves any clay crafter can make. Most home ovens display temperatures that are off by 10 to 25 degrees. That small difference can completely change your results.
How Long Should You Bake Clay In The Oven
Temperature and time go hand in hand. You cannot separate one from the other when baking clay. The general rule is 15 minutes per quarter inch of thickness. So a piece that is half an inch thick needs about 30 minutes. A full inch needs around 60 minutes.
The Thickness Rule Explained
This thickness-based timing is the most reliable method for oven-baked clay projects. Here is how it works in practice:
- Thin pieces (1/4 inch): 15 minutes at the correct temperature.
- Medium pieces (1/2 inch): 30 minutes at the correct temperature.
- Thick pieces (3/4 inch): 45 minutes at the correct temperature.
- Very thick pieces (1 inch or more): 60 minutes, and consider baking in stages.
For very thick projects, many experienced crafters bake in two or three sessions. They bake for 15 minutes, let the piece cool, then bake again. This prevents the outside from burning before the inside cures. It is a simple trick that makes a huge difference.
Can You Bake Clay Too Long?
Yes, you absolutely can. While slightly overbaking is usually fine, extended high-heat exposure causes problems. Clay left in the oven too long at too high a temperature can turn brown, crack, or release unpleasant fumes. The key is to follow the time guidelines and set a timer. Do not guess. Do not walk away and forget about your clay projects in the oven.
Also keep in mind that clay baking time can vary based on your oven’s actual temperature. If your oven runs hot, reduce the time slightly and check early. If it runs cold, add a few minutes but watch carefully.
Step-by-Step Guide To Baking Clay In Your Oven
Now that you understand the temperature and timing, let us walk through the actual process. Follow these steps for flawless clay hardening in oven results every time.
Step 1: Prepare Your Workspace
Start by covering your work surface with parchment paper or a ceramic tile. This keeps your clay clean and prevents it from sticking. Wash your hands to remove oils and dirt. Oils from your fingers can create soft spots on your finished piece that do not cure properly.
Step 2: Shape Your Project
Build or sculpt your clay project however you like. Make sure there are no thin areas that could burn, and no thick areas that might stay soft. For jewelry pieces like clay beads, use a toothpick to poke a hole before baking. This is much easier than trying to drill through hardened clay.
Step 3: Preheat Your Oven
Set your oven to the correct temperature for your specific clay brand. Wait until the oven reaches that temperature before placing your project inside. Use your oven thermometer to confirm the actual heat. Do not rely solely on the oven dial.
Step 4: Place Clay on a Baking Surface
Put your clay project on a piece of parchment paper sitting on a baking sheet. The parchment prevents sticking and makes cleanup easy. Never place clay directly on a bare metal tray. It can stick and leave marks on your finished piece.
Step 5: Bake for the Recommended Time
Slide the baking sheet into the oven and set your timer. Follow the thickness rule for timing. Do not open the oven door frequently, as this drops the temperature and can cause uneven curing.
Step 6: Cool Properly
Once the timer goes off, turn off the oven and let the clay cool inside. This slow cooling prevents cracking and warping. After the oven is completely cool, remove your piece. You should be able to mark it with a fingernail, but it should not dent easily.
Common Mistakes When Baking Clay
Even experienced crafters make mistakes sometimes. Knowing what goes wrong helps you avoid those pitfalls. Here are the most common errors people make when baking clay at home.
Mistake 1: Guessing the Temperature
This is the number one mistake. Many people set their oven to the nearest temperature without checking the clay brand instructions. Always follow the manufacturer’s recommended temperature exactly. Guessing leads to underbaked or overbaked projects.
Mistake 2: Skipping the Oven Thermometer
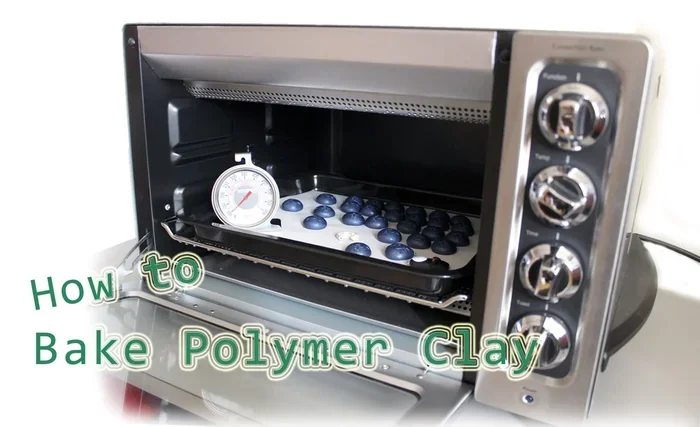
Home ovens are notoriously inaccurate. Some run 25 degrees too hot without you knowing. An inexpensive oven thermometer solves this problem instantly. Place it inside your oven and check it regularly. It is the best investment you can make for polymer clay crafts.
Mistake 3: Baking on Wrong Surfaces
Never bake clay on aluminum foil directly. The foil can react with certain clay brands and create shiny spots or discoloration. Always use parchment paper, cardstock, or a ceramic tile as your baking surface.
Mistake 4: Not Baking Long Enough
Some people pull their clay out too early because they think it looks done on the outside. The inside may still be soft. Always follow the full recommended baking time based on thickness. Patience pays off with a stronger, more durable finish.
Mistake 5: Using a Toaster Oven Without Adjustments
Toaster ovens are popular for small clay projects, but they heat differently than full-size ovens. They can have hot spots and less even heat distribution. If you use a toaster oven for clay baking, rotate your piece halfway through and monitor it closely.
Tips For Perfect Clay Baking Results
Getting professional-quality results at home is easier than you think. These clay baking tips come from experienced crafters and will elevate your projects immediately.
Use a Dedicated Oven
Ideally, use a separate oven just for clay. Cooking clay fumes can linger and affect food cooked in the same oven later. If you must use your kitchen oven, line it with foil and place a small bowl of water inside to help absorb fumes. Never bake clay and food at the same time.
Condition Your Clay First
Before baking, knead your clay thoroughly. This process, called conditioning, warms up the clay and makes it pliable. Well-conditioned clay bakes more evenly and has fewer internal air bubbles. You can condition by hand or run the clay through a pasta machine several times.
Build Up Thick Pieces Gradually
For thick sculptures or figurines, build the clay in layers rather than all at once. Each layer should be no more than a quarter inch thick. This ensures the entire piece cures evenly without burning the exterior.
Test With a Scrap Piece
Before baking your finished project, bake a small scrap piece at the same temperature and time. Check its hardness and color. This test run tells you if your oven temperature is accurate and if your timing is correct. It is a simple habit that saves projects.
Add Glaze After Baking
Once your clay is fully baked and cooled, you can apply a varnish or glaze for extra shine and protection. Glaze should always go on after baking, never before. Baking glazed clay can cause the glaze to bubble or change color.
Troubleshooting Common Clay Baking Problems
Even when you follow all the guidelines, things can go wrong. Here is how to fix the most common clay curing problems.
Problem: Clay Is Still Soft After Baking
This almost always means the temperature was too low or the baking time was too short. Place the piece back in the oven for another round at the correct temperature. Check with an oven thermometer to confirm your oven is actually reaching the right heat. For thicker pieces, you may need to extend the baking time significantly.
Problem: Clay Has Browned or Burned
Burnt clay means the temperature was too high. Unfortunately, you cannot fix a burnt piece. Start over with a new temperature setting. Always remember that what temperature to bake clay in oven depends on your specific brand. Lower the temperature by 10 degrees next time and increase the baking time slightly.
Problem: Clay Cracked During or After Baking
Cracking usually happens when the clay cools too quickly or when it was not conditioned properly. Let your piece cool slowly inside the turned-off oven. Also check that you built up thick sections gradually and that there were no air bubbles trapped inside.
Problem: Clay Has Shiny Spots or Sticky Areas
Shiny spots often come from direct contact with metal surfaces. Sticky areas indicate underbaking. Re-bake the piece for the recommended time at the correct temperature. Make sure you always use parchment paper or a ceramic tile as your baking surface.
Expert Insights On Baking Polymer Clay
Professional clay artists and hobbyists alike agree on a few key principles. First, never rush the process. Baking clay is not like baking cookies where a few extra minutes does not matter much. With clay, precision is everything. Second, invest in a good oven thermometer. It costs just a few dollars and eliminates the biggest variable in your baking equation.
Many experts also recommend keeping a baking log. Write down the clay brand, temperature, time, and results for each project. Over time, this log becomes your personal reference guide. You will know exactly what works for your specific oven and your preferred clay type. It is a simple practice that separates good results from great ones.
Another pro tip is to avoid opening the oven door during baking. Every time you open the door, the temperature drops significantly. This creates uneven curing and can cause your piece to crack. Trust the timer and let the oven do its work with the door closed.
Finally, remember that polymer clay oven settings are just a starting point. Every oven is different. Your home oven may need slight adjustments compared to the brand recommendations. The key is to test, observe, and refine your process over time. Once you find your oven sweet spot, you will never have to guess again.
Conclusion
Getting the temperature to bake clay in oven right is the foundation of every successful polymer clay project. The standard temperature of 275°F works for most brands, but always double-check your specific clay’s instructions. Combine the right temperature with proper timing, a reliable oven thermometer, and the right baking surface. Avoid common mistakes like guessing, skipping the thermometer, or pulling your piece out too early.
With the tips and guidelines in this article, you have everything you need to create beautiful, durable clay crafts at home. Practice makes perfect, and every project you bake teaches you something new. Start with simple pieces, follow the steps carefully, and build your confidence. Soon, baking clay in the oven will feel like second nature. Your projects will be harder, more vibrant, and more professional-looking than ever before. Happy crafting!
Frequently Asked Questions
Can I bake clay in a regular kitchen oven?
Yes, absolutely. A regular kitchen oven works perfectly fine for baking polymer clay. Just make sure you never bake clay and food in the same oven at the same time. The fumes released during clay curing are not safe for consumption. Use parchment paper and consider lining the oven with foil for easy cleanup.
What happens if I bake clay at too high a temperature?
Baking clay at too high a temperature can cause burning, discoloration, warping, and the release of potentially harmful fumes. Overbaked clay becomes brittle and may crack. Always follow the manufacturer’s recommended temperature and use an oven thermometer to verify accuracy.
How do I know when my clay is fully baked?
Fully baked clay is hard and durable. You should not be able to dent it easily with your fingernail. If the clay still feels soft or flexible, it needs more time in the oven. Let it cool completely before testing, as warm clay will feel softer than it actually is.
Can I use a toaster oven to bake clay?
Yes, toaster ovens work well for small clay projects. However, toaster ovens can have uneven heat distribution and hot spots. Rotate your piece halfway through baking and monitor it closely. An oven thermometer is especially important when using a toaster oven.
Why did my clay crack after baking?
Cracking usually happens when clay cools too quickly or when thick sections were not built up gradually. Let your baked clay cool slowly inside the turned-off oven. Also make sure your clay was properly conditioned before shaping and that there were no trapped air bubbles.
Do I need to glaze clay after baking?
Glazing is optional but recommended for a finished look. Apply varnish or glaze only after the clay has cooled completely. Baking glaze onto raw clay can cause bubbling and uneven results. A good glaze adds shine, protection, and a professional finish to your polymer clay crafts.
=== END ===